
A first mission step by step
Here a simple mission is built whole and in order: the addon, the world, characters, groups, vehicles, zones, markers, the description. The result is a working TvT mission for two sides — no spawn selection, no elaborate mapping — but one that can already be started and played. If you only need the short list of steps, it is on the Quick start page.
In the example: Cain (the Kolguev map), two sides — the US (Delta Force) and the USSR, the US task is to capture a Soviet base. The finished result is published on the Workshop — ECHOLobby SupercoolMissions: download it and see how it is put together.
1. The addon
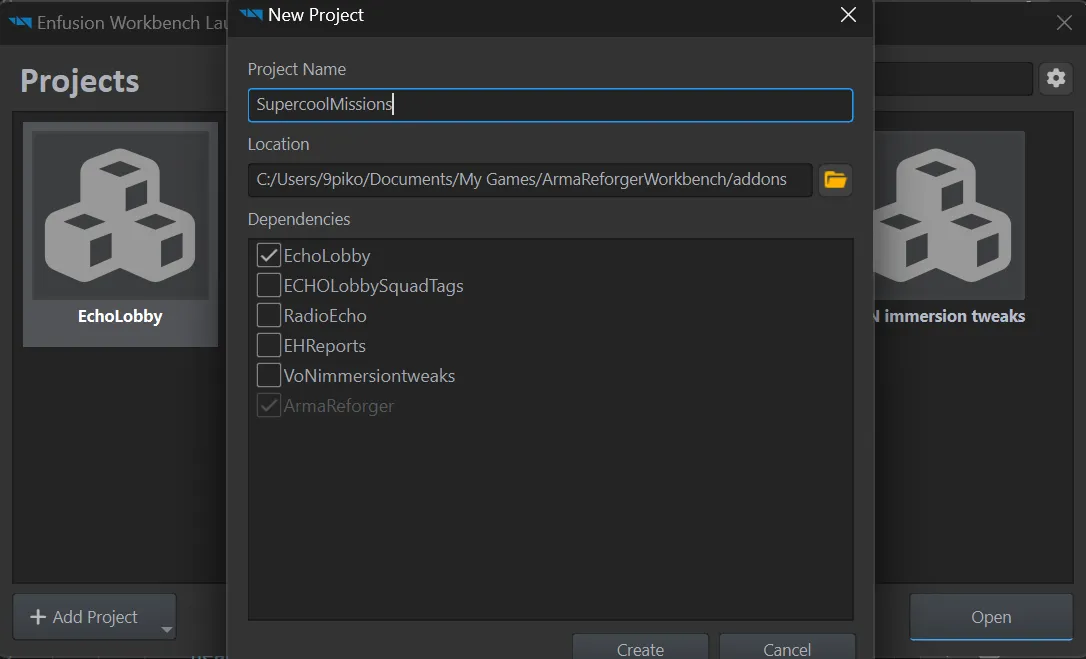
Section titled “1. The addon”Create a project in the Workbench launcher and tick EchoLobby in the dependencies. Without it the Resource Browser has no gamemode, no zones and no lobby tools.
2. The world
Section titled “2. The world”A mission is a sub-scene over the terrain’s world: you don’t change the terrain itself, everything of yours goes into a separate file.
-
Find the world of the terrain you need in the Resource Browser, for example
ArmaReforger/worlds/Cain/Cain.ent— that is the Kolguev map, and open it in World Editor.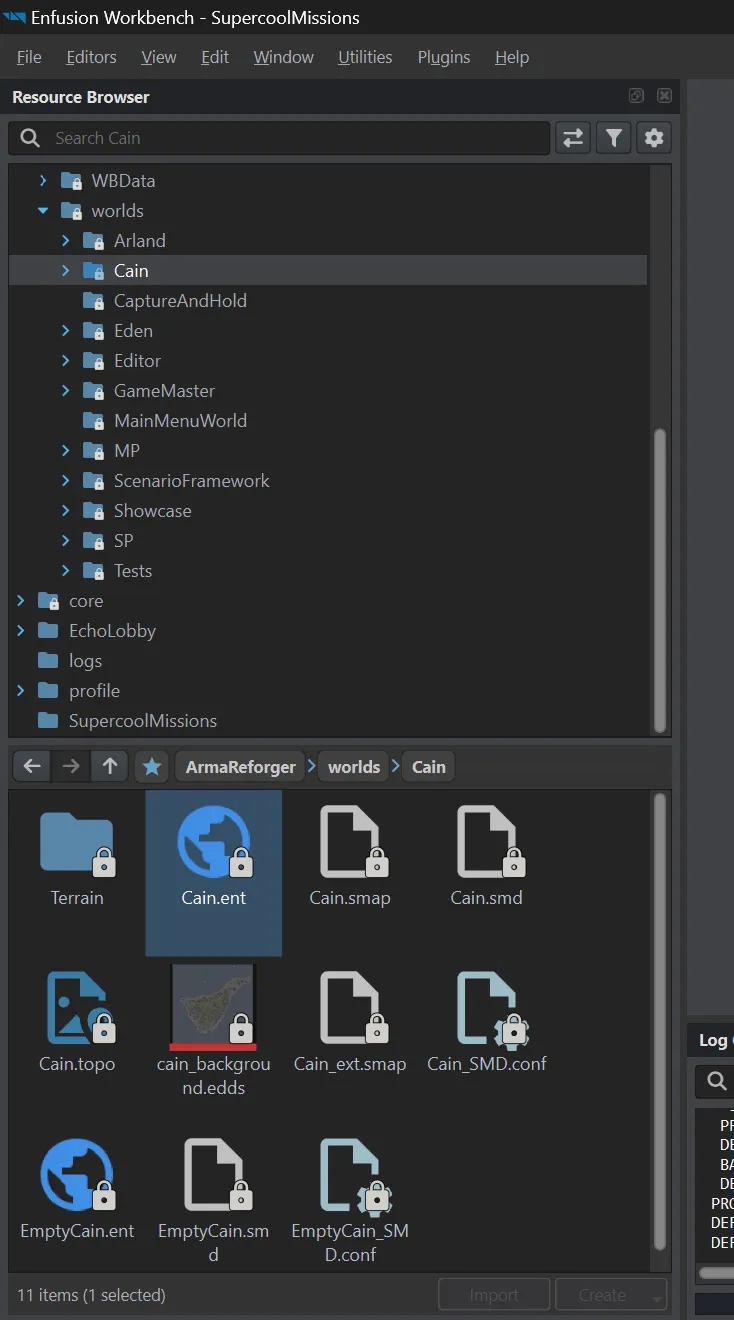
-
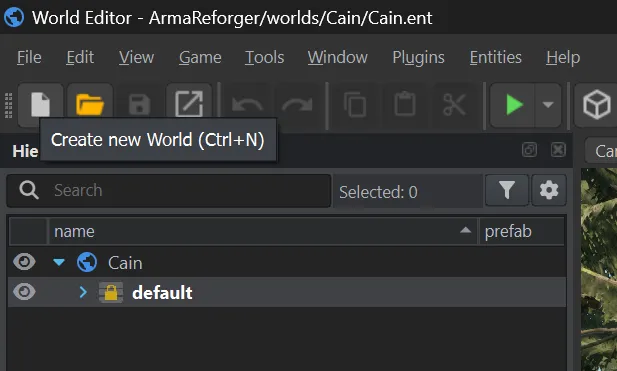
Create new World (Ctrl+N).
-
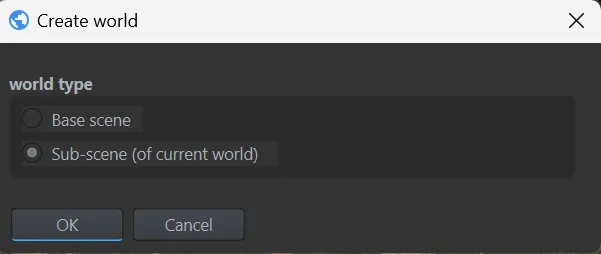
Choose Sub-scene (of current world).
-
Save the sub-scene into your addon — create a
worlds/folder in it and name the file after the mission.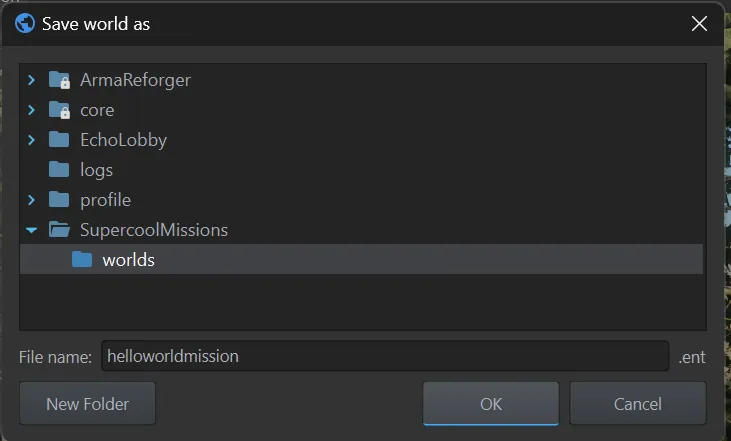
Everything else goes into this sub-scene.
3. The gamemode and the AI world
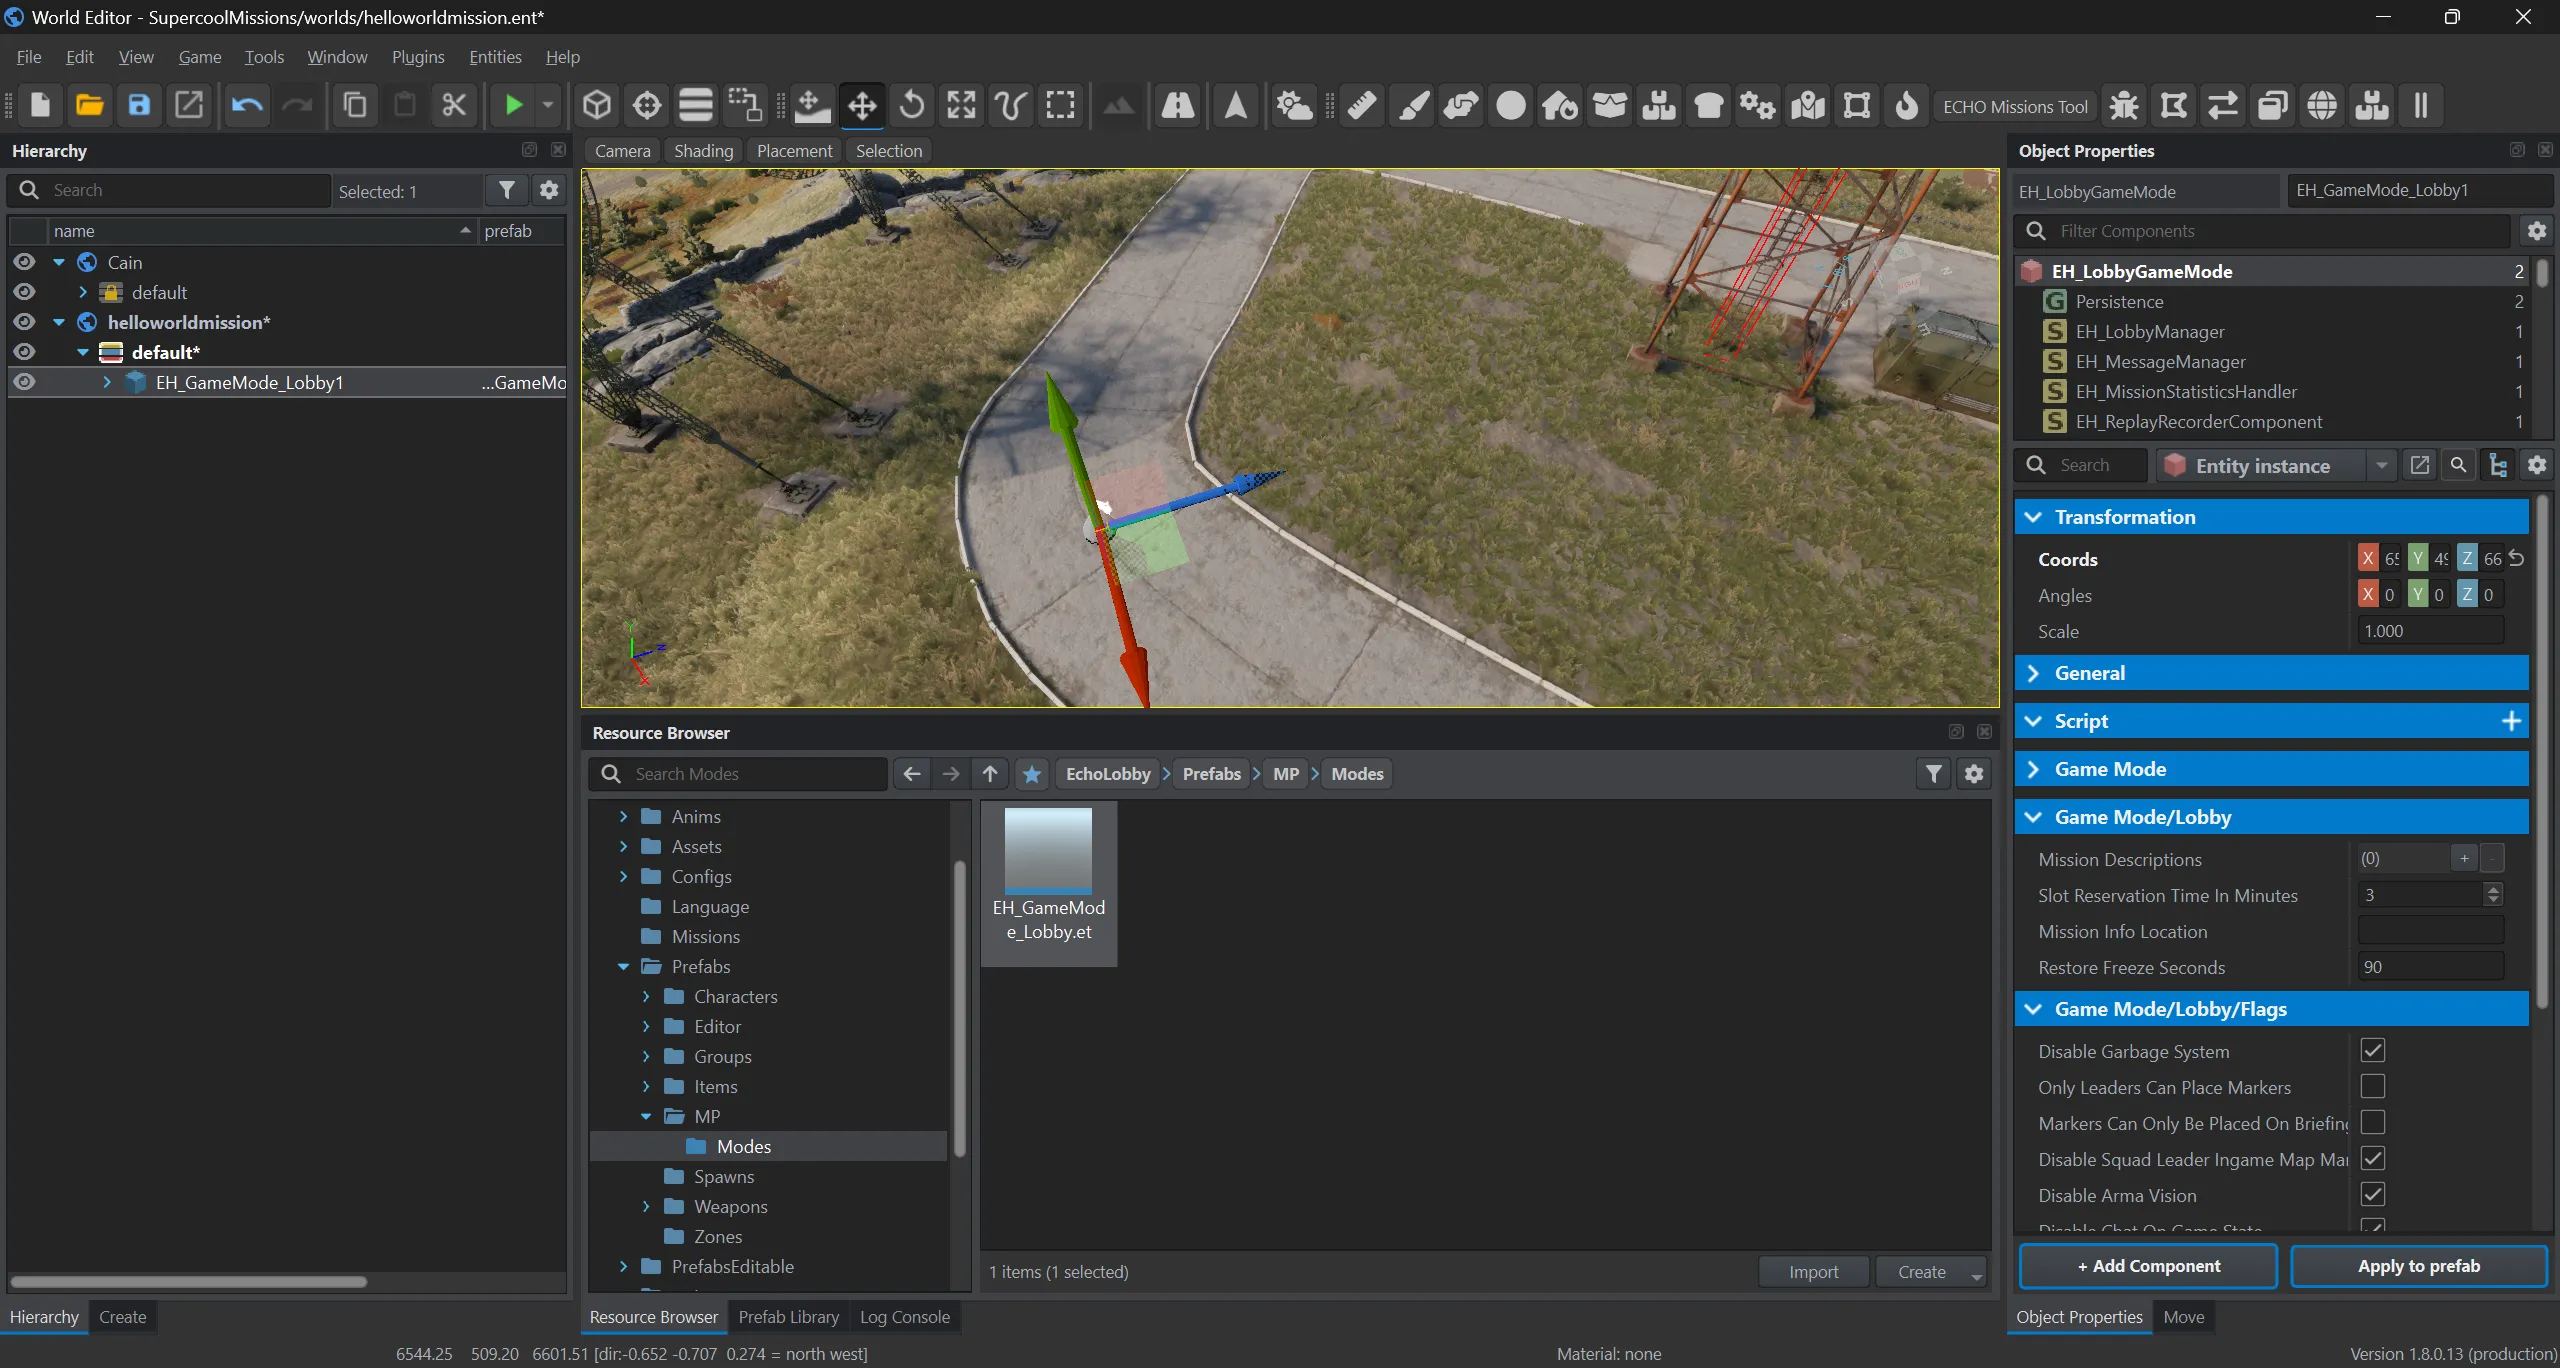
Section titled “3. The gamemode and the AI world”Place the Prefabs/MP/Modes/EH_GameMode_Lobby.et prefab in the world. All lobby settings live on it — see Gamemode settings; for now they can be left alone.
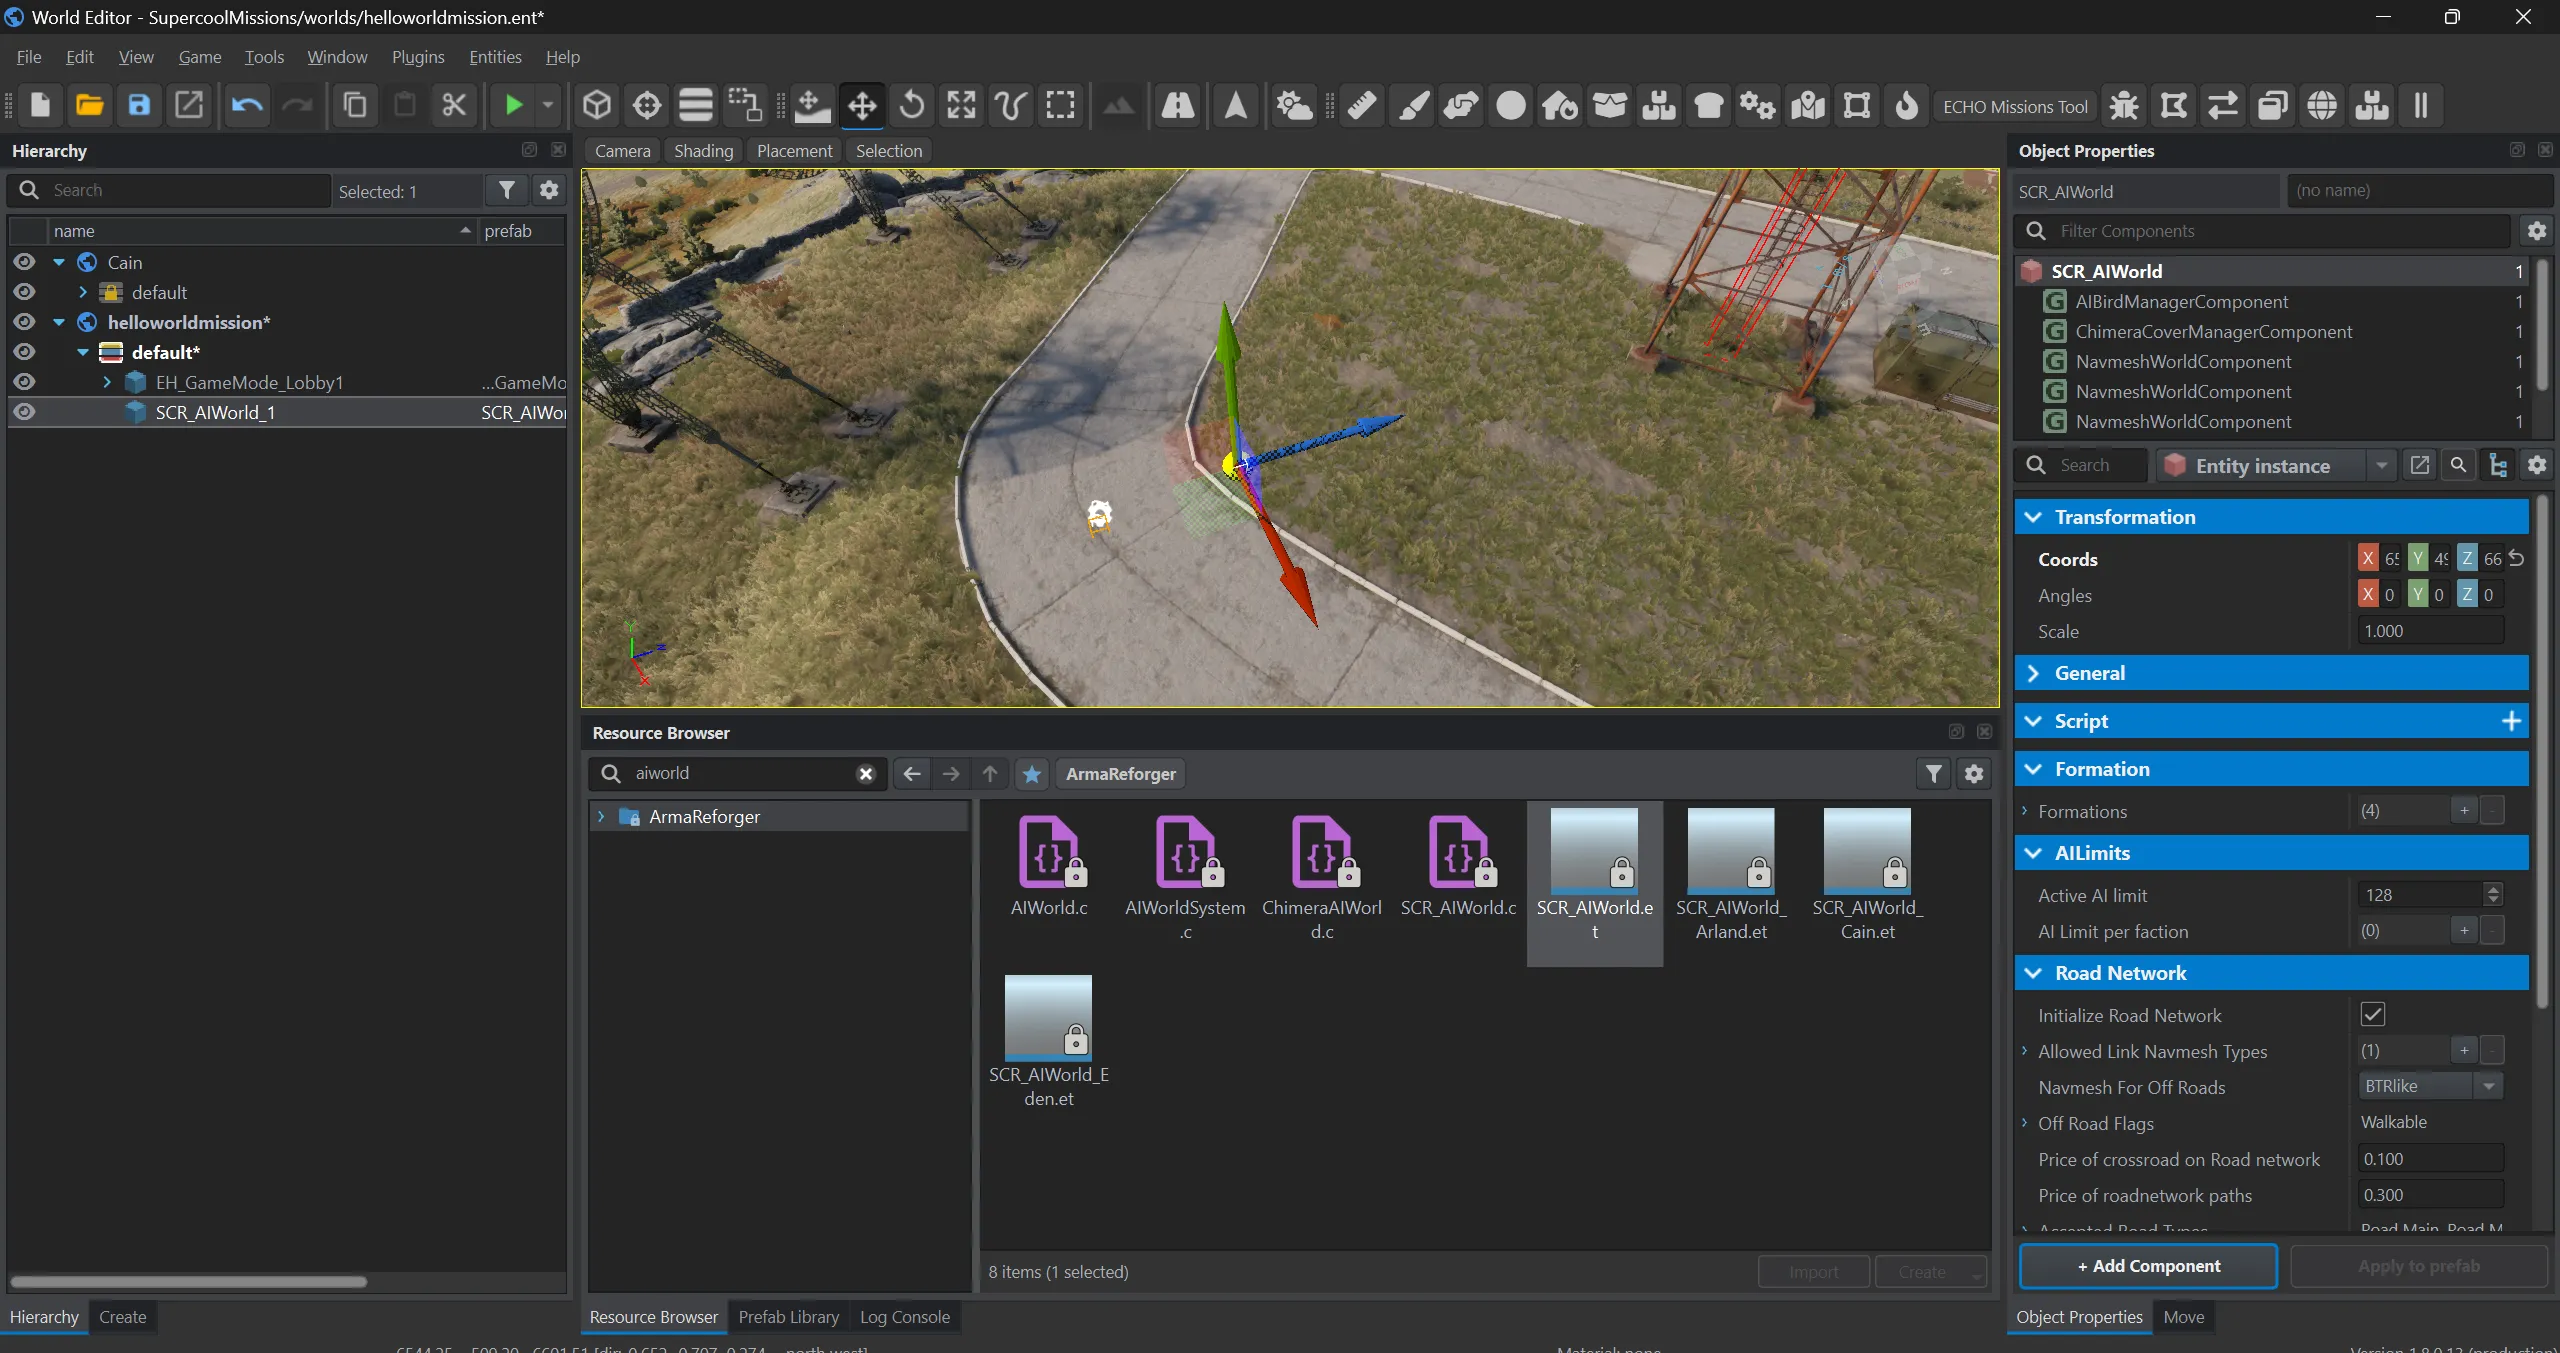
Next to it place Prefabs/AI/SCR_AIWorld.et or the variant for your terrain, for example SCR_AIWorld_Cain.et. Without it groups don’t show up in the lobby.
4. Characters
Section titled “4. Characters”A lobby slot is a character placed in the world. The easiest way is to take vanilla ones, already dressed and armed, and duplicate them into your addon.
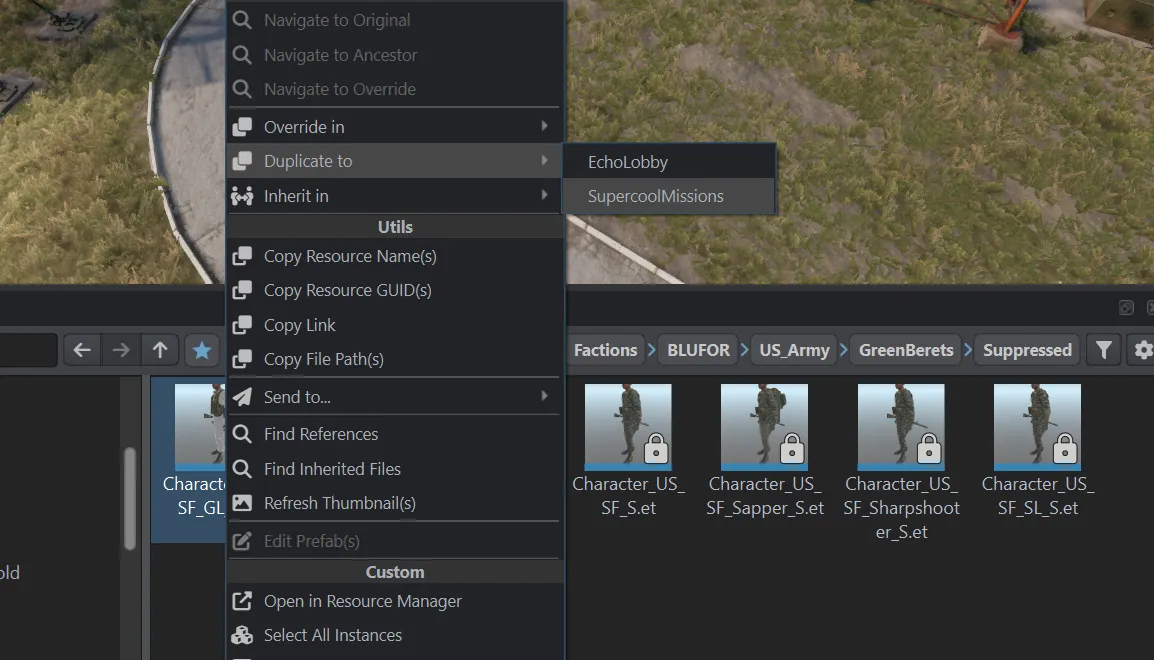
A faction’s characters live in ArmaReforger/Prefabs/Characters/Factions/…, for example BLUFOR/US_Army/GreenBerets/Suppressed.
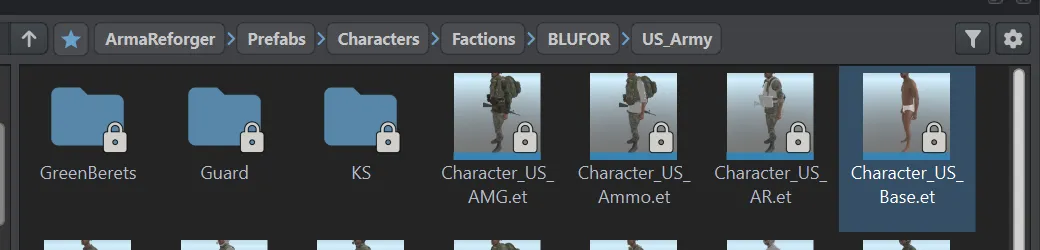
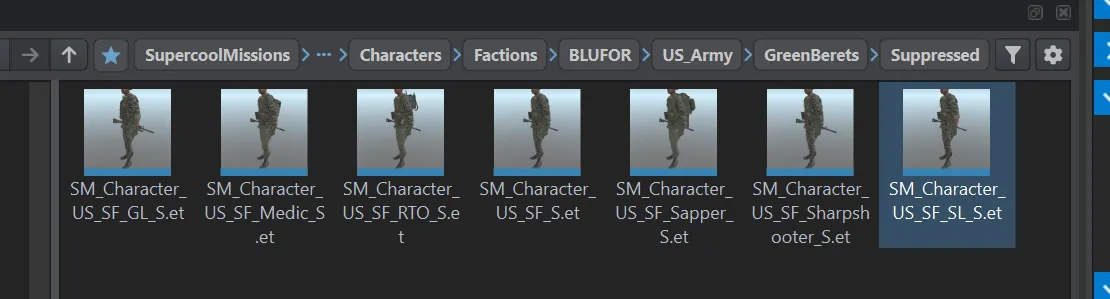
Select the roles you need, right-click — Duplicate to → your addon.
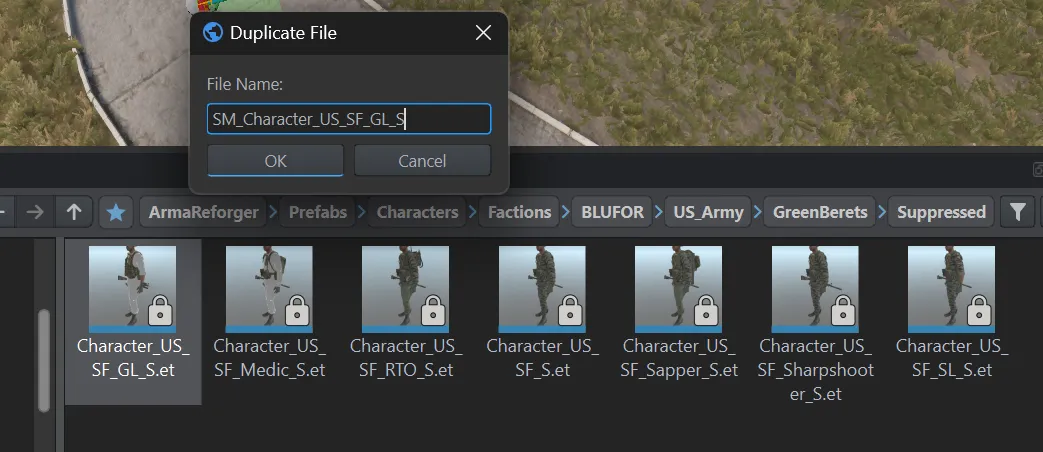
Give the copies a prefix of your own so they aren’t mixed up with the vanilla ones.
Turning a character into a slot
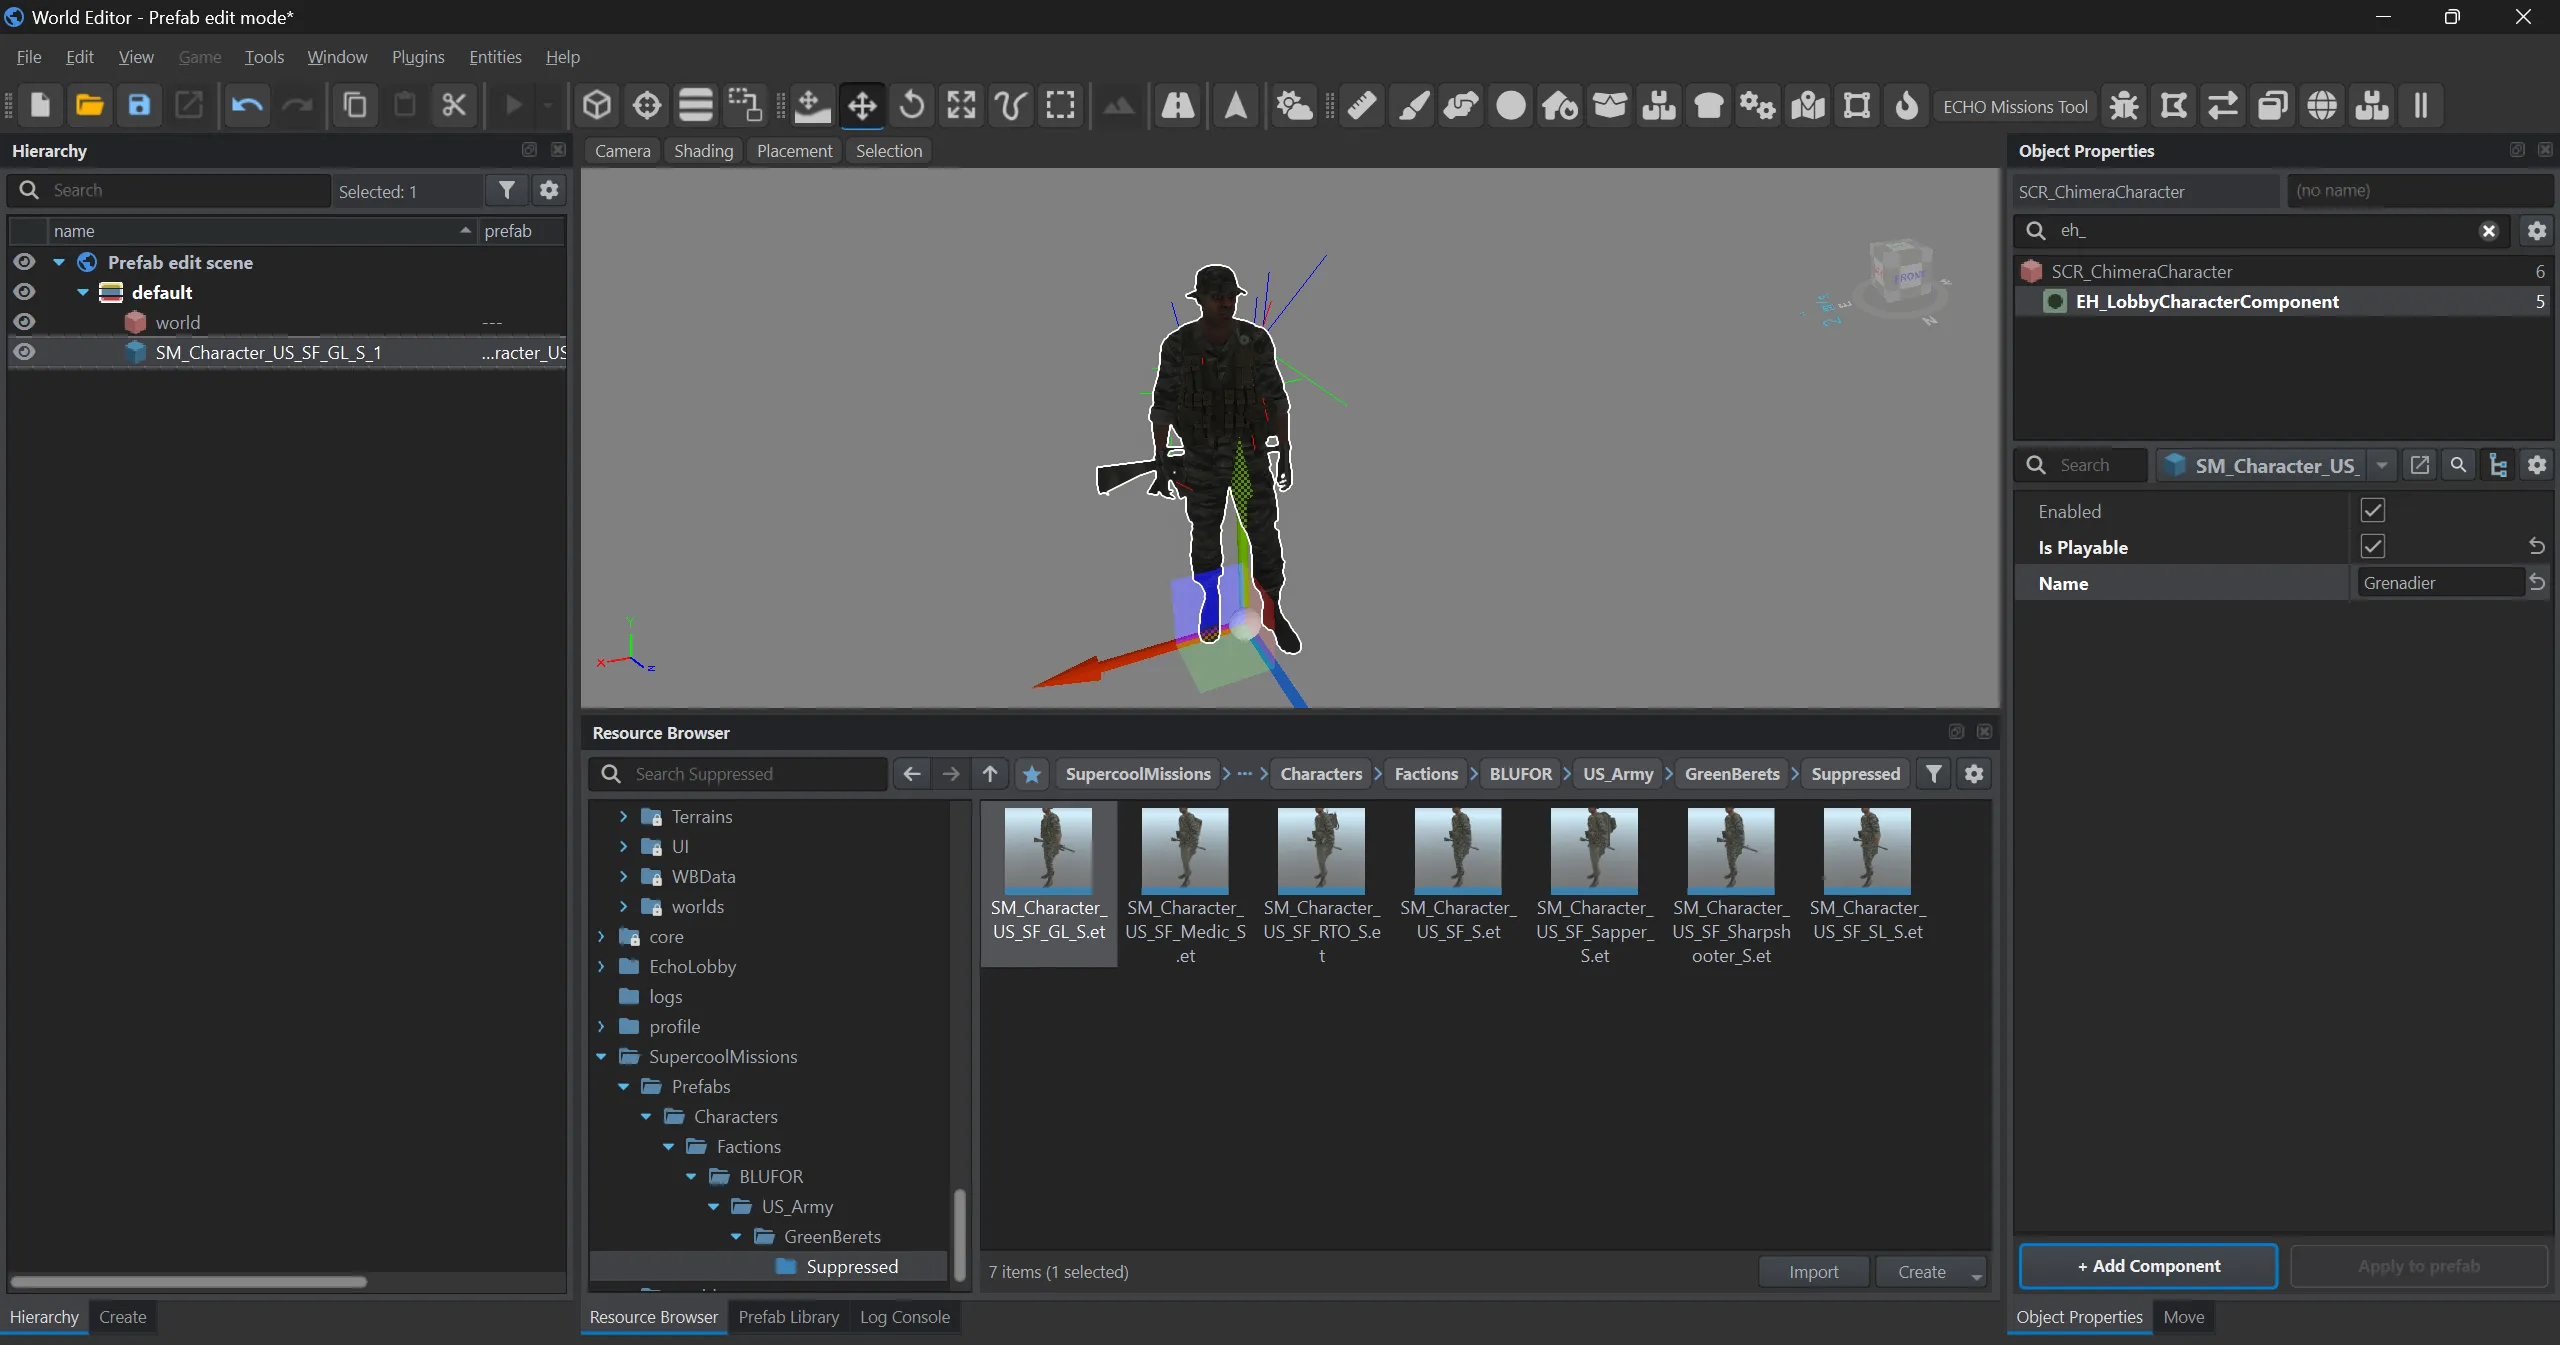
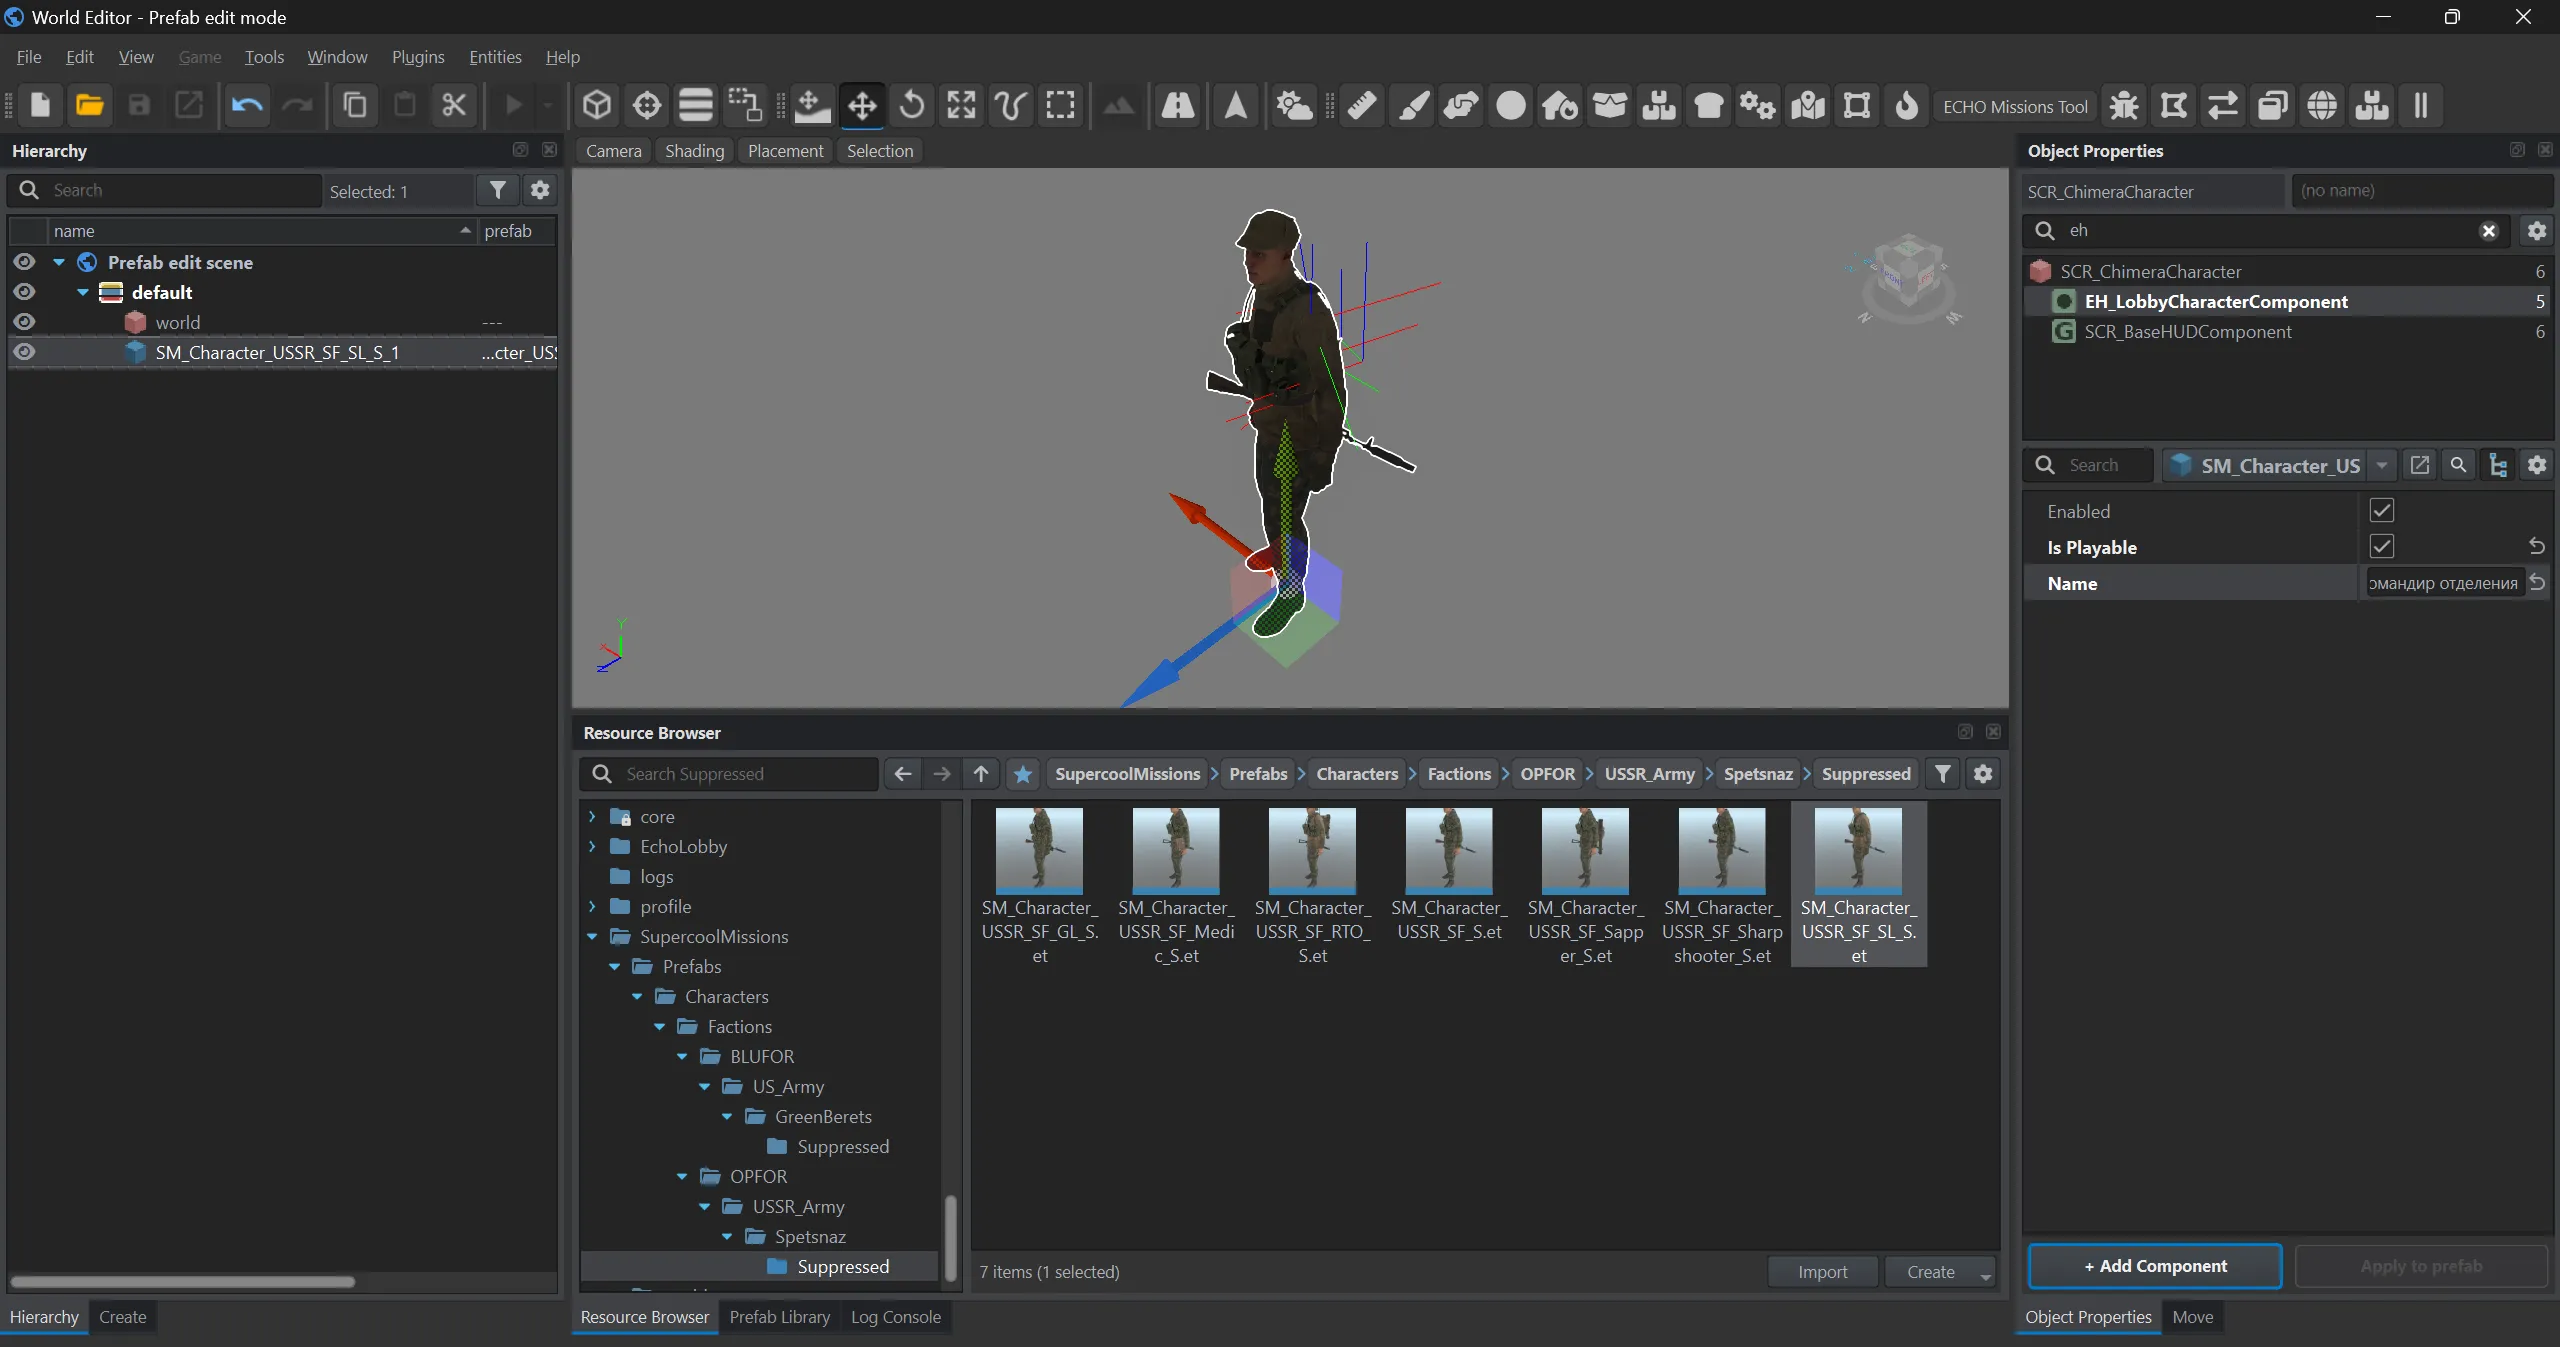
Section titled “Turning a character into a slot”Open the character’s prefab and press Edit Prefab — it opens in prefab edit mode.

Add the EH_LobbyCharacterComponent component, enable Is Playable and fill in Name — the role the player sees in slotting.
Repeat for every role of both sides.
More on the fields: Groups and slots.
5. Groups
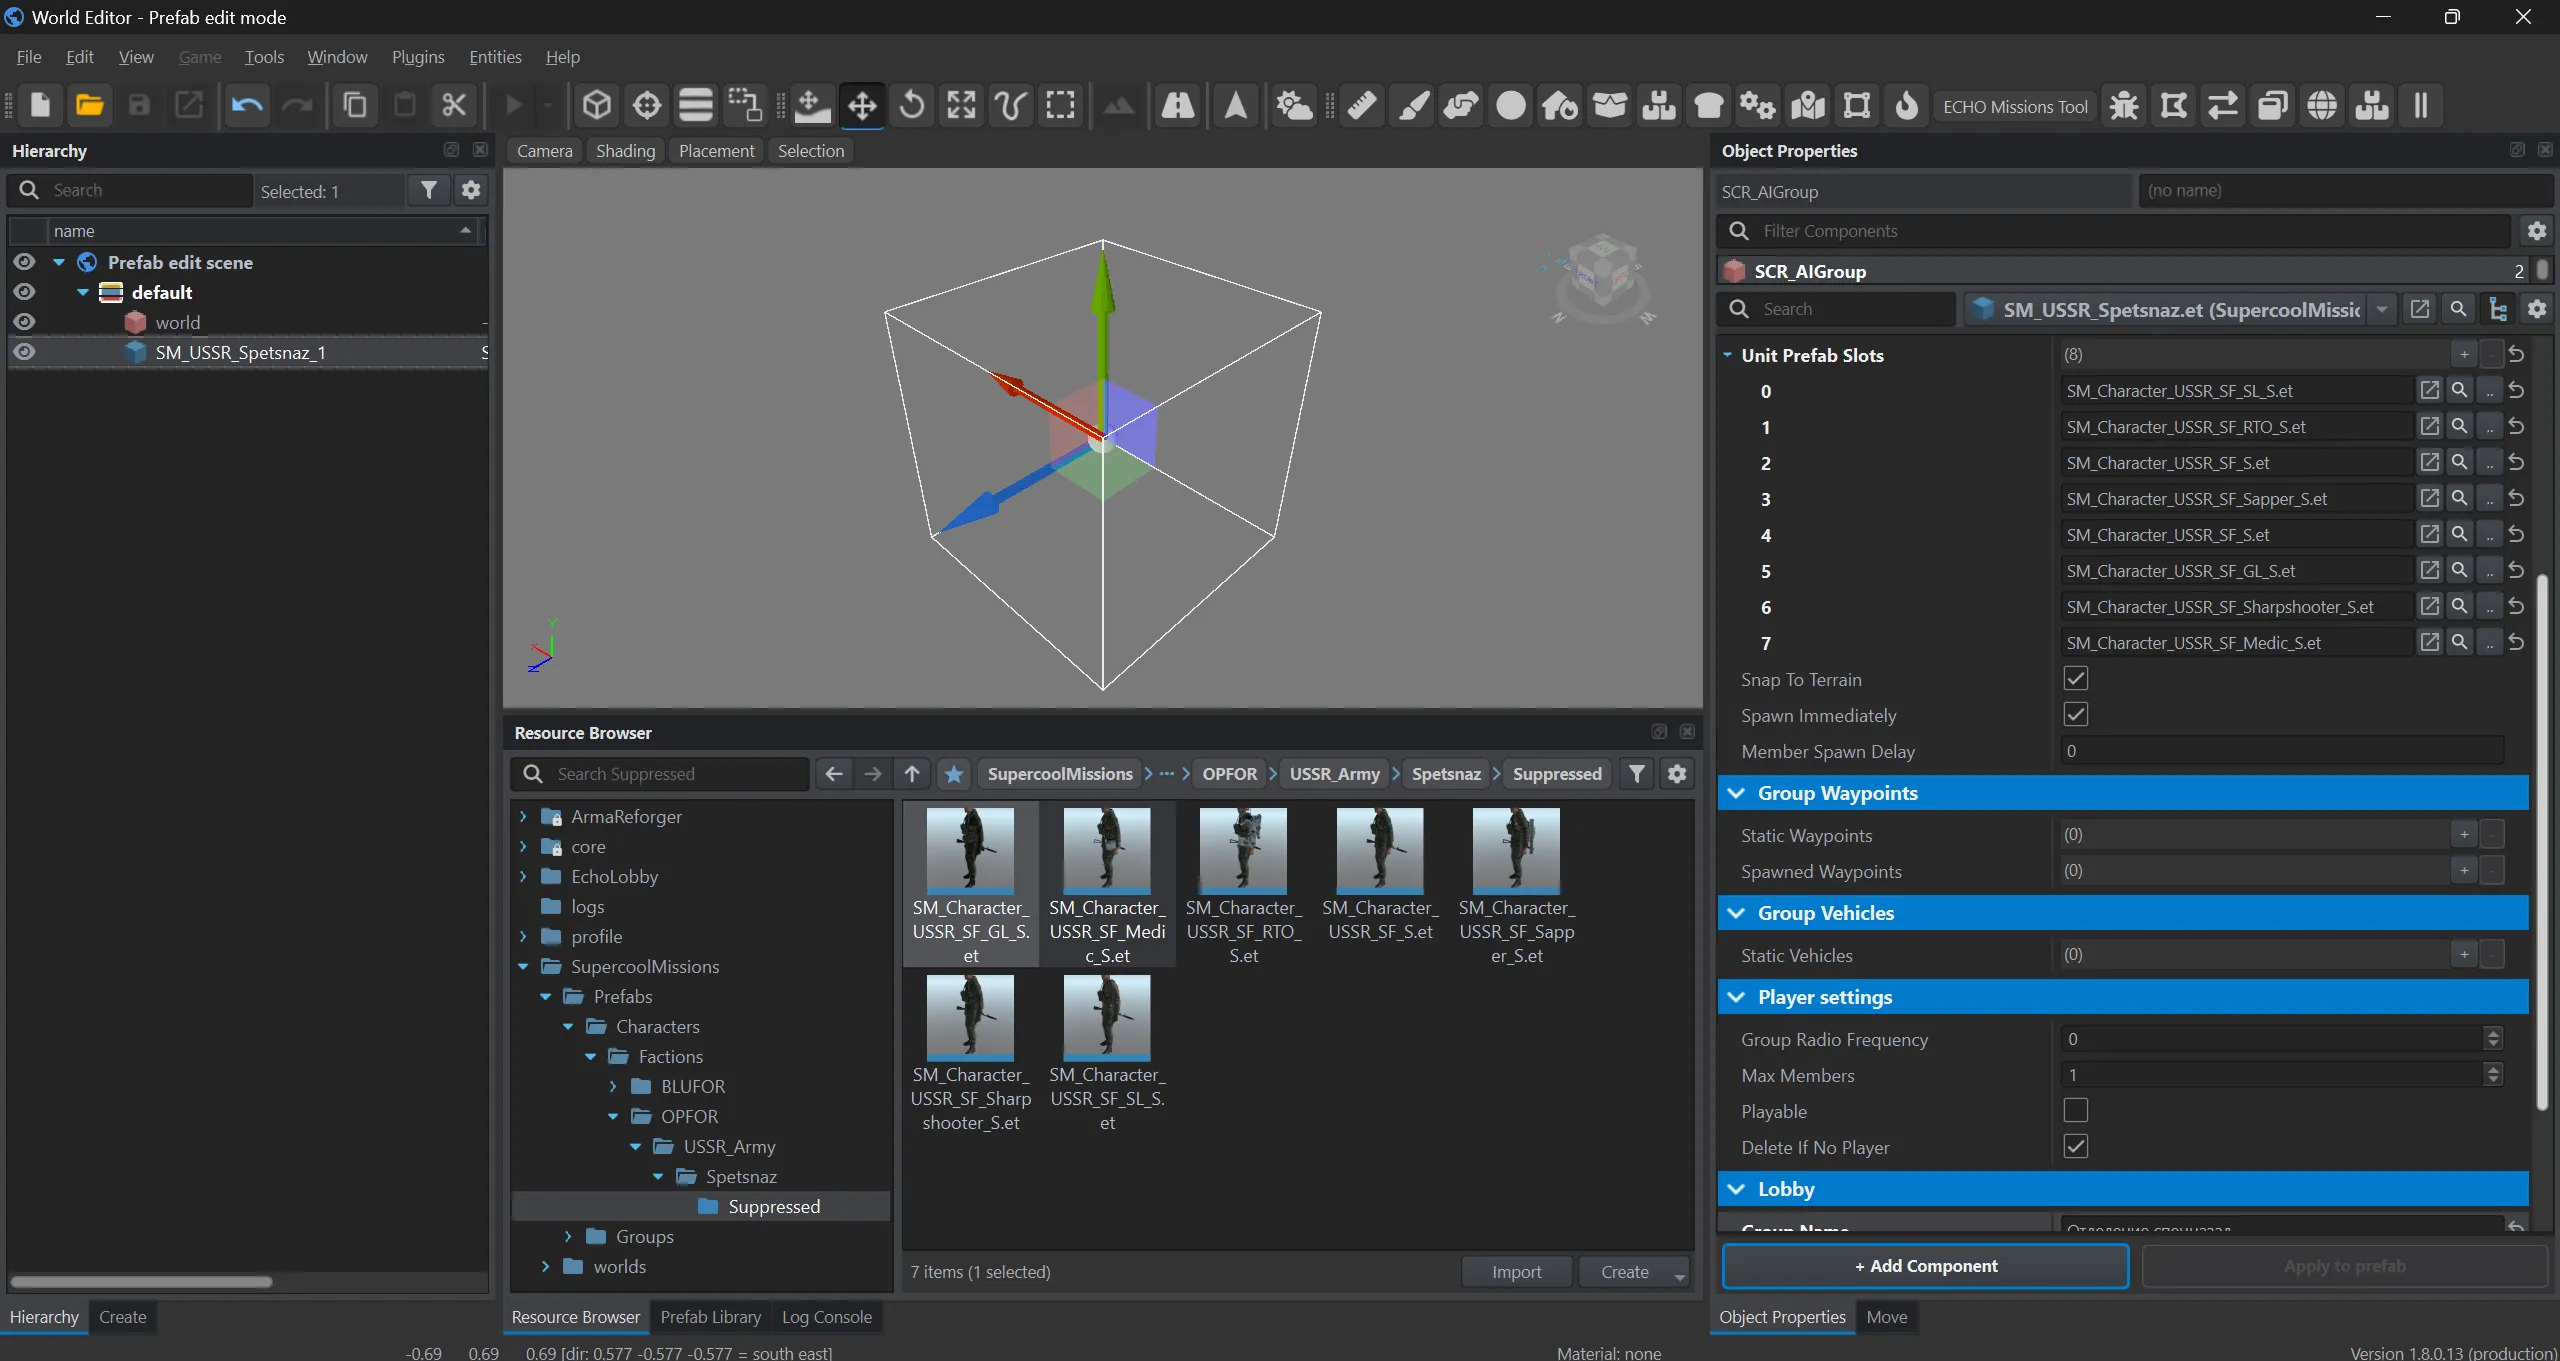
Section titled “5. Groups”A group is an SCR_AIGroup with a list of characters. Take the faction’s base group (Group_US_Base.et) and Inherit in → your addon: the group inherits the faction’s settings and you only change its contents.
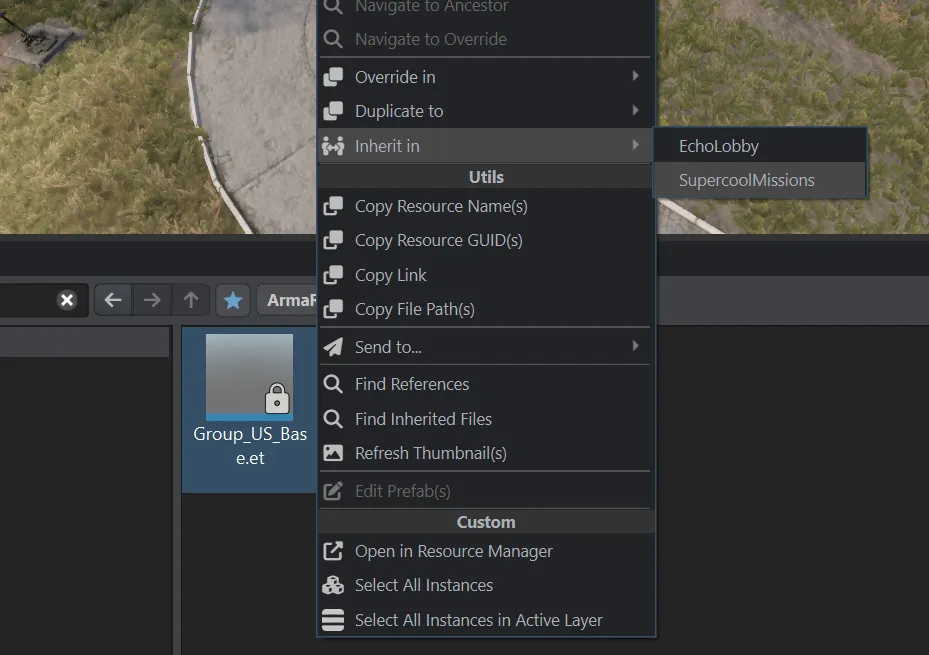
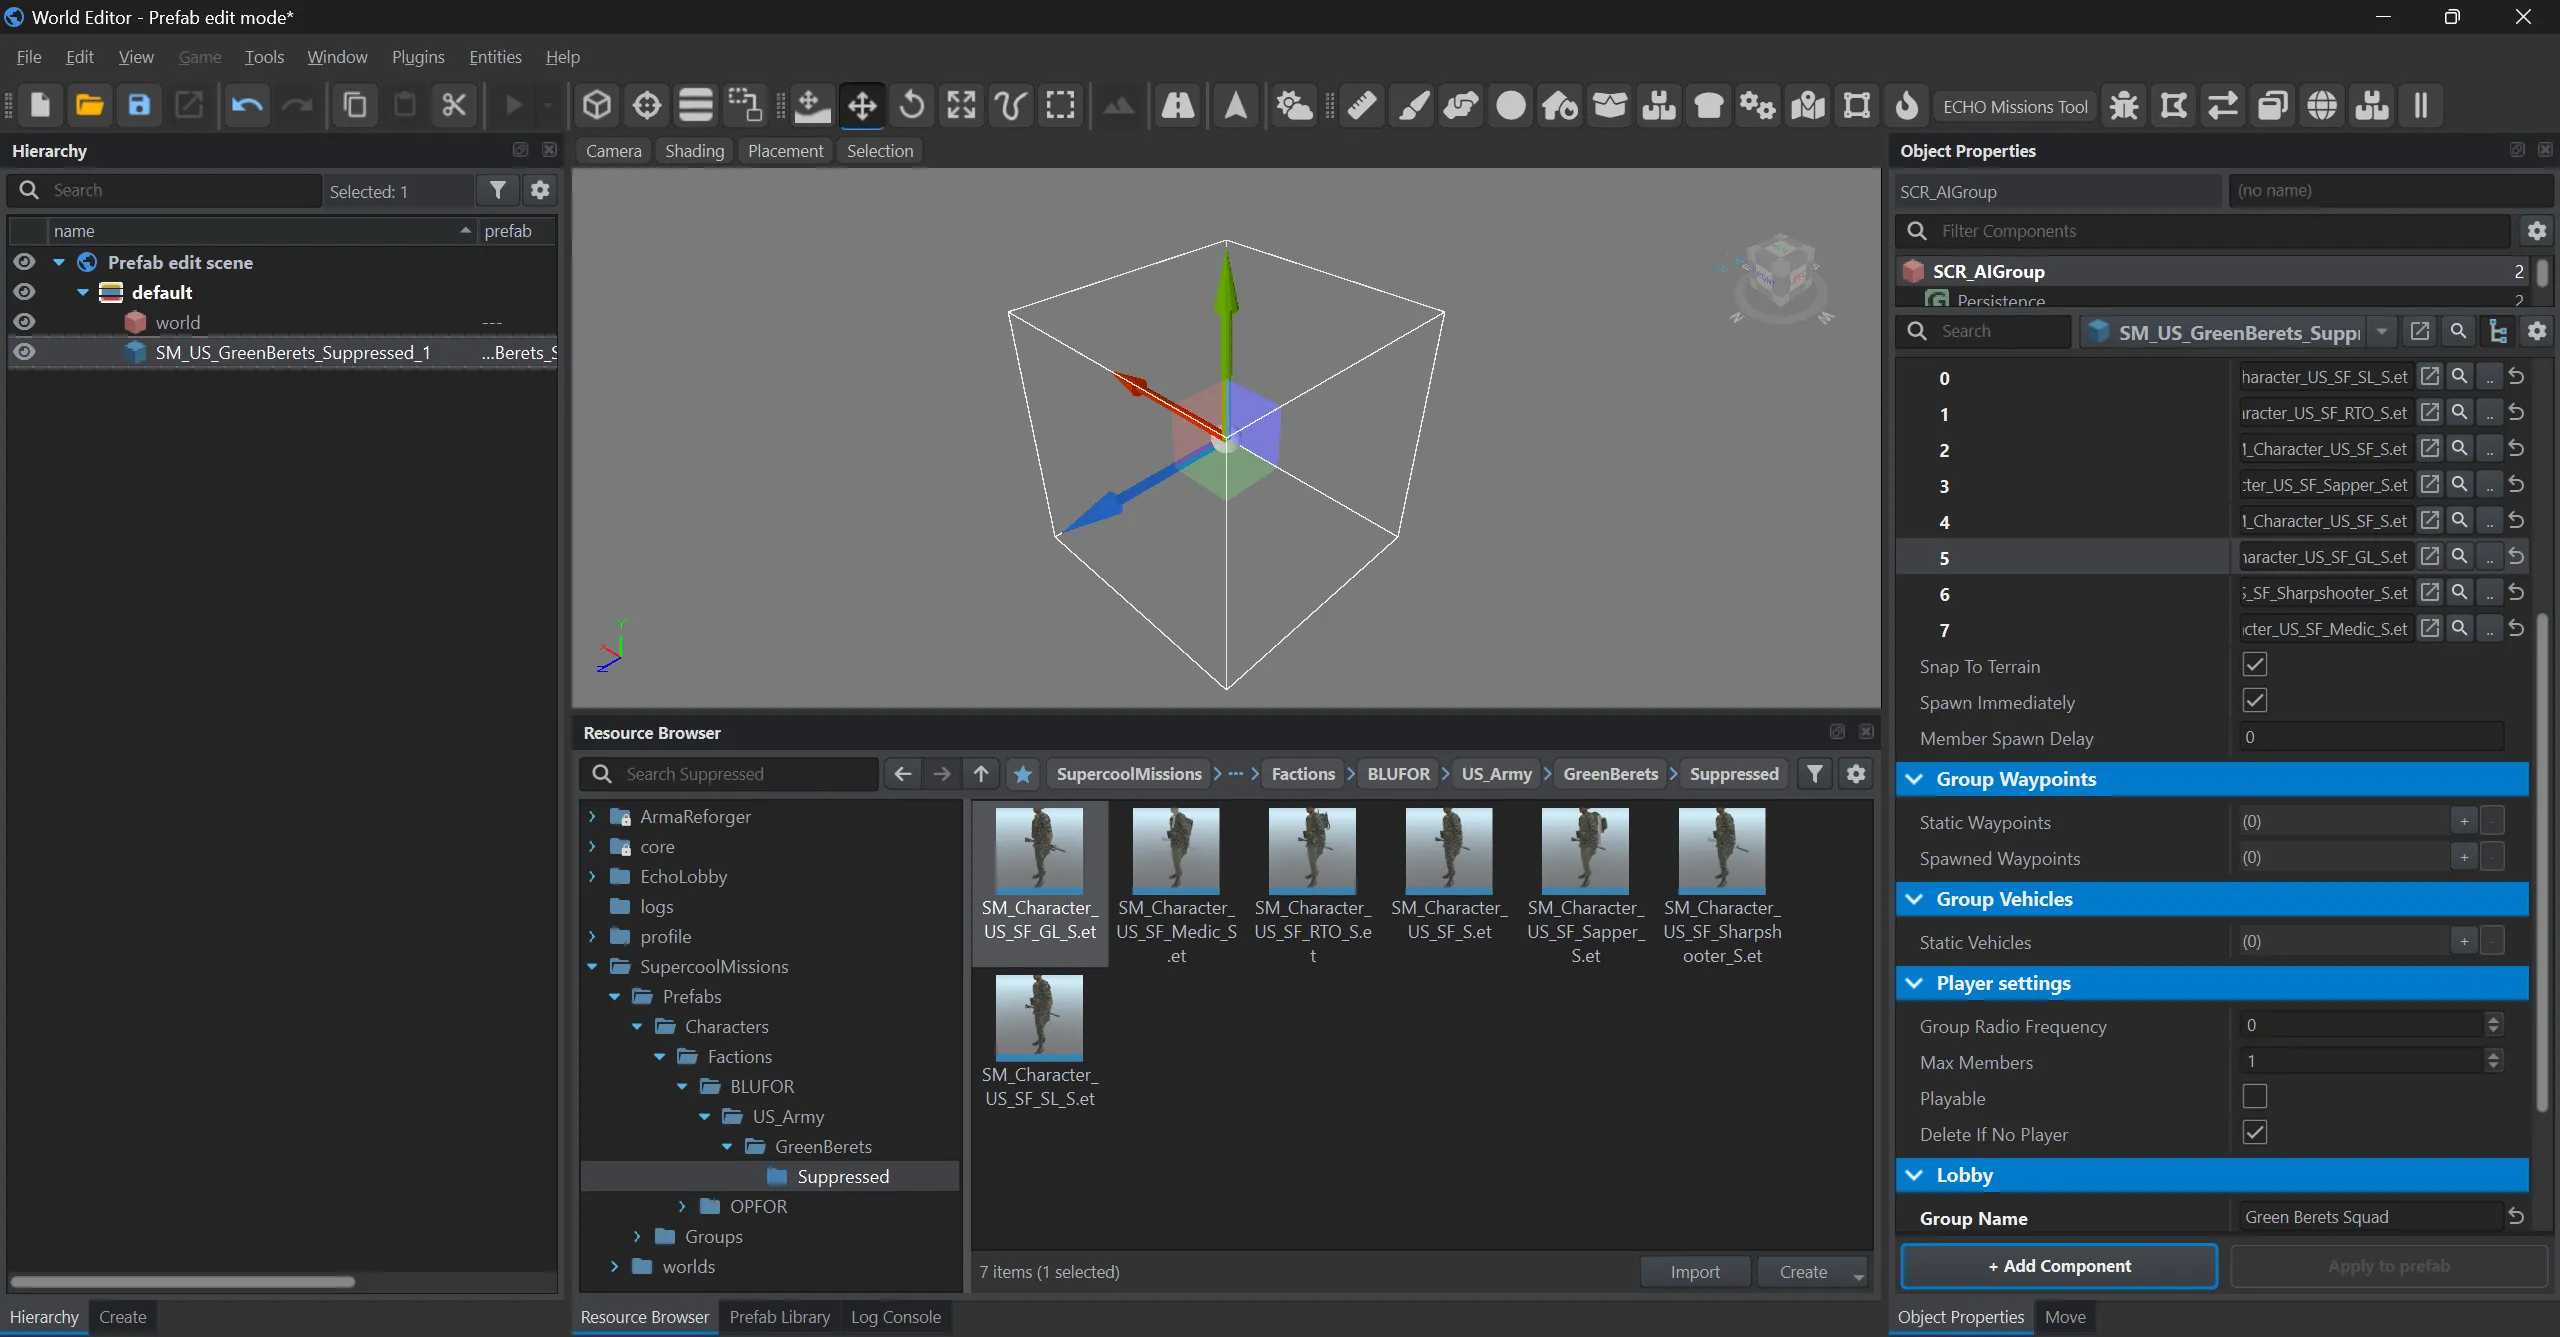
In the inherited group:
- put your prefabs into the list of characters — the order in the list is the order of slots in the lobby;
- fill in Group Name in the Lobby category — the squad’s name in slotting.
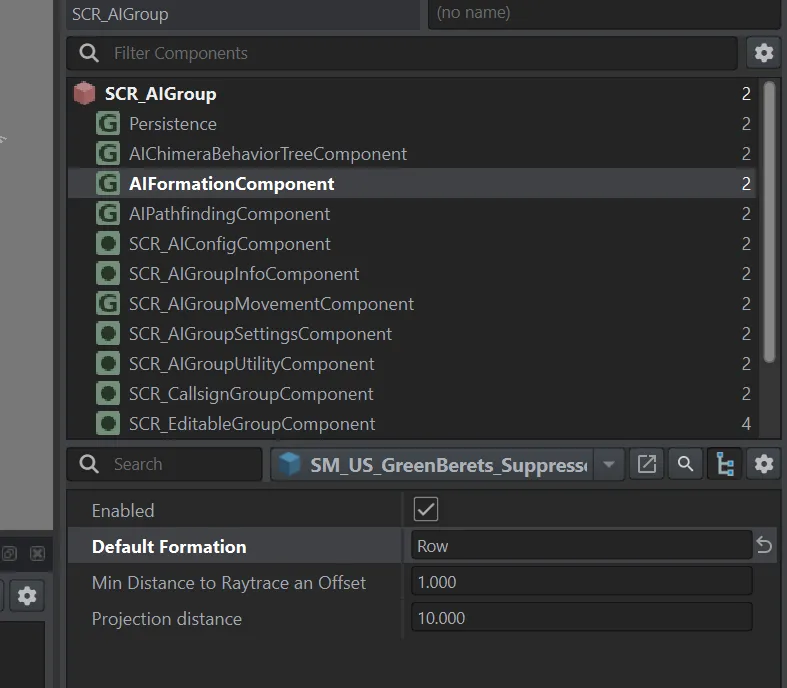
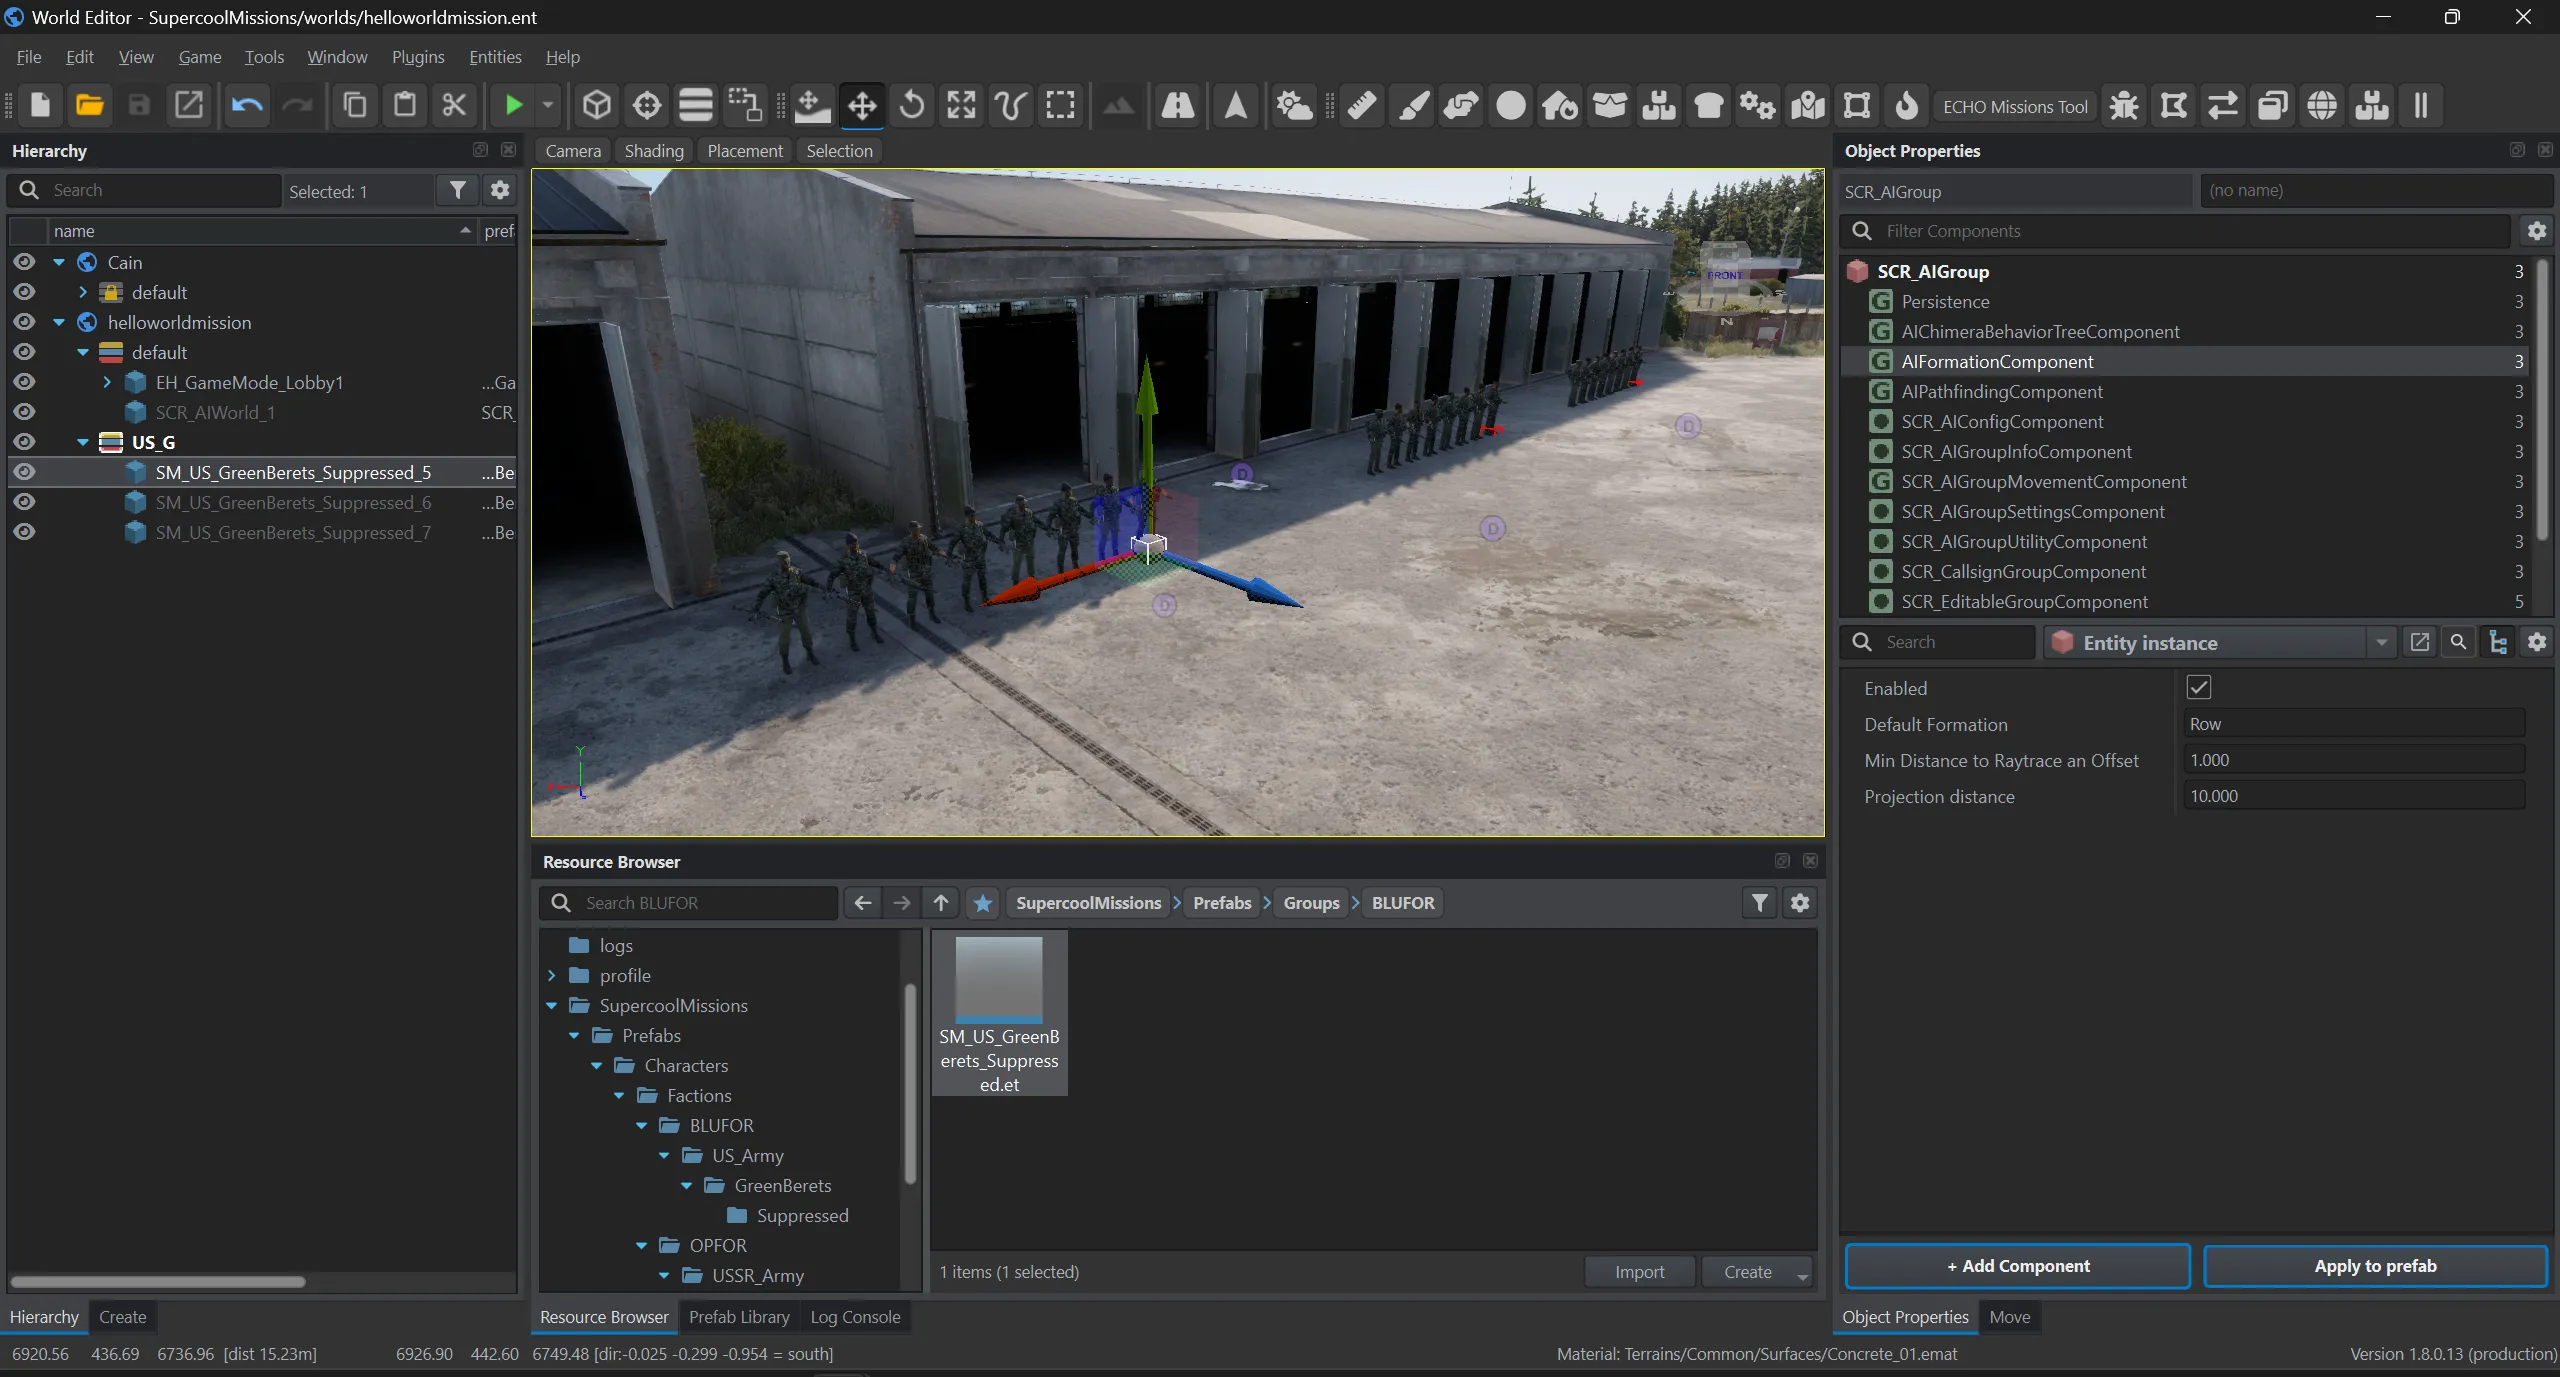
A recommendation: set Default Formation to Row in AIFormationComponent. Then the characters stand in a line in the editor, and the group is easier to place and look over.
Do the same for the other side.
6. Layers and placement
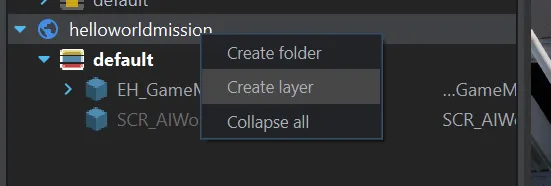
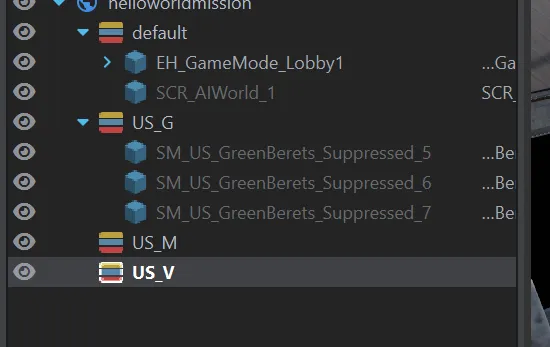
Section titled “6. Layers and placement”Everything of yours is better kept in layers — one layer per kind of object for each side. Right-click the mission in the Hierarchy — Create layer.
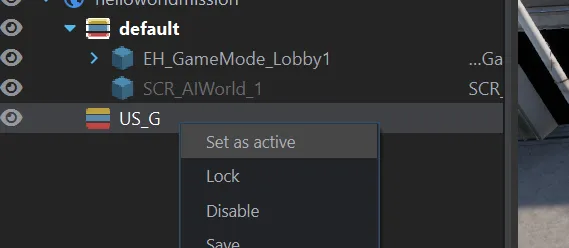
Make the layer active (double-click it) — new objects go into it.
Place the groups around the world.
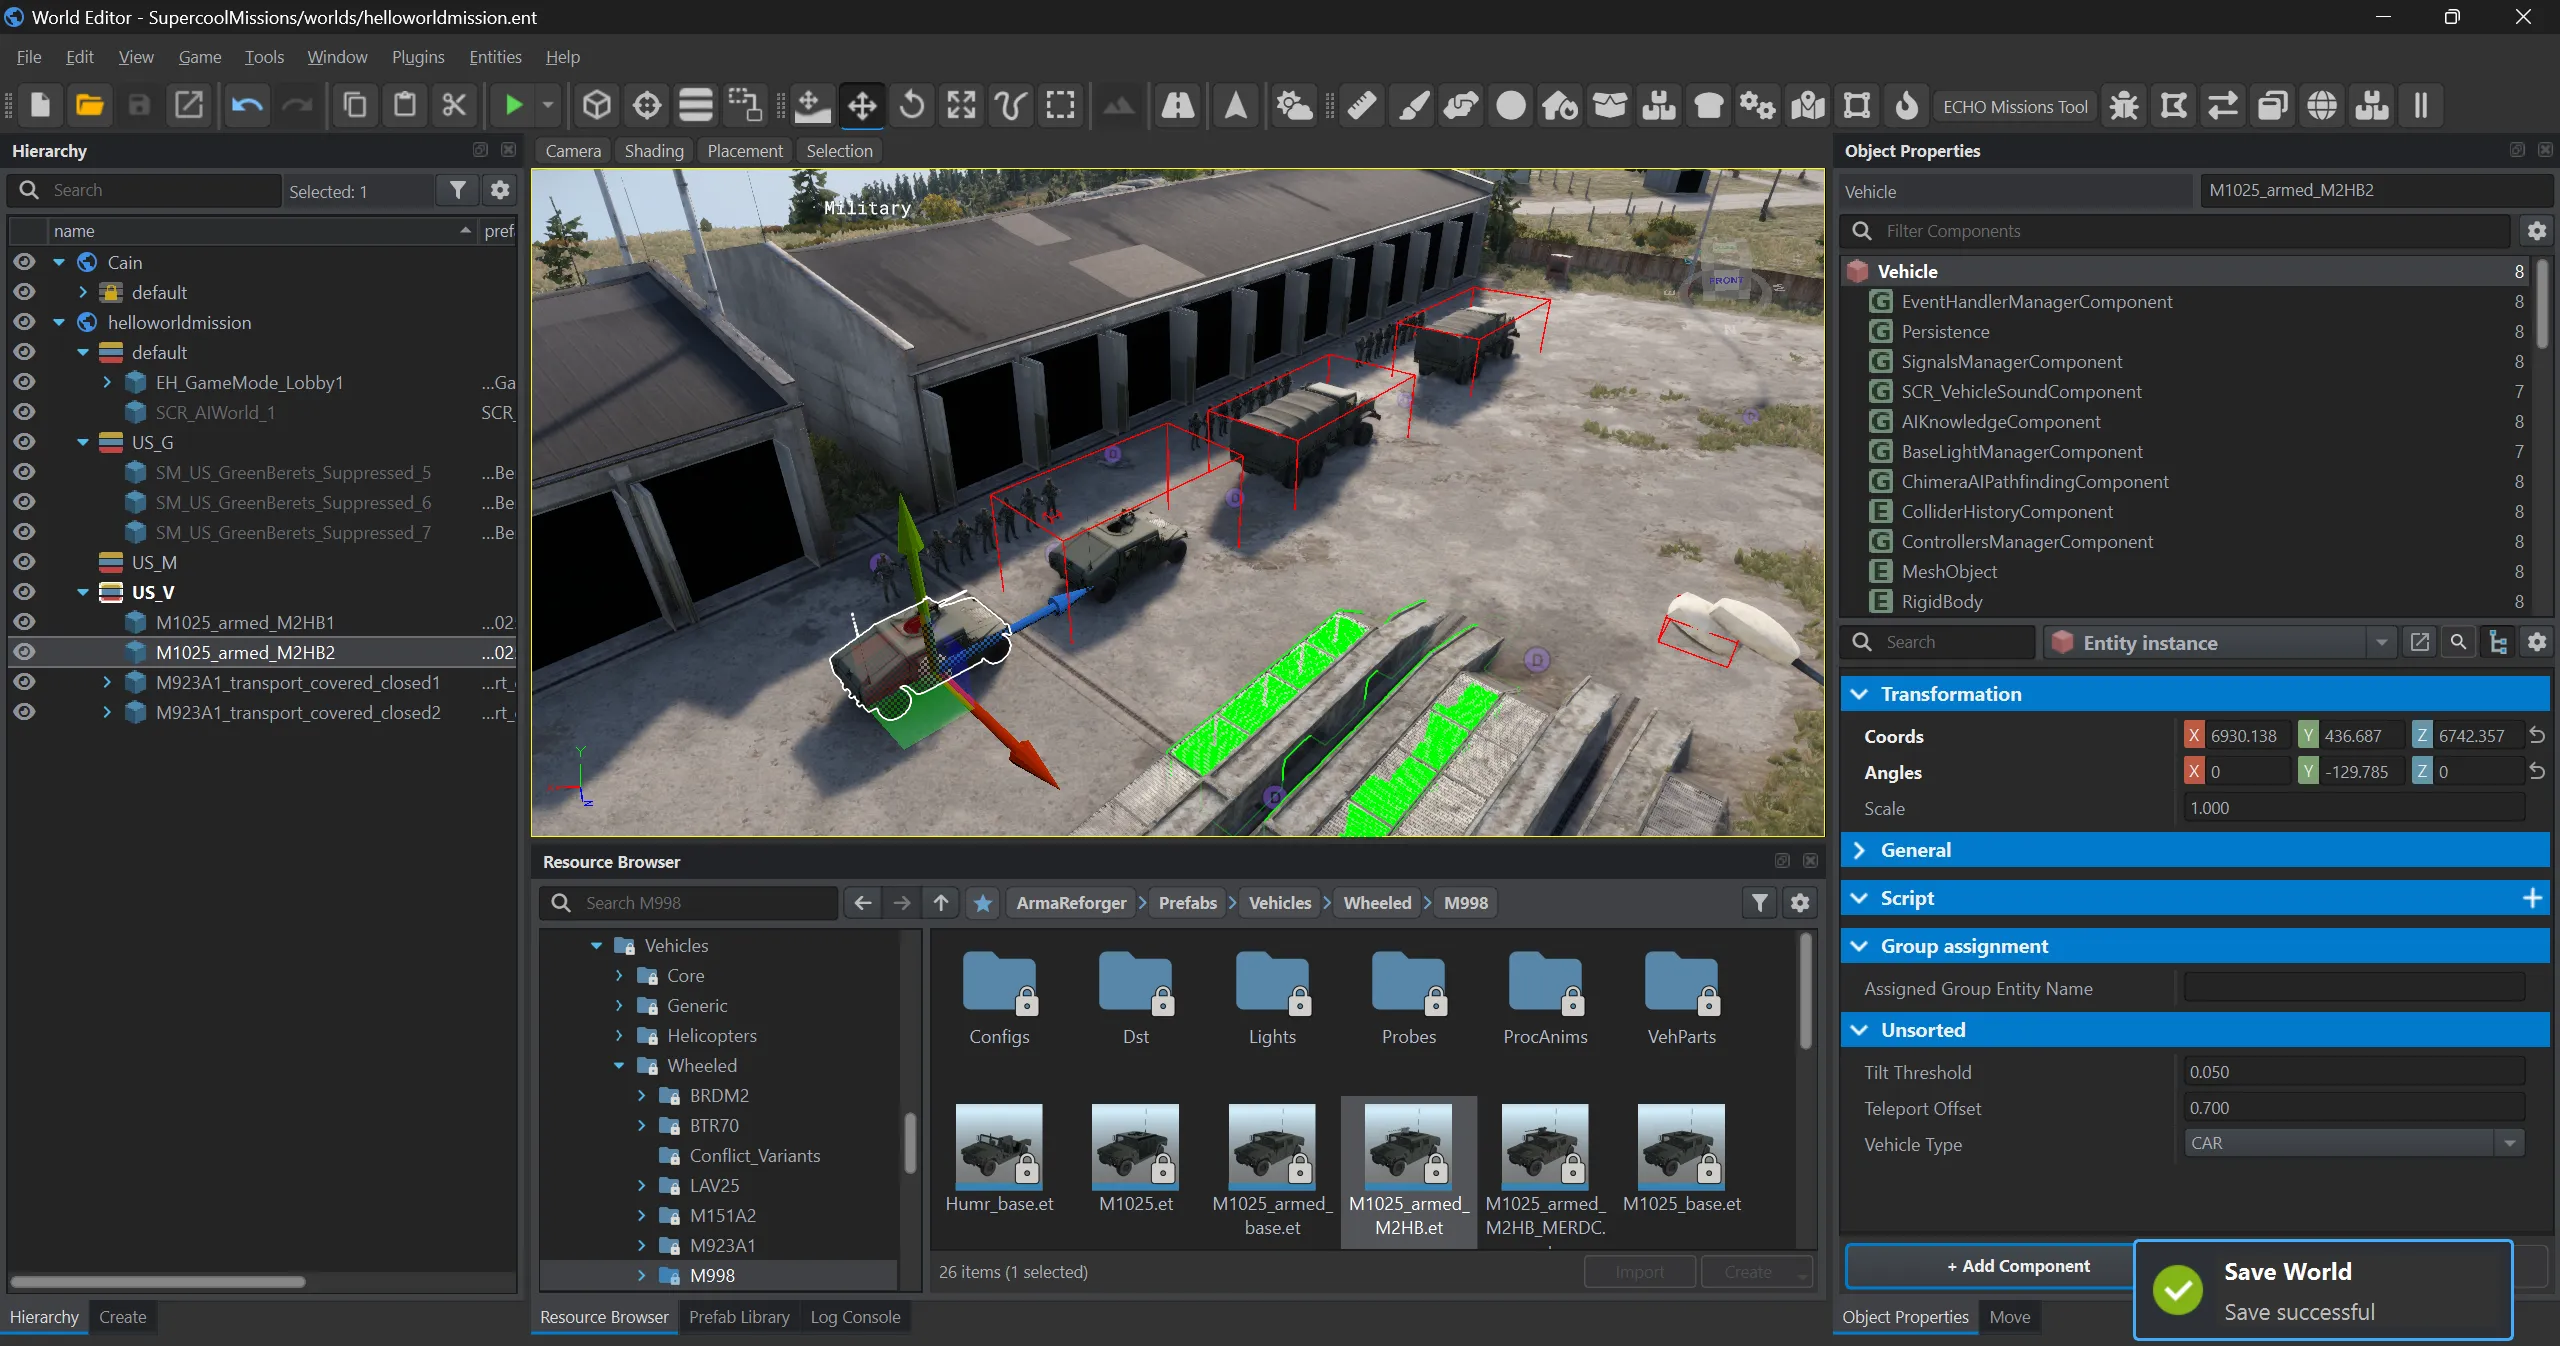
Create the layers for markers and vehicles, and make the vehicle layer active.
Place the vehicles.
The layer scheme ECHO missions follow: US_G — groups, US_M — markers, US_V — vehicles, US_Z — zones, Mapping — objects placed in the world. And the same for the other side.
7. Callsigns
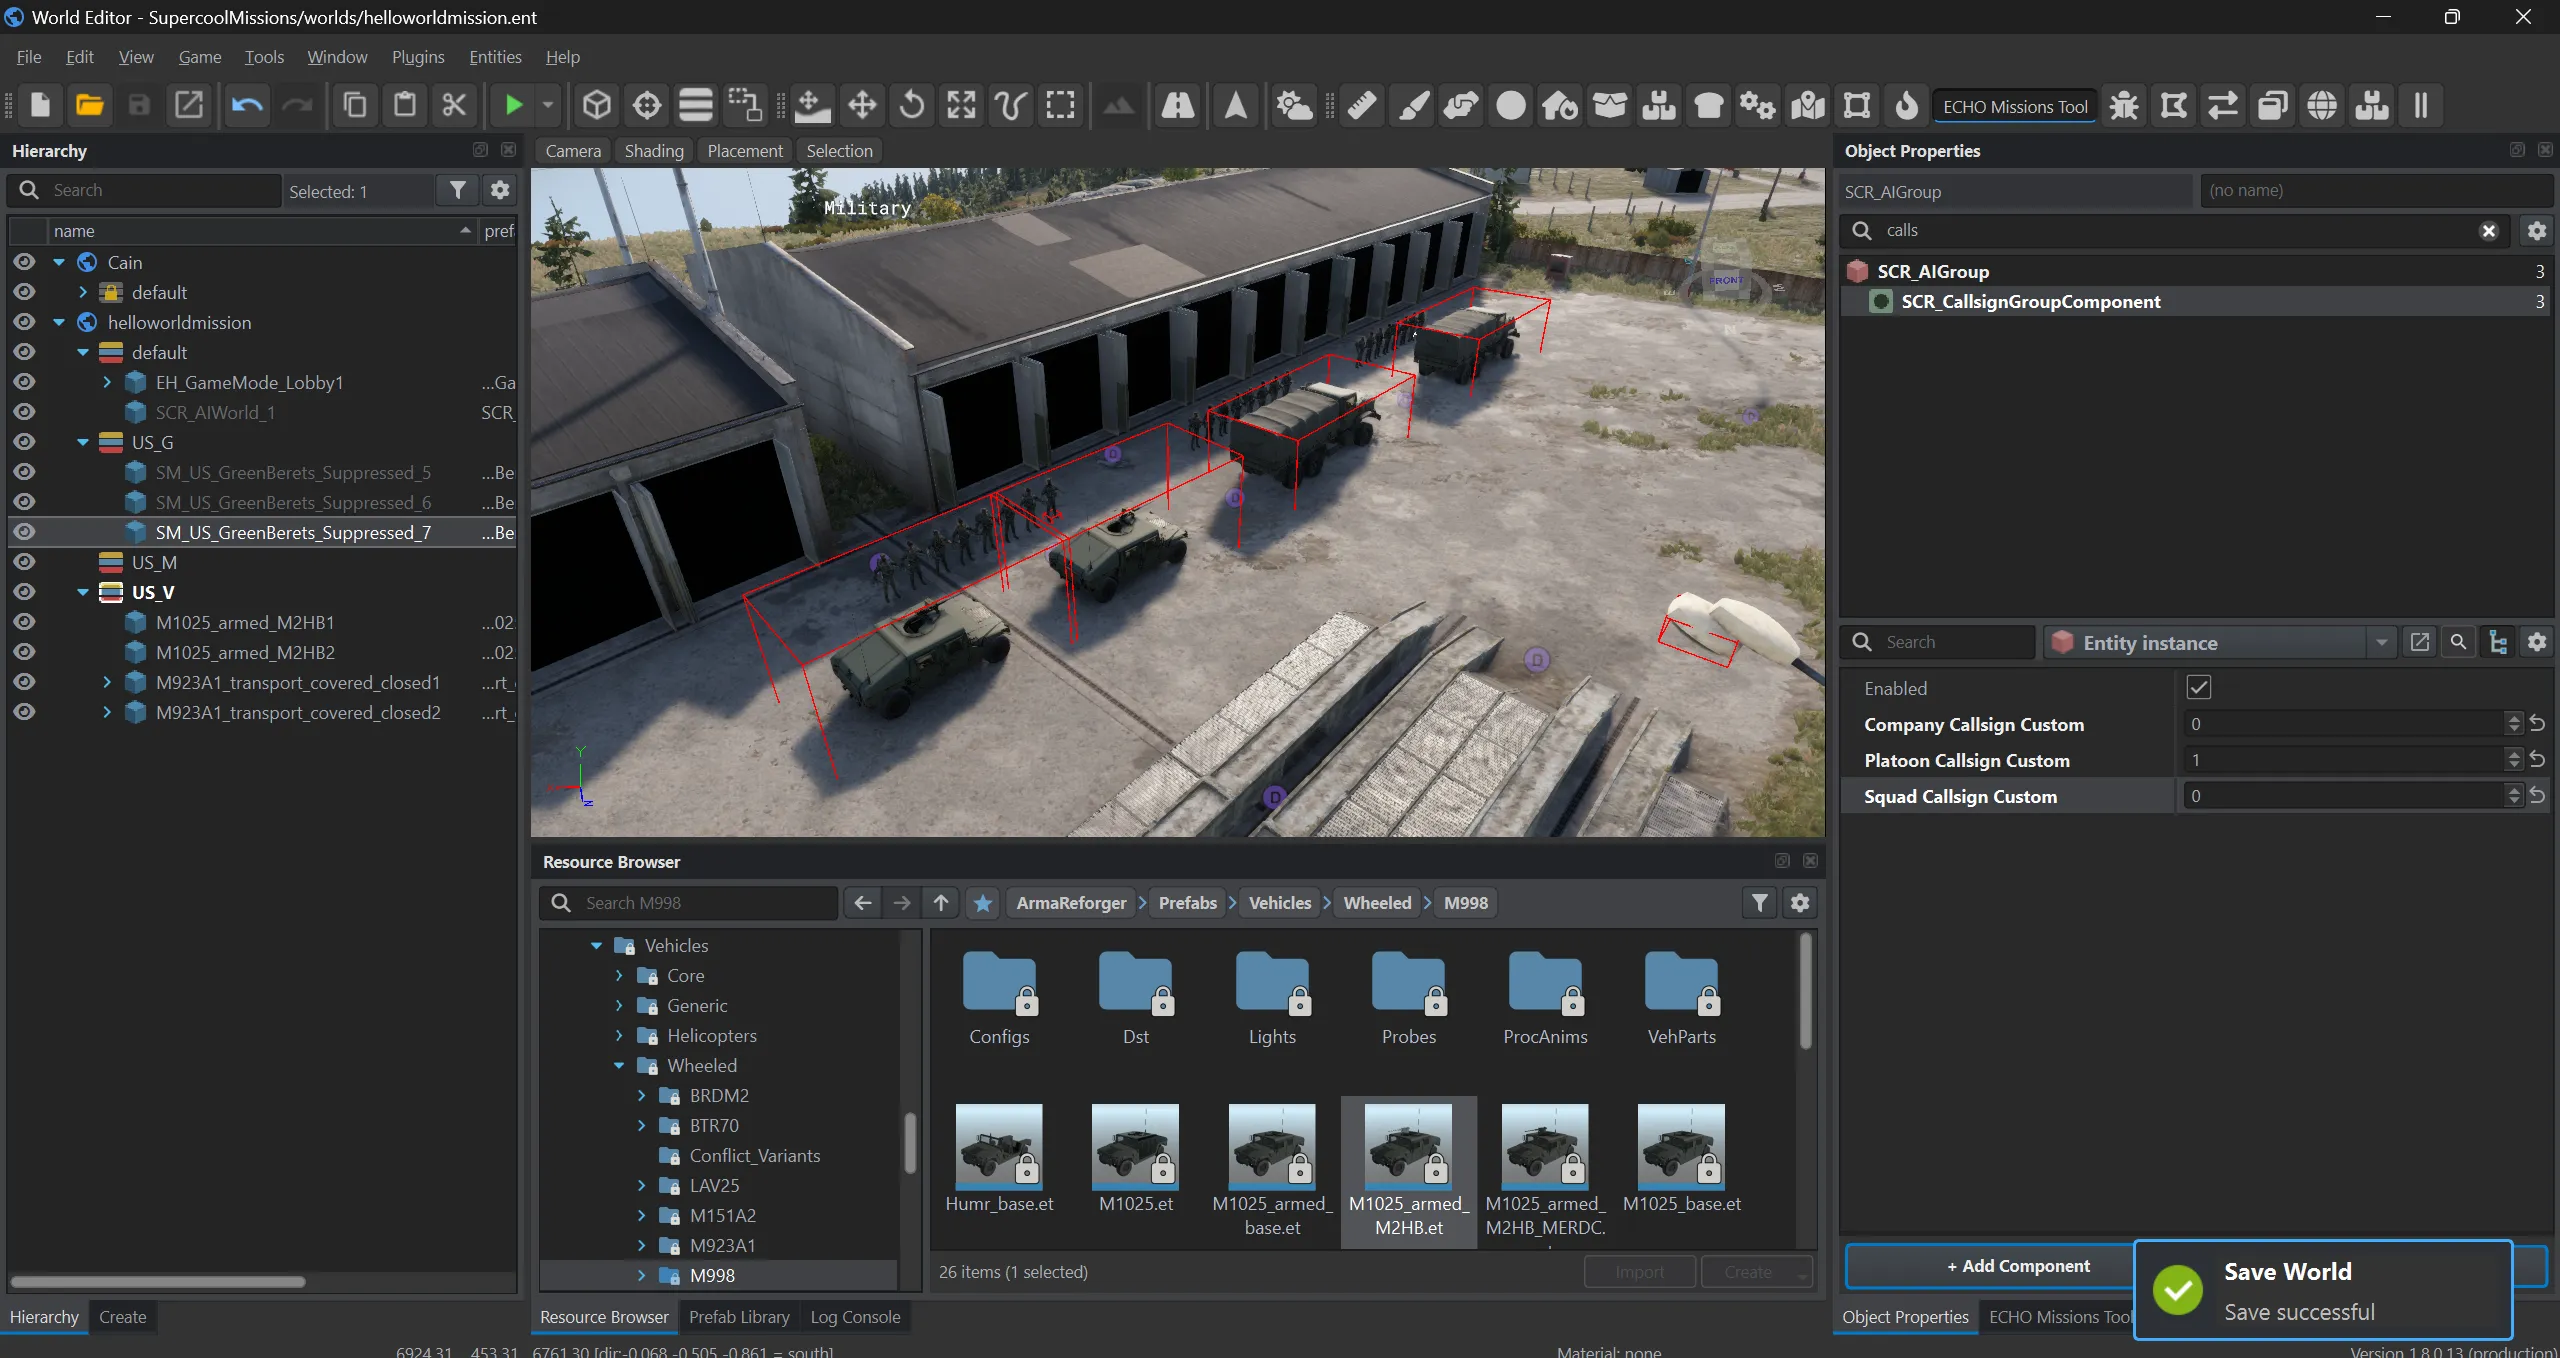
Section titled “7. Callsigns”A group’s callsign is made of a company, a platoon and a squad. It is set for one group at a time, in either of two ways:
- in the group’s
SCR_CallsignGroupComponent— the Company, Platoon and Squad Callsign Custom fields; - in ECHO Missions Tool on the top panel of World Editor: select the group, put the same three numbers into the Callsigns fields and press Assign callsigns.
8. Entity names and group markers
Section titled “8. Entity names and group markers”This is already done for all of the side’s groups at once. Select them and open the tool.
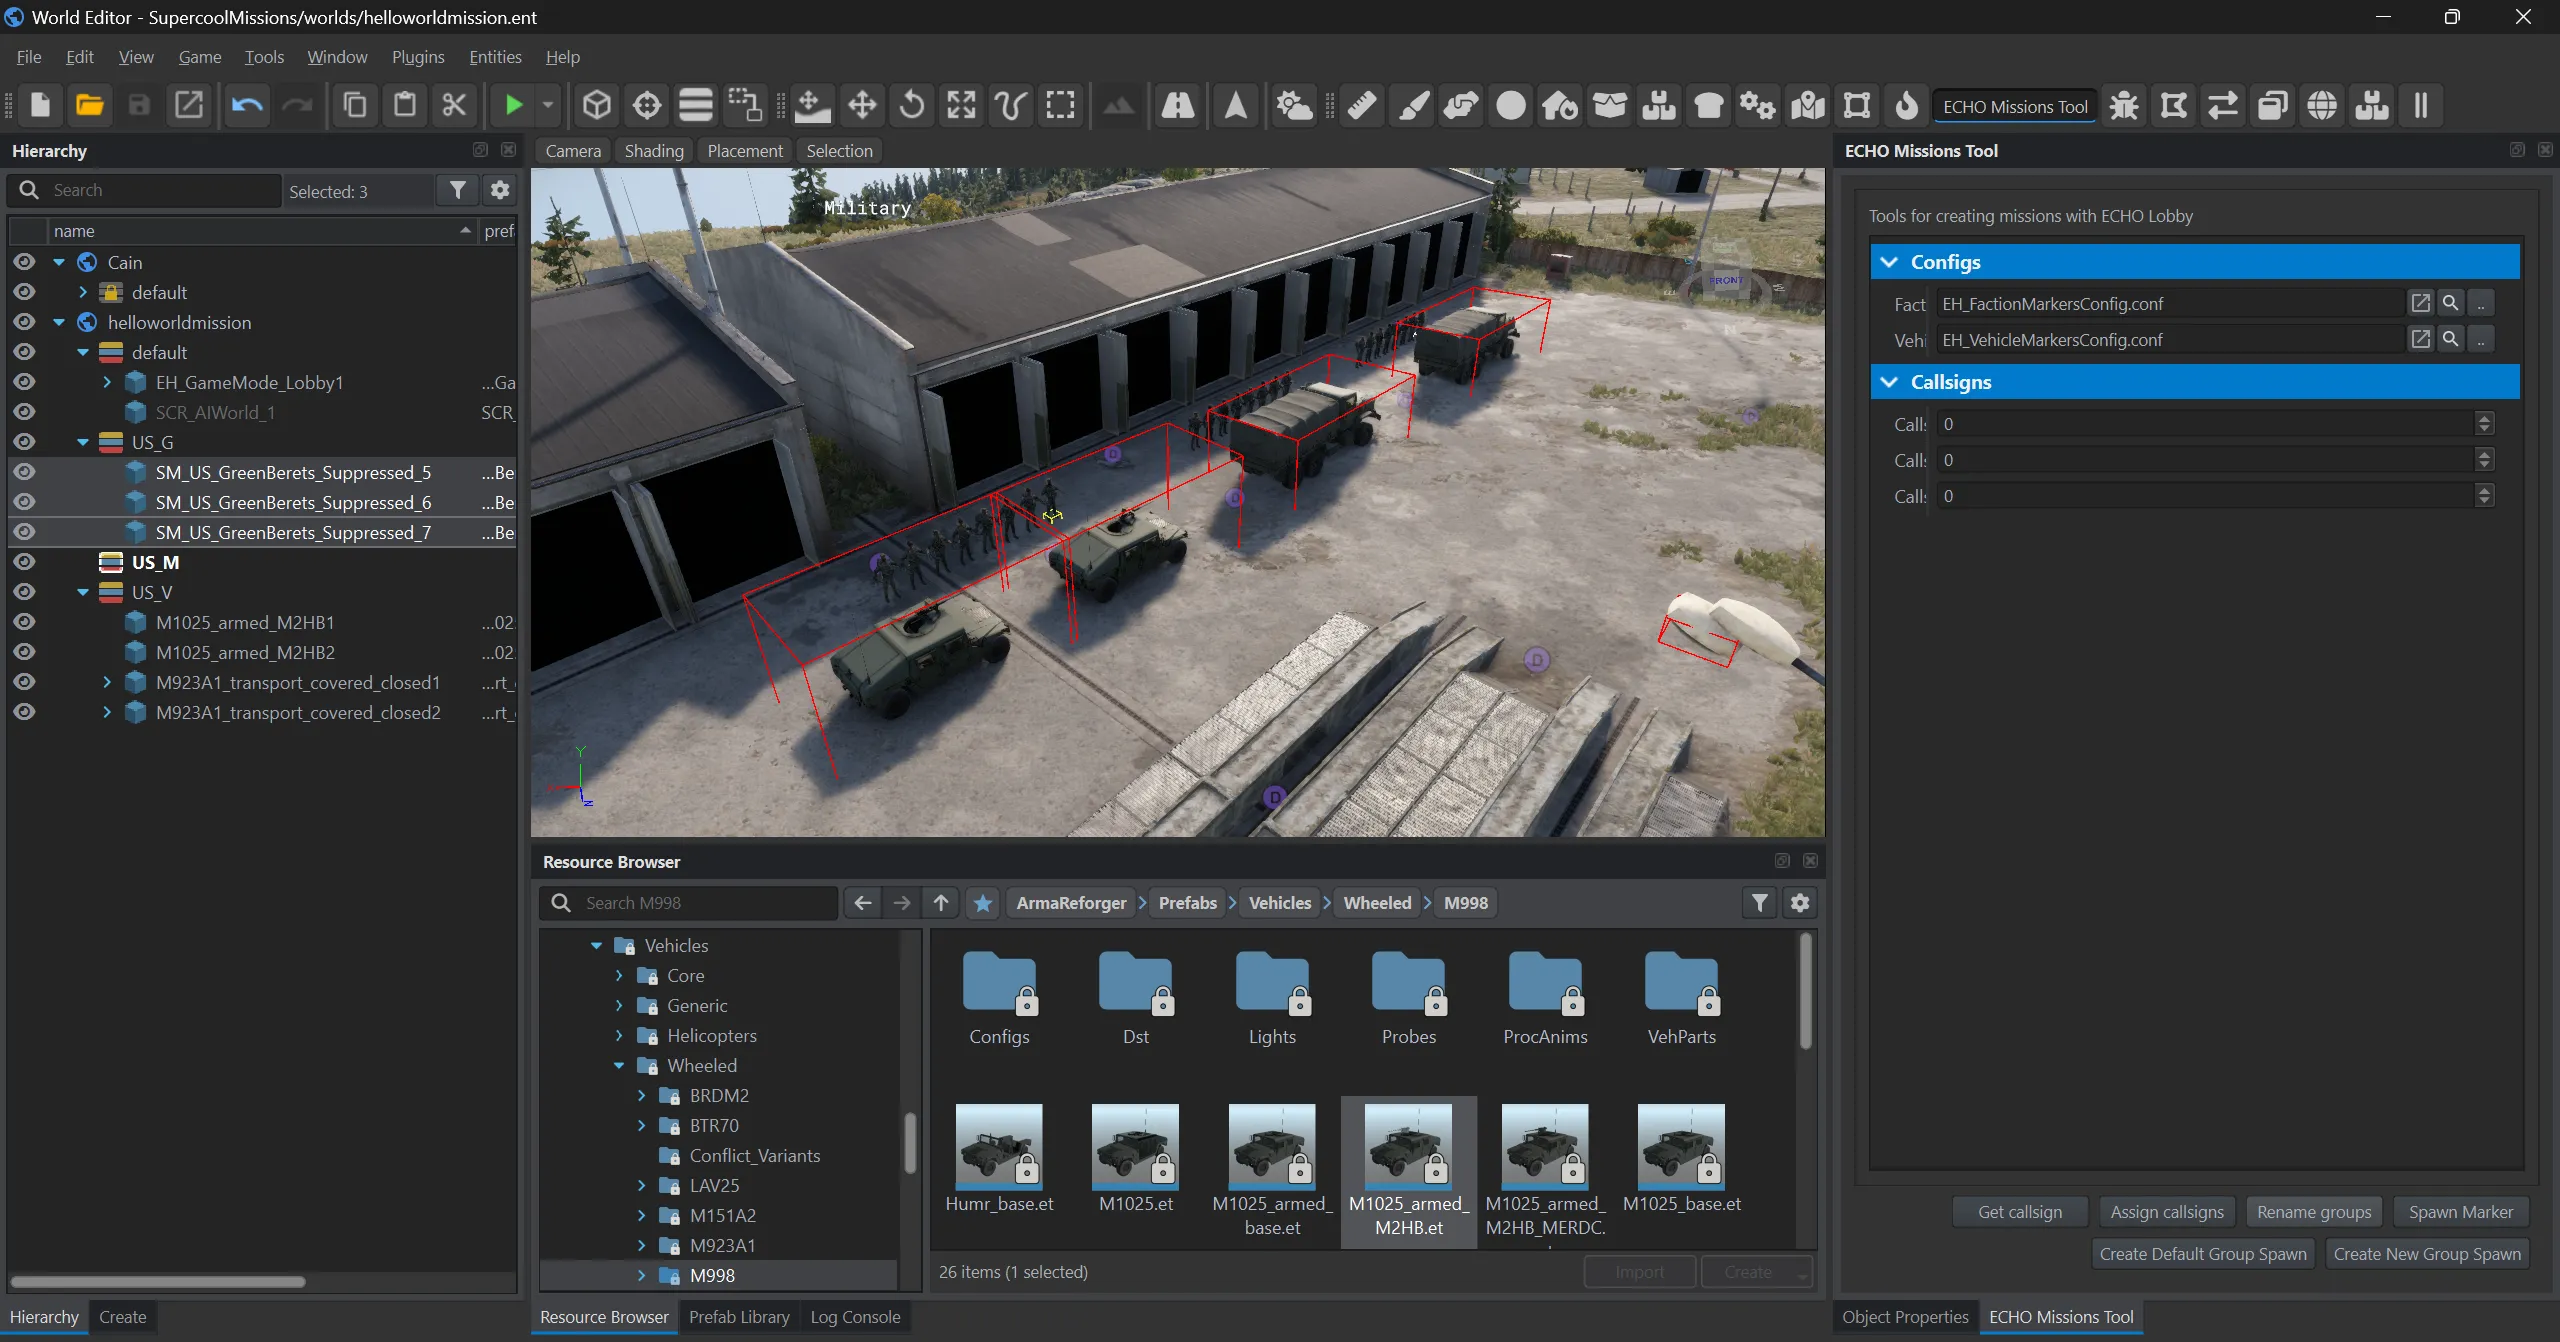
Press Rename groups — the groups get entity names after their callsigns, like US_0_0_0. Then make the marker layer active and, with the groups still selected, press Spawn Marker.
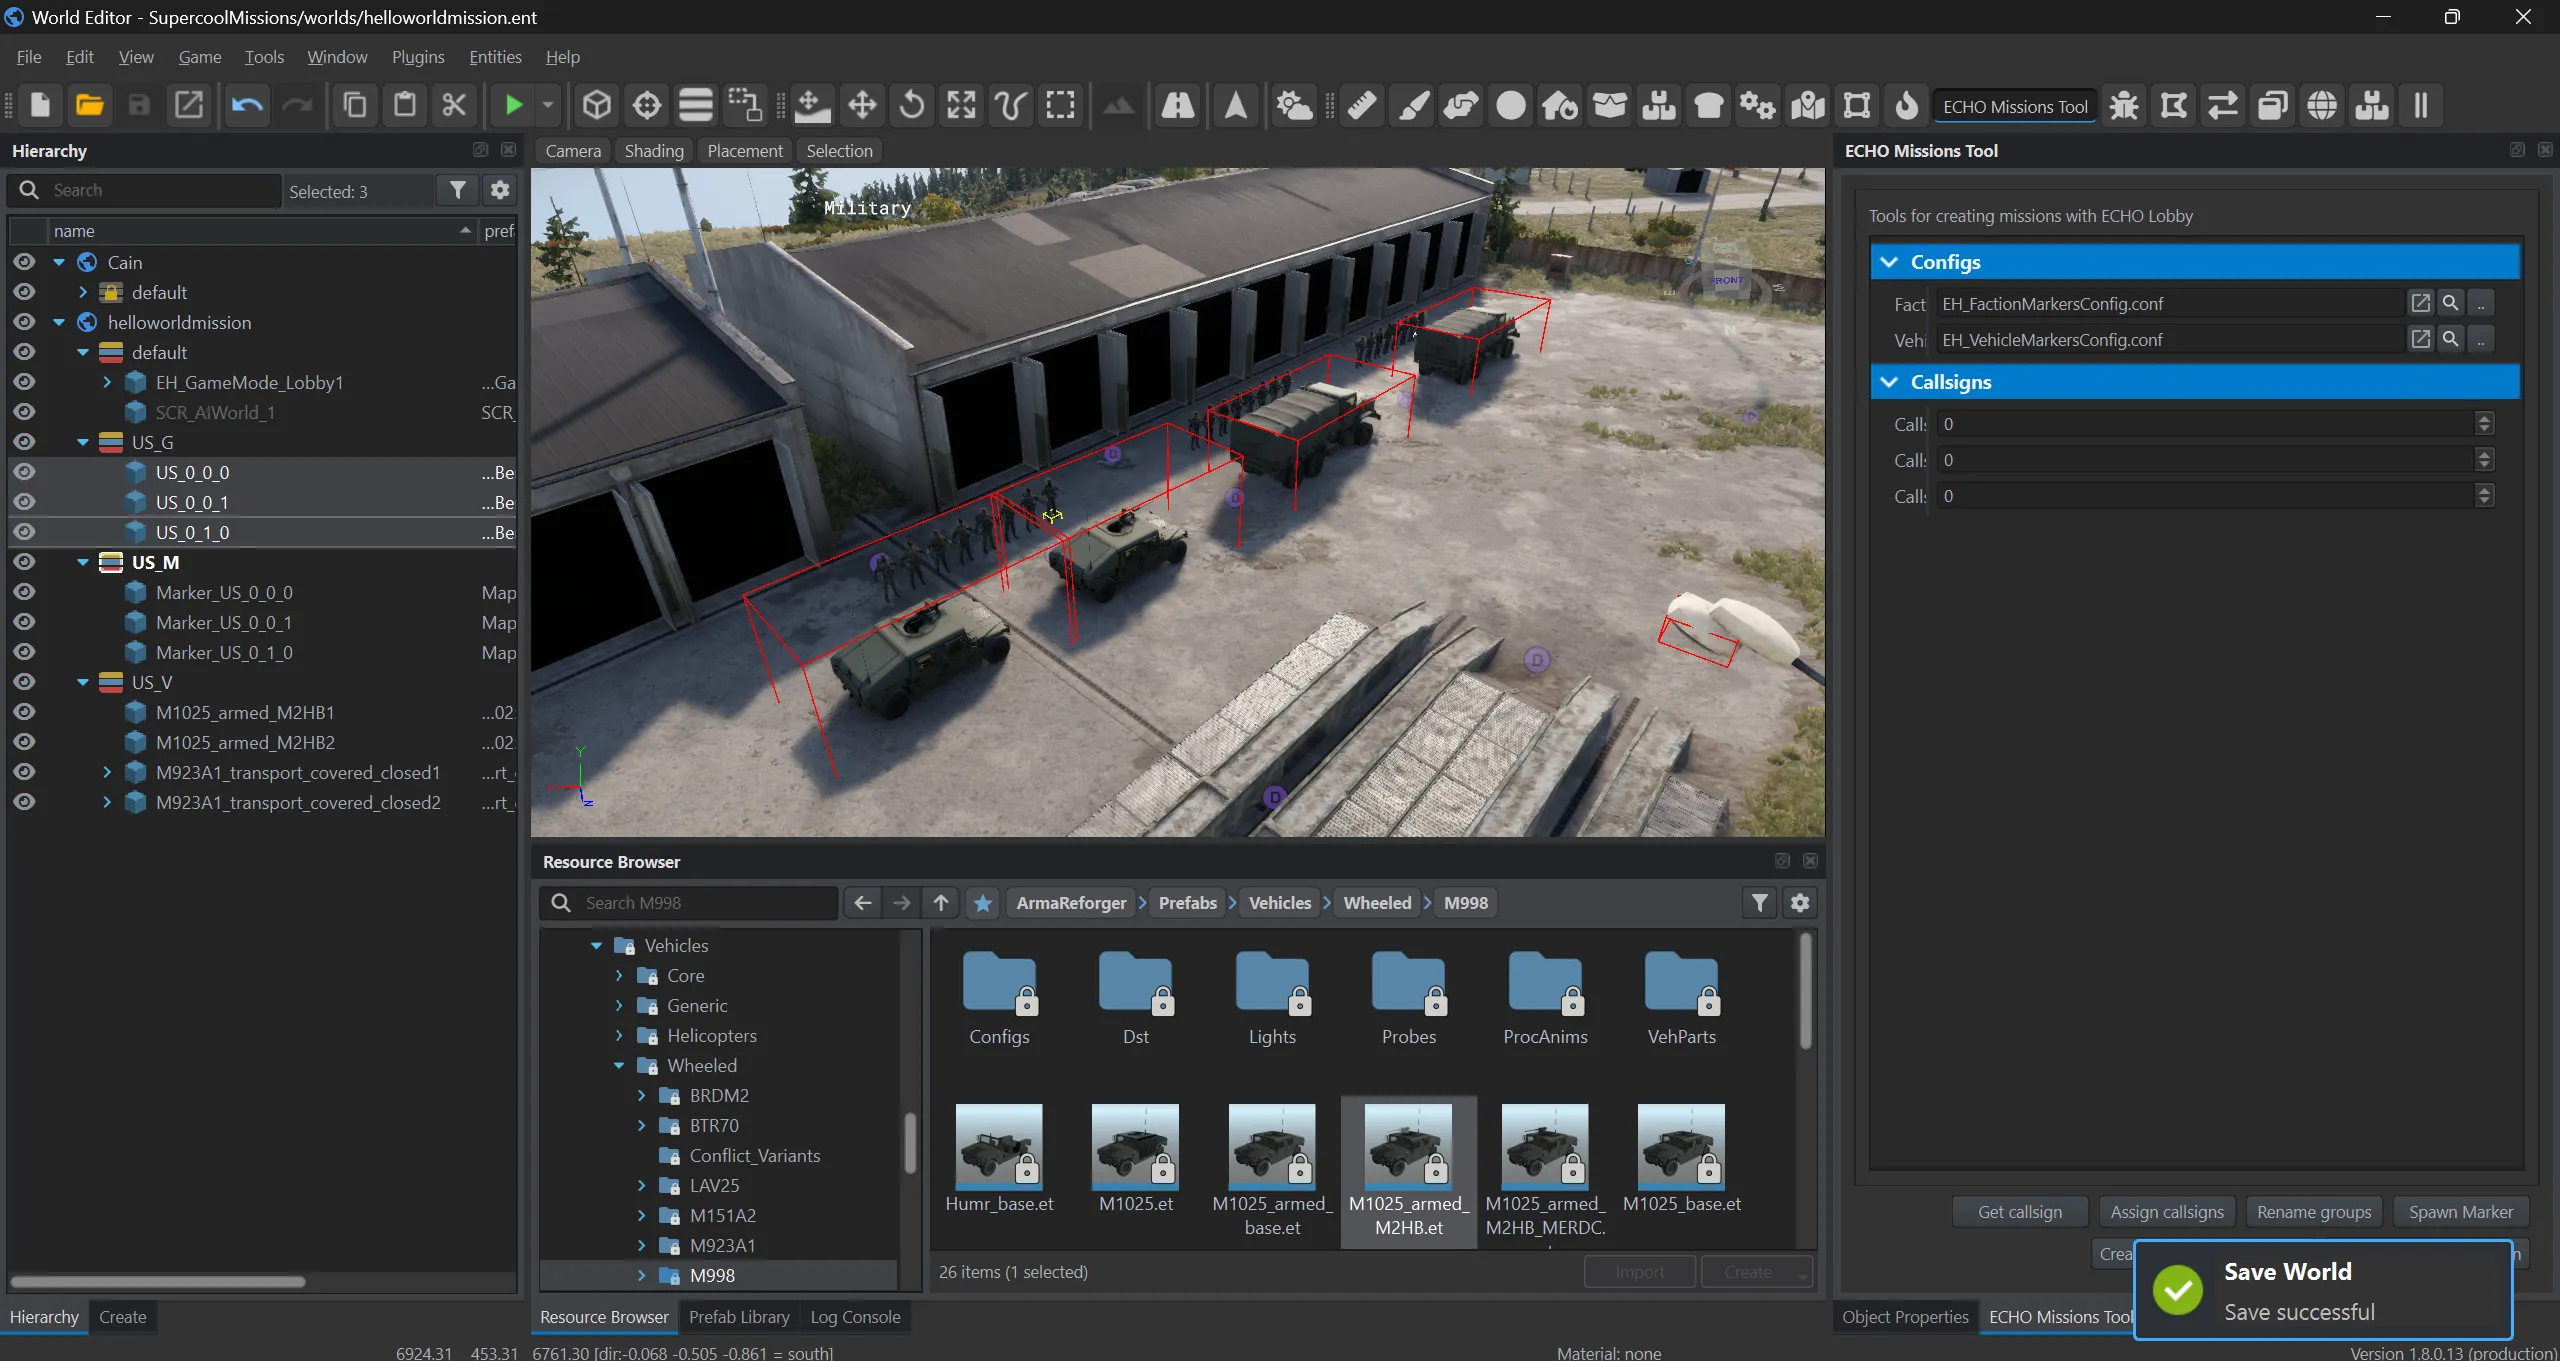
The entity names are later needed by vehicles and spawns, so rename the groups before anything else.
9. Vehicles
Section titled “9. Vehicles”Assign a vehicle to a group: the Assigned Group Entity Name field takes the group’s entity name. Then the squad’s vehicles are shown in slotting, and on a chosen spawn they move together with the group.
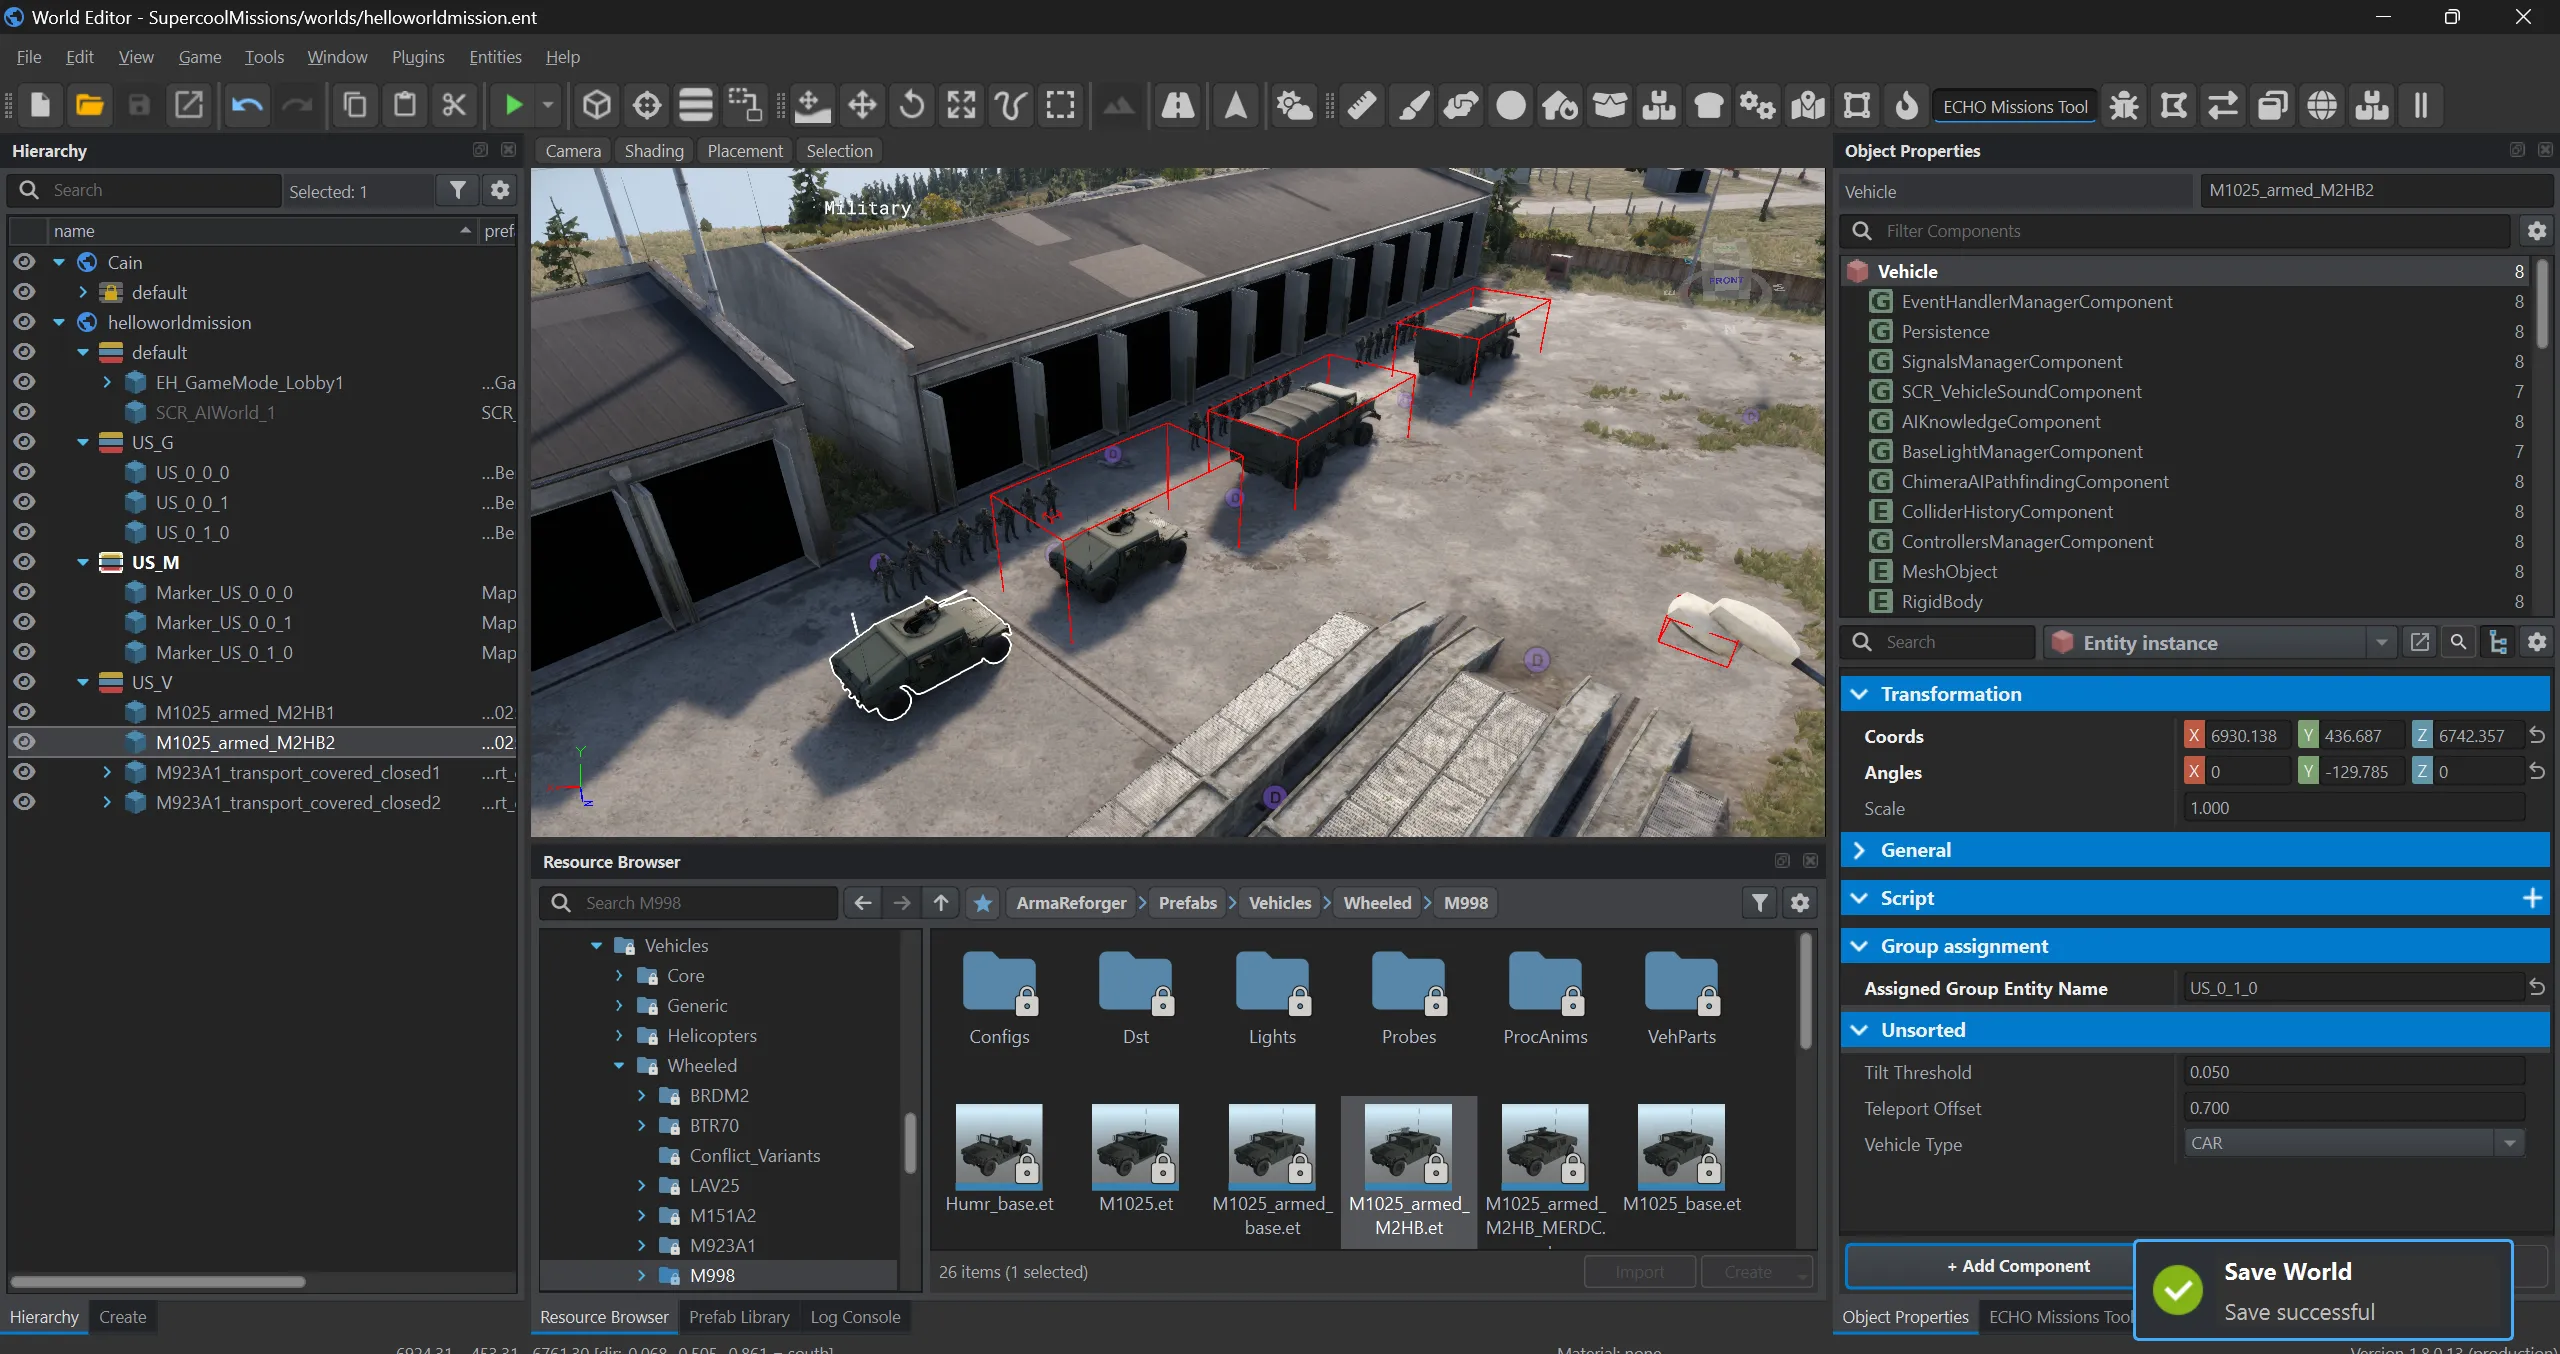
Select the vehicles and press Spawn Marker — their icons appear on the map.
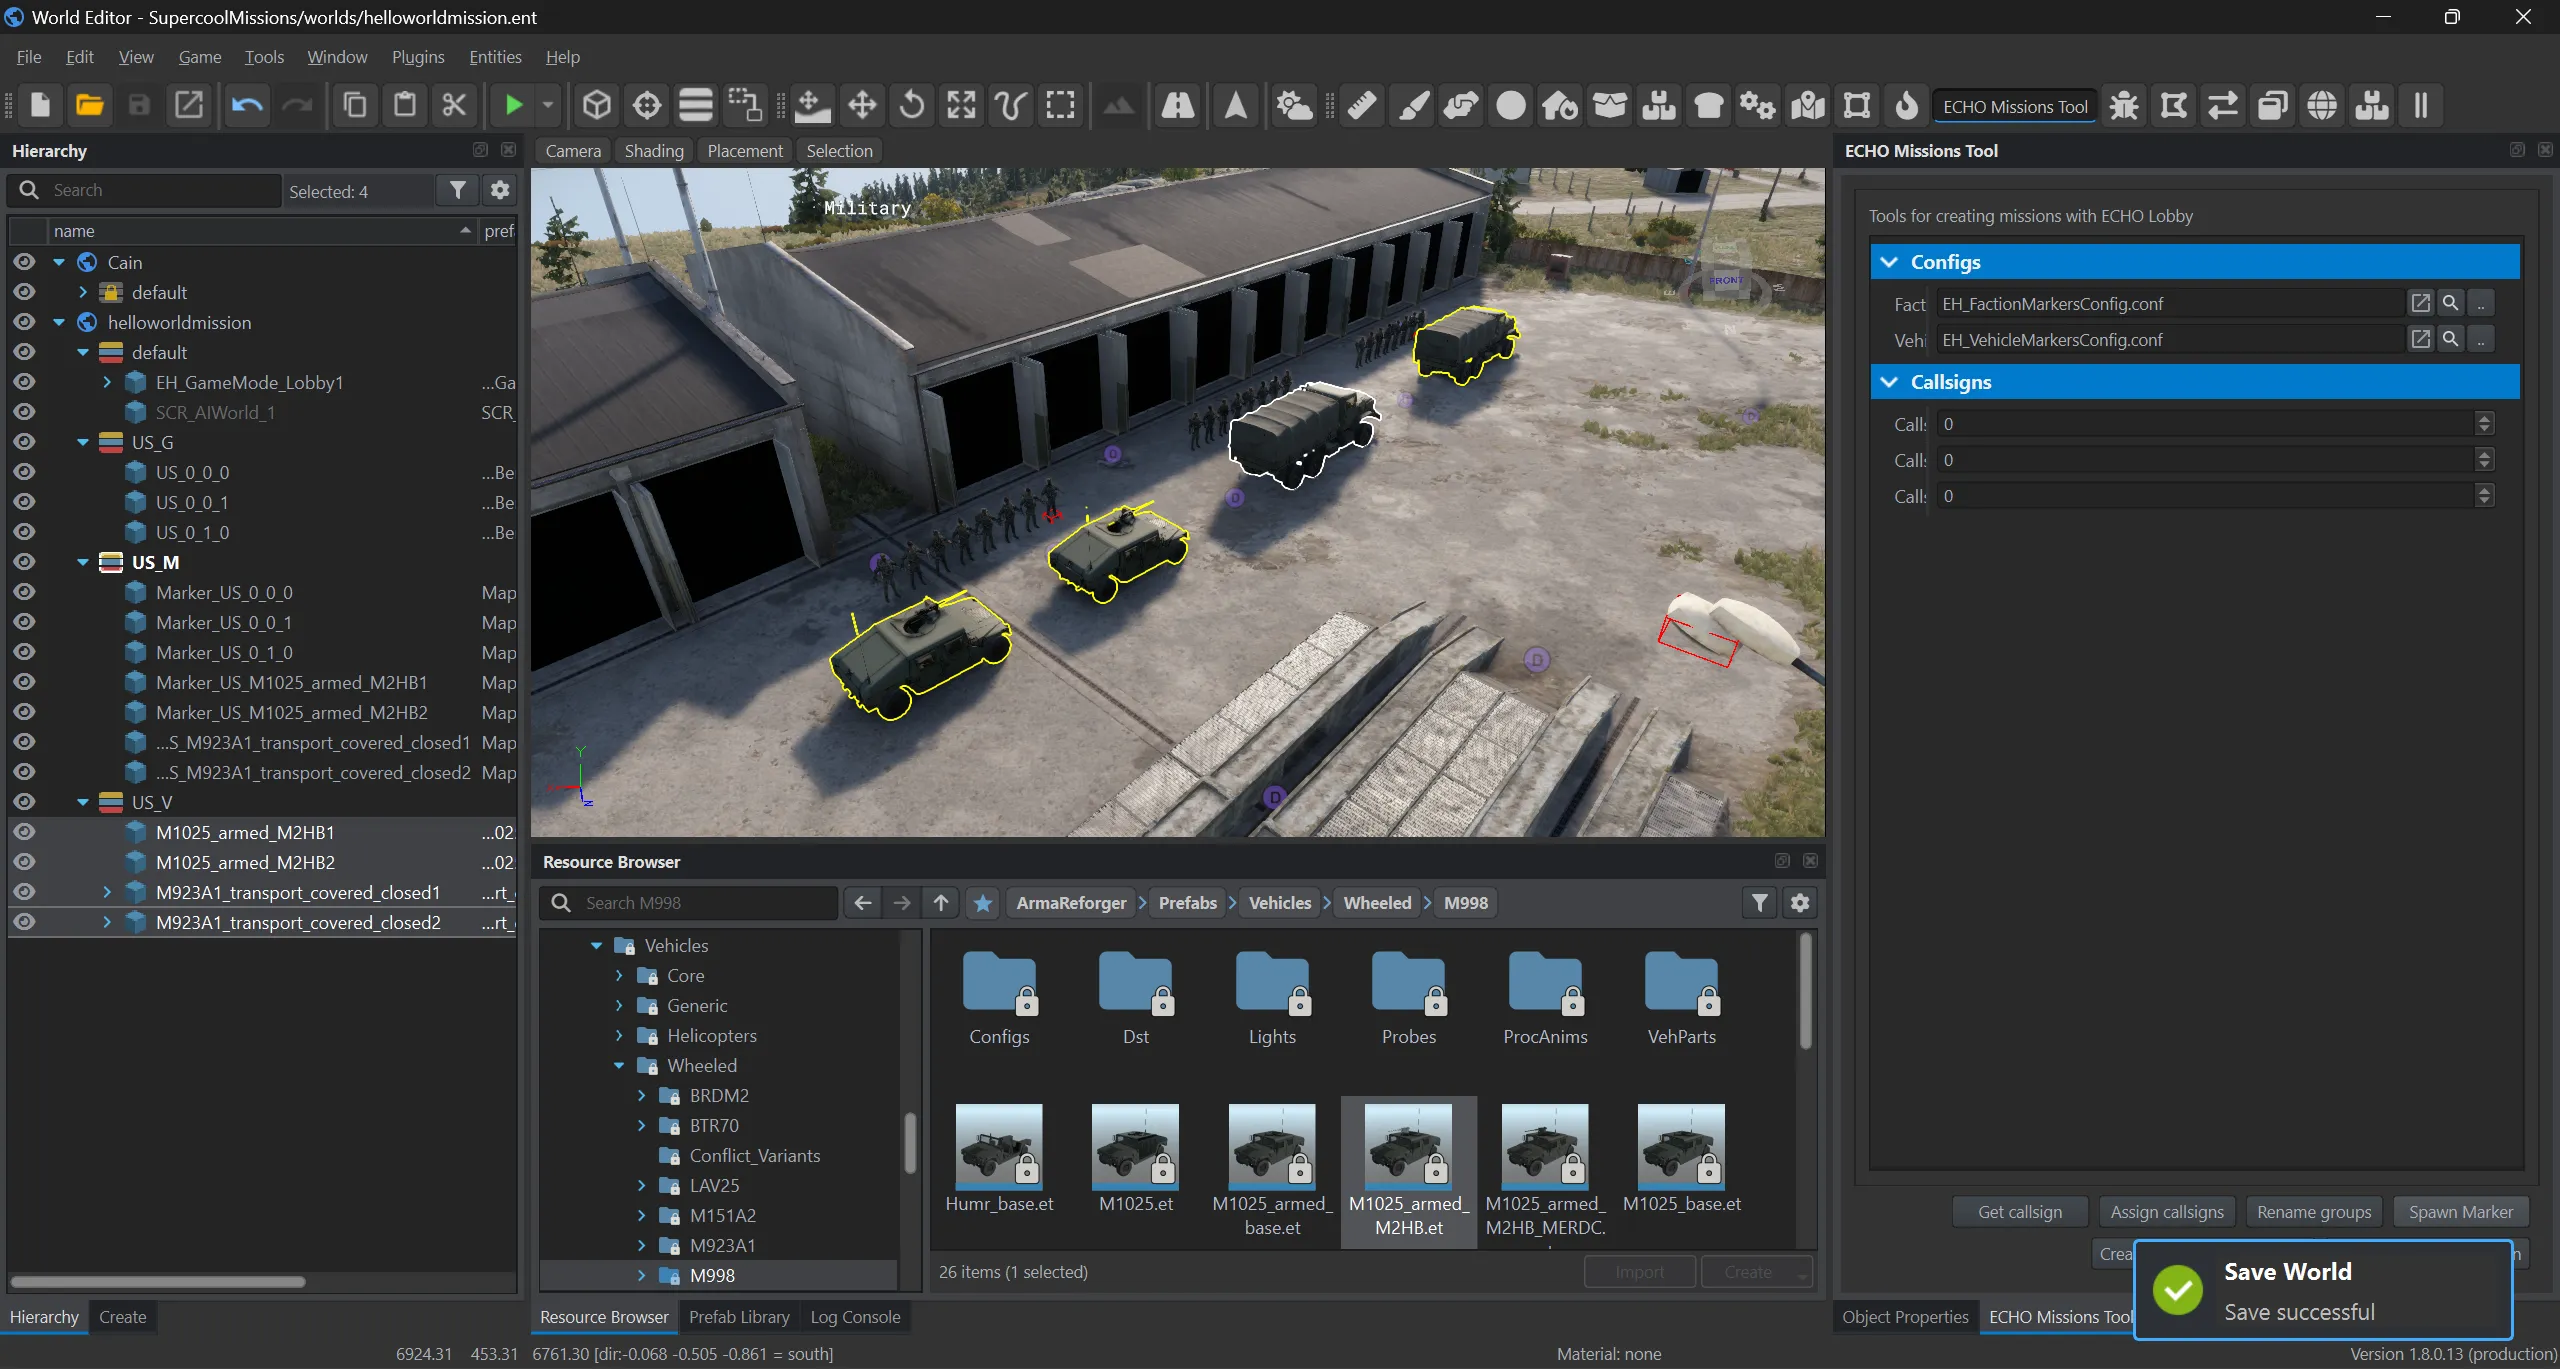
Repeat steps 6–9 for the other side.
10. Zones
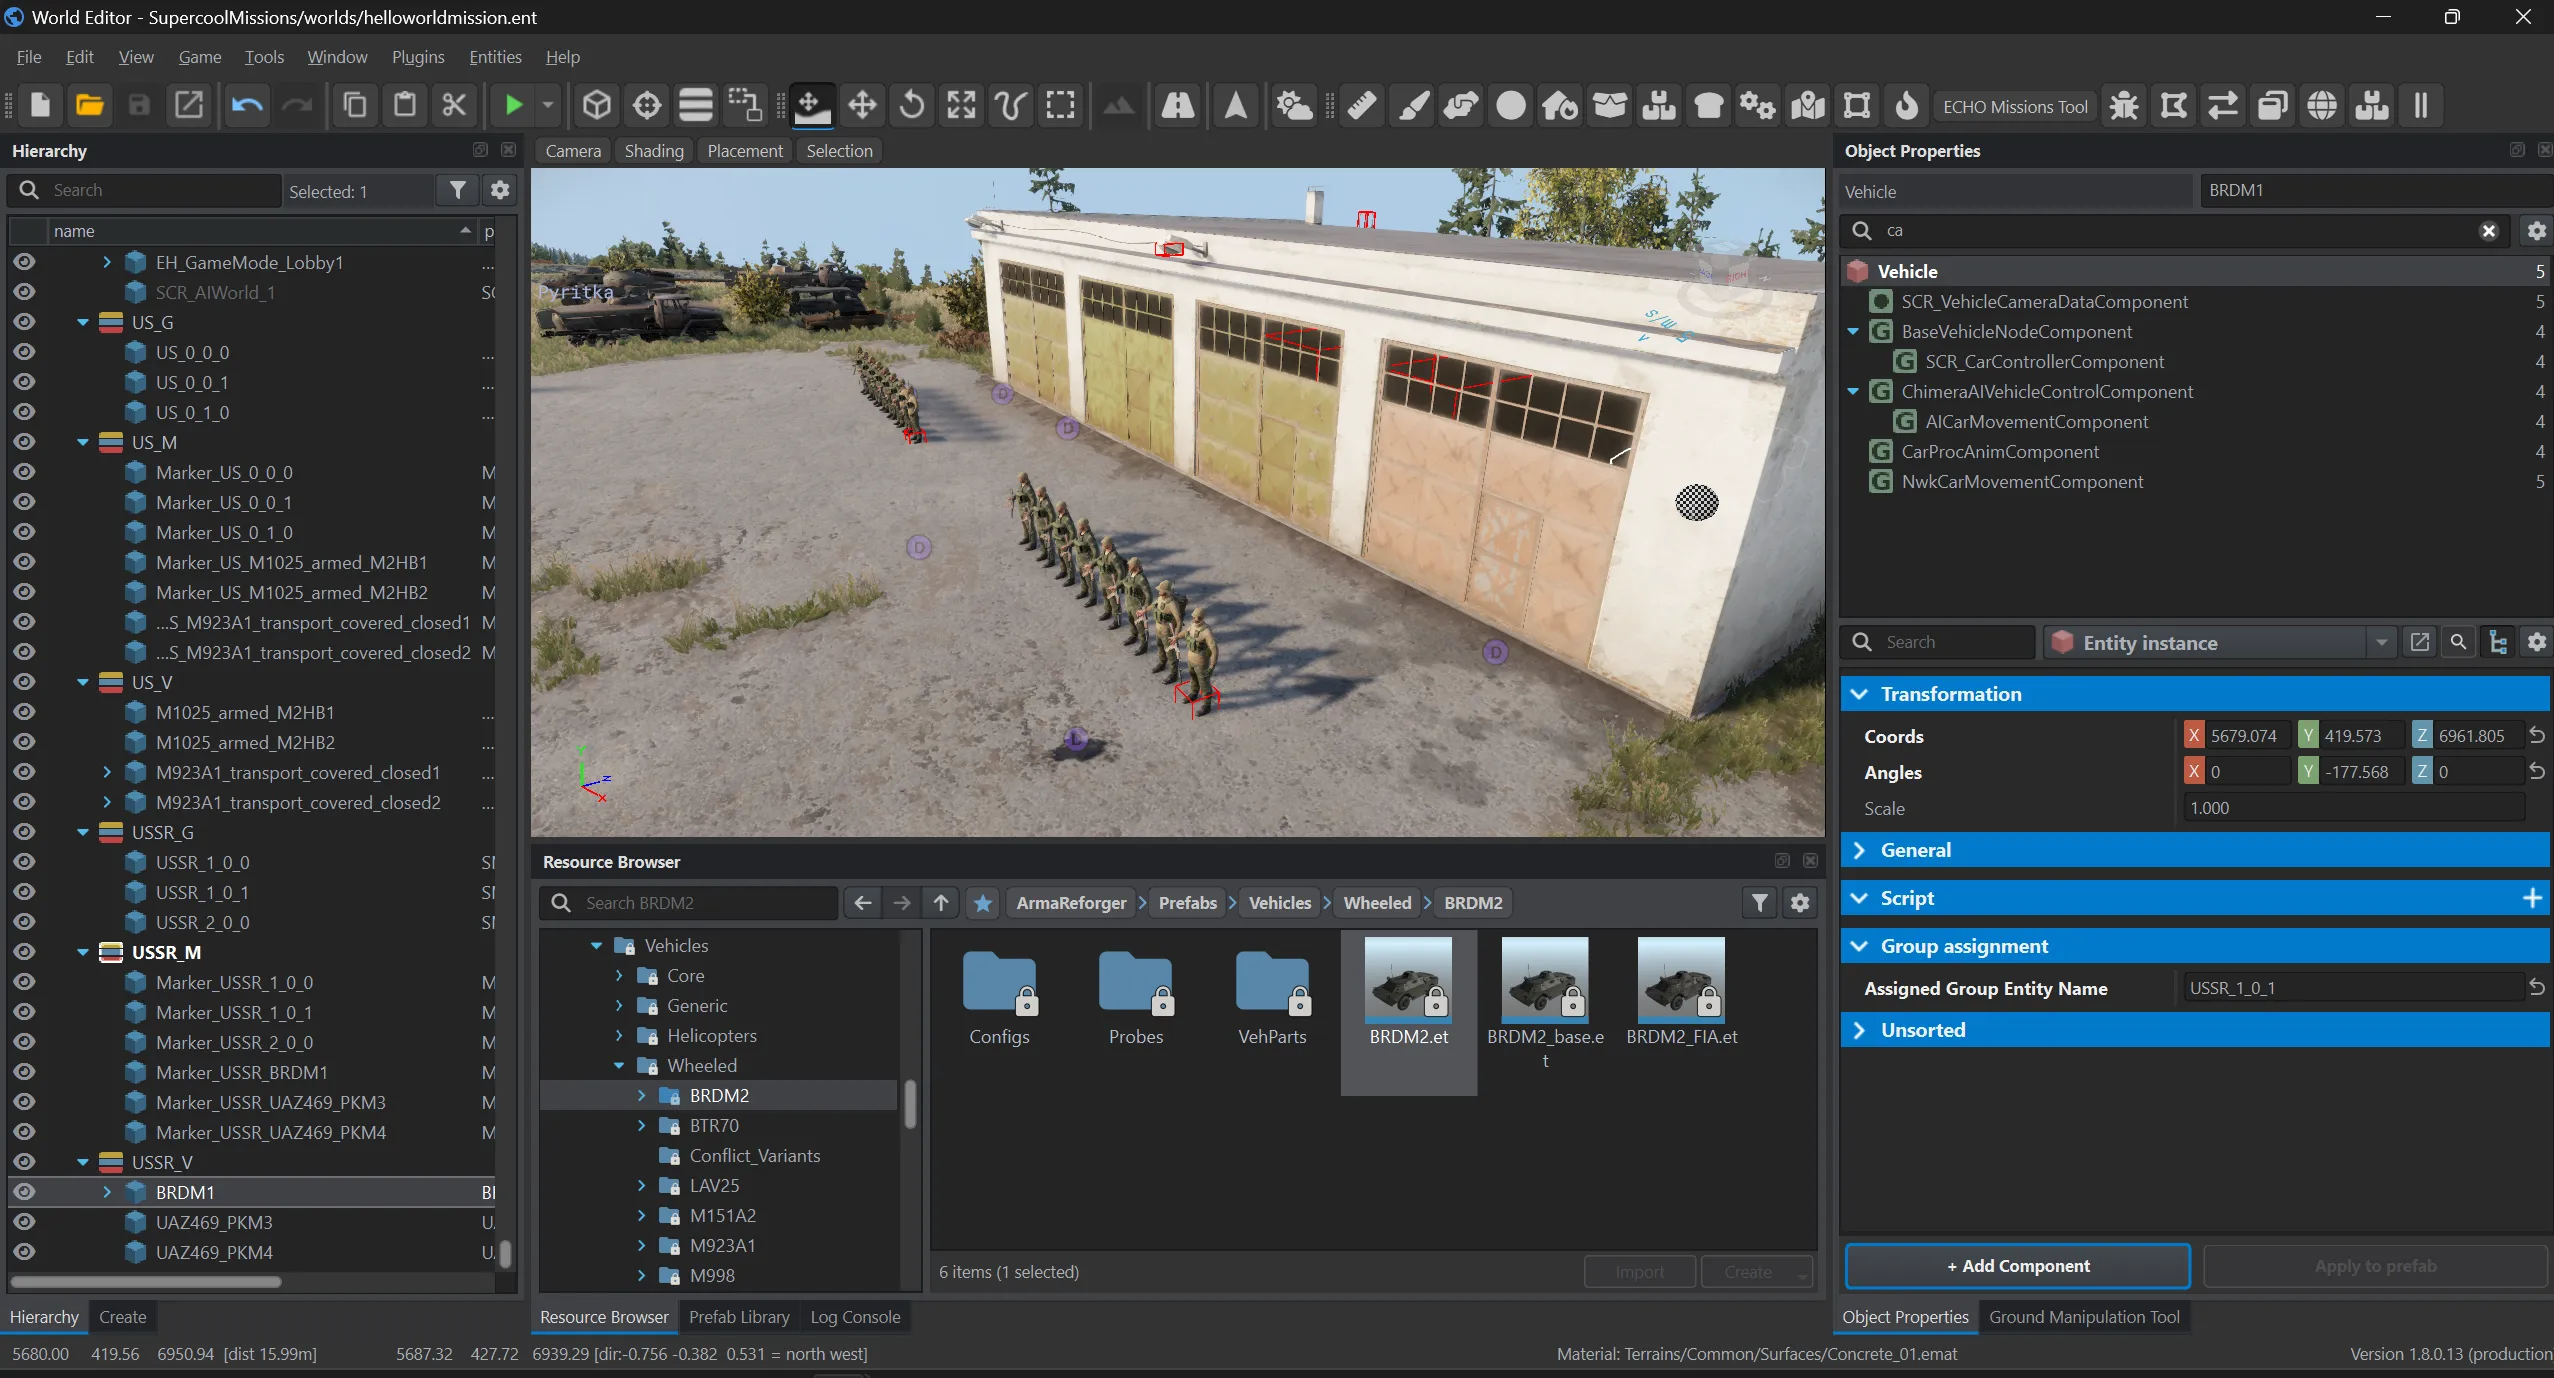
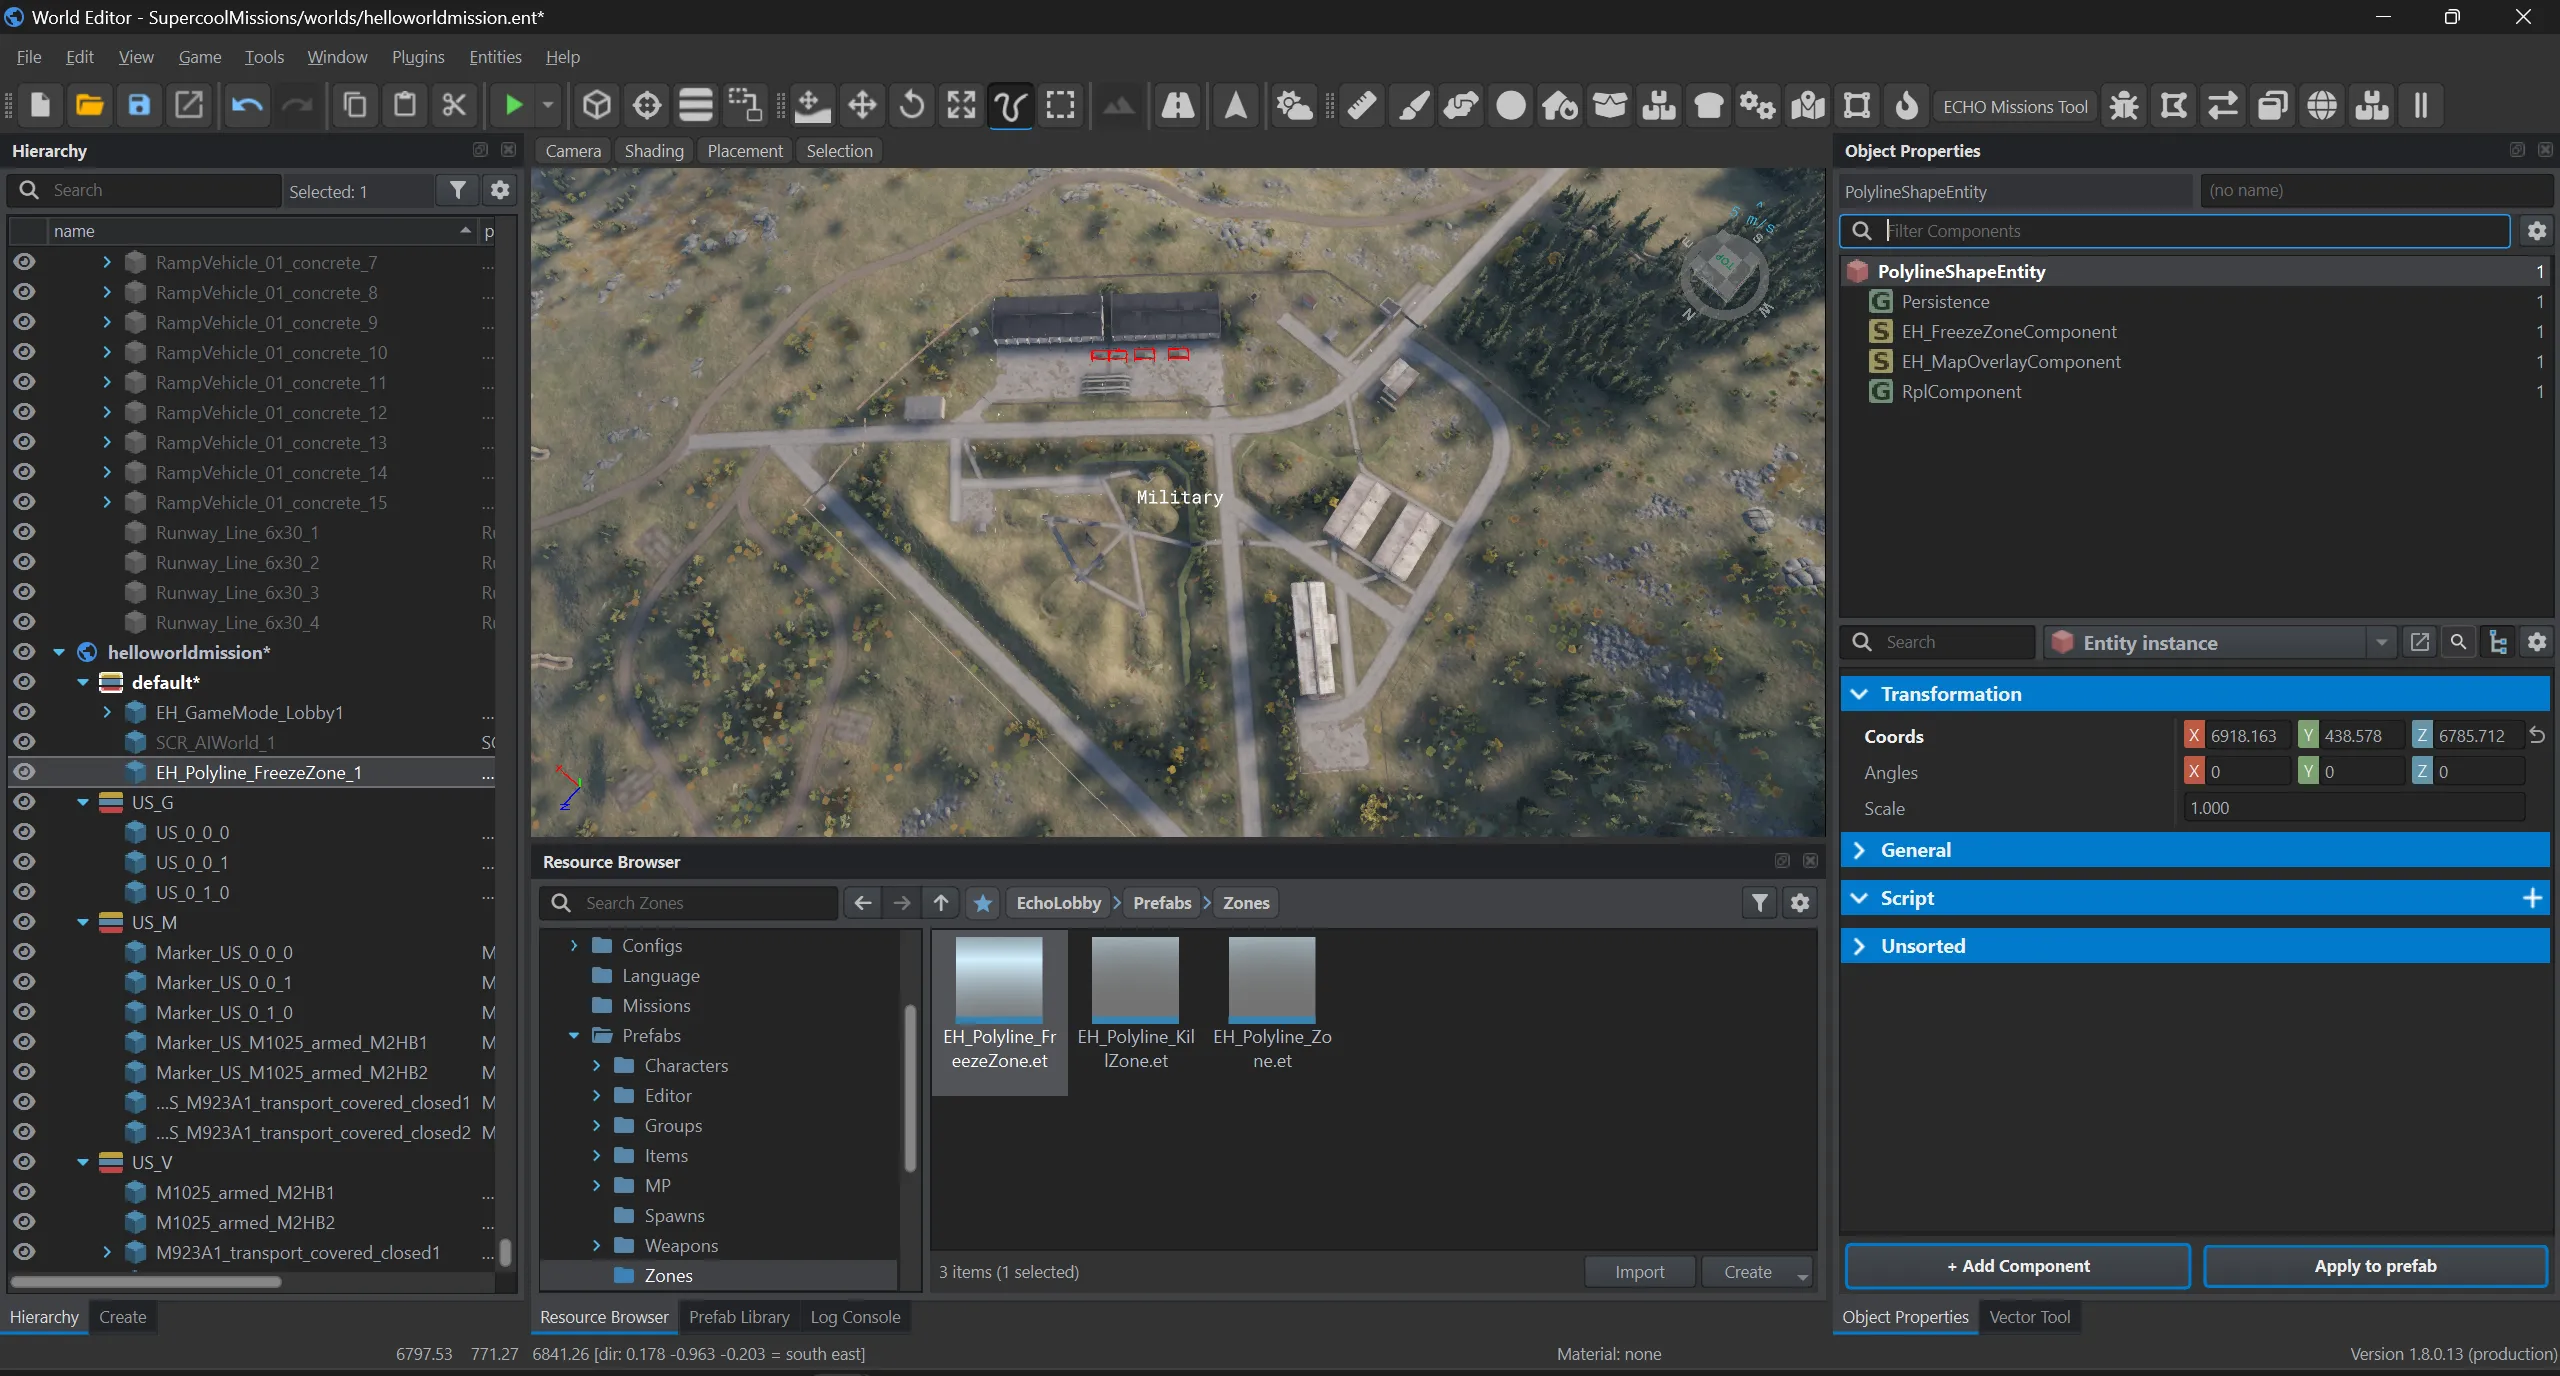
Section titled “10. Zones”All zones are polylines: place the prefab, select Vector Tool on the top panel and, holding Alt, click in the world — every click adds a point of the outline.
Freezetime
Section titled “Freezetime”Place Prefabs/Zones/EH_Polyline_FreezeZone.et and draw the side’s starting area.
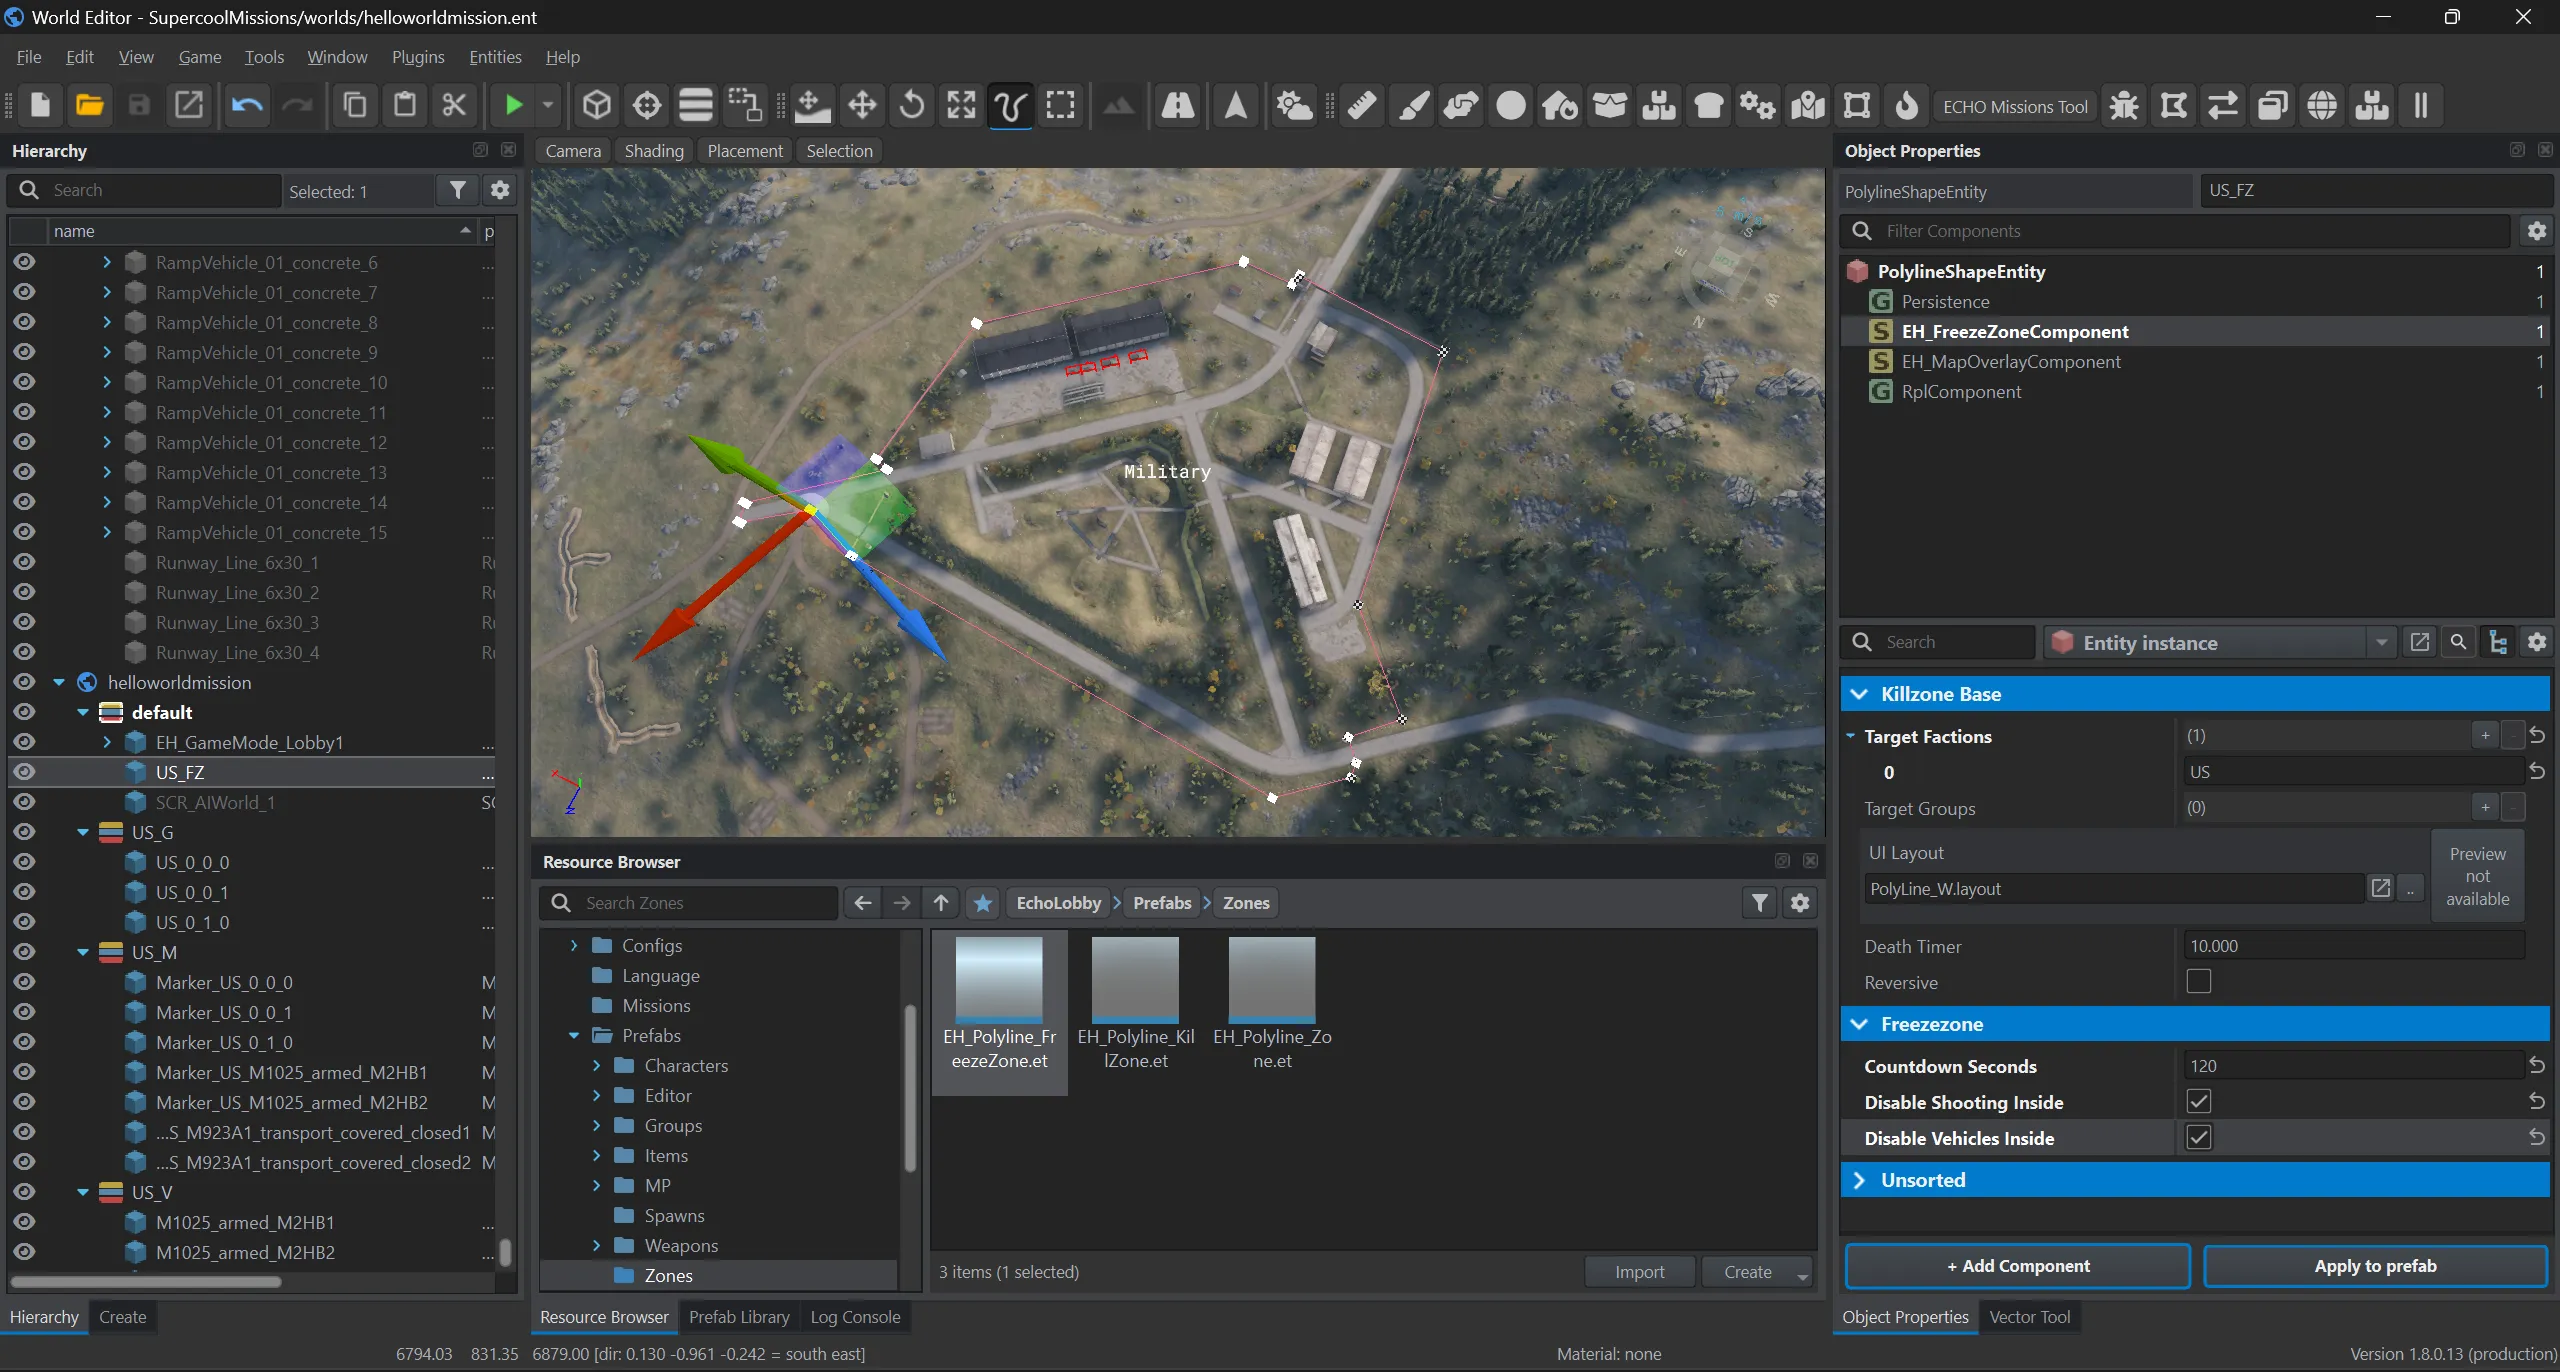
In EH_FreezeZoneComponent set Target Factions to your side and Countdown Seconds to the length of the freezetime; if you like, forbid shooting and vehicles inside.
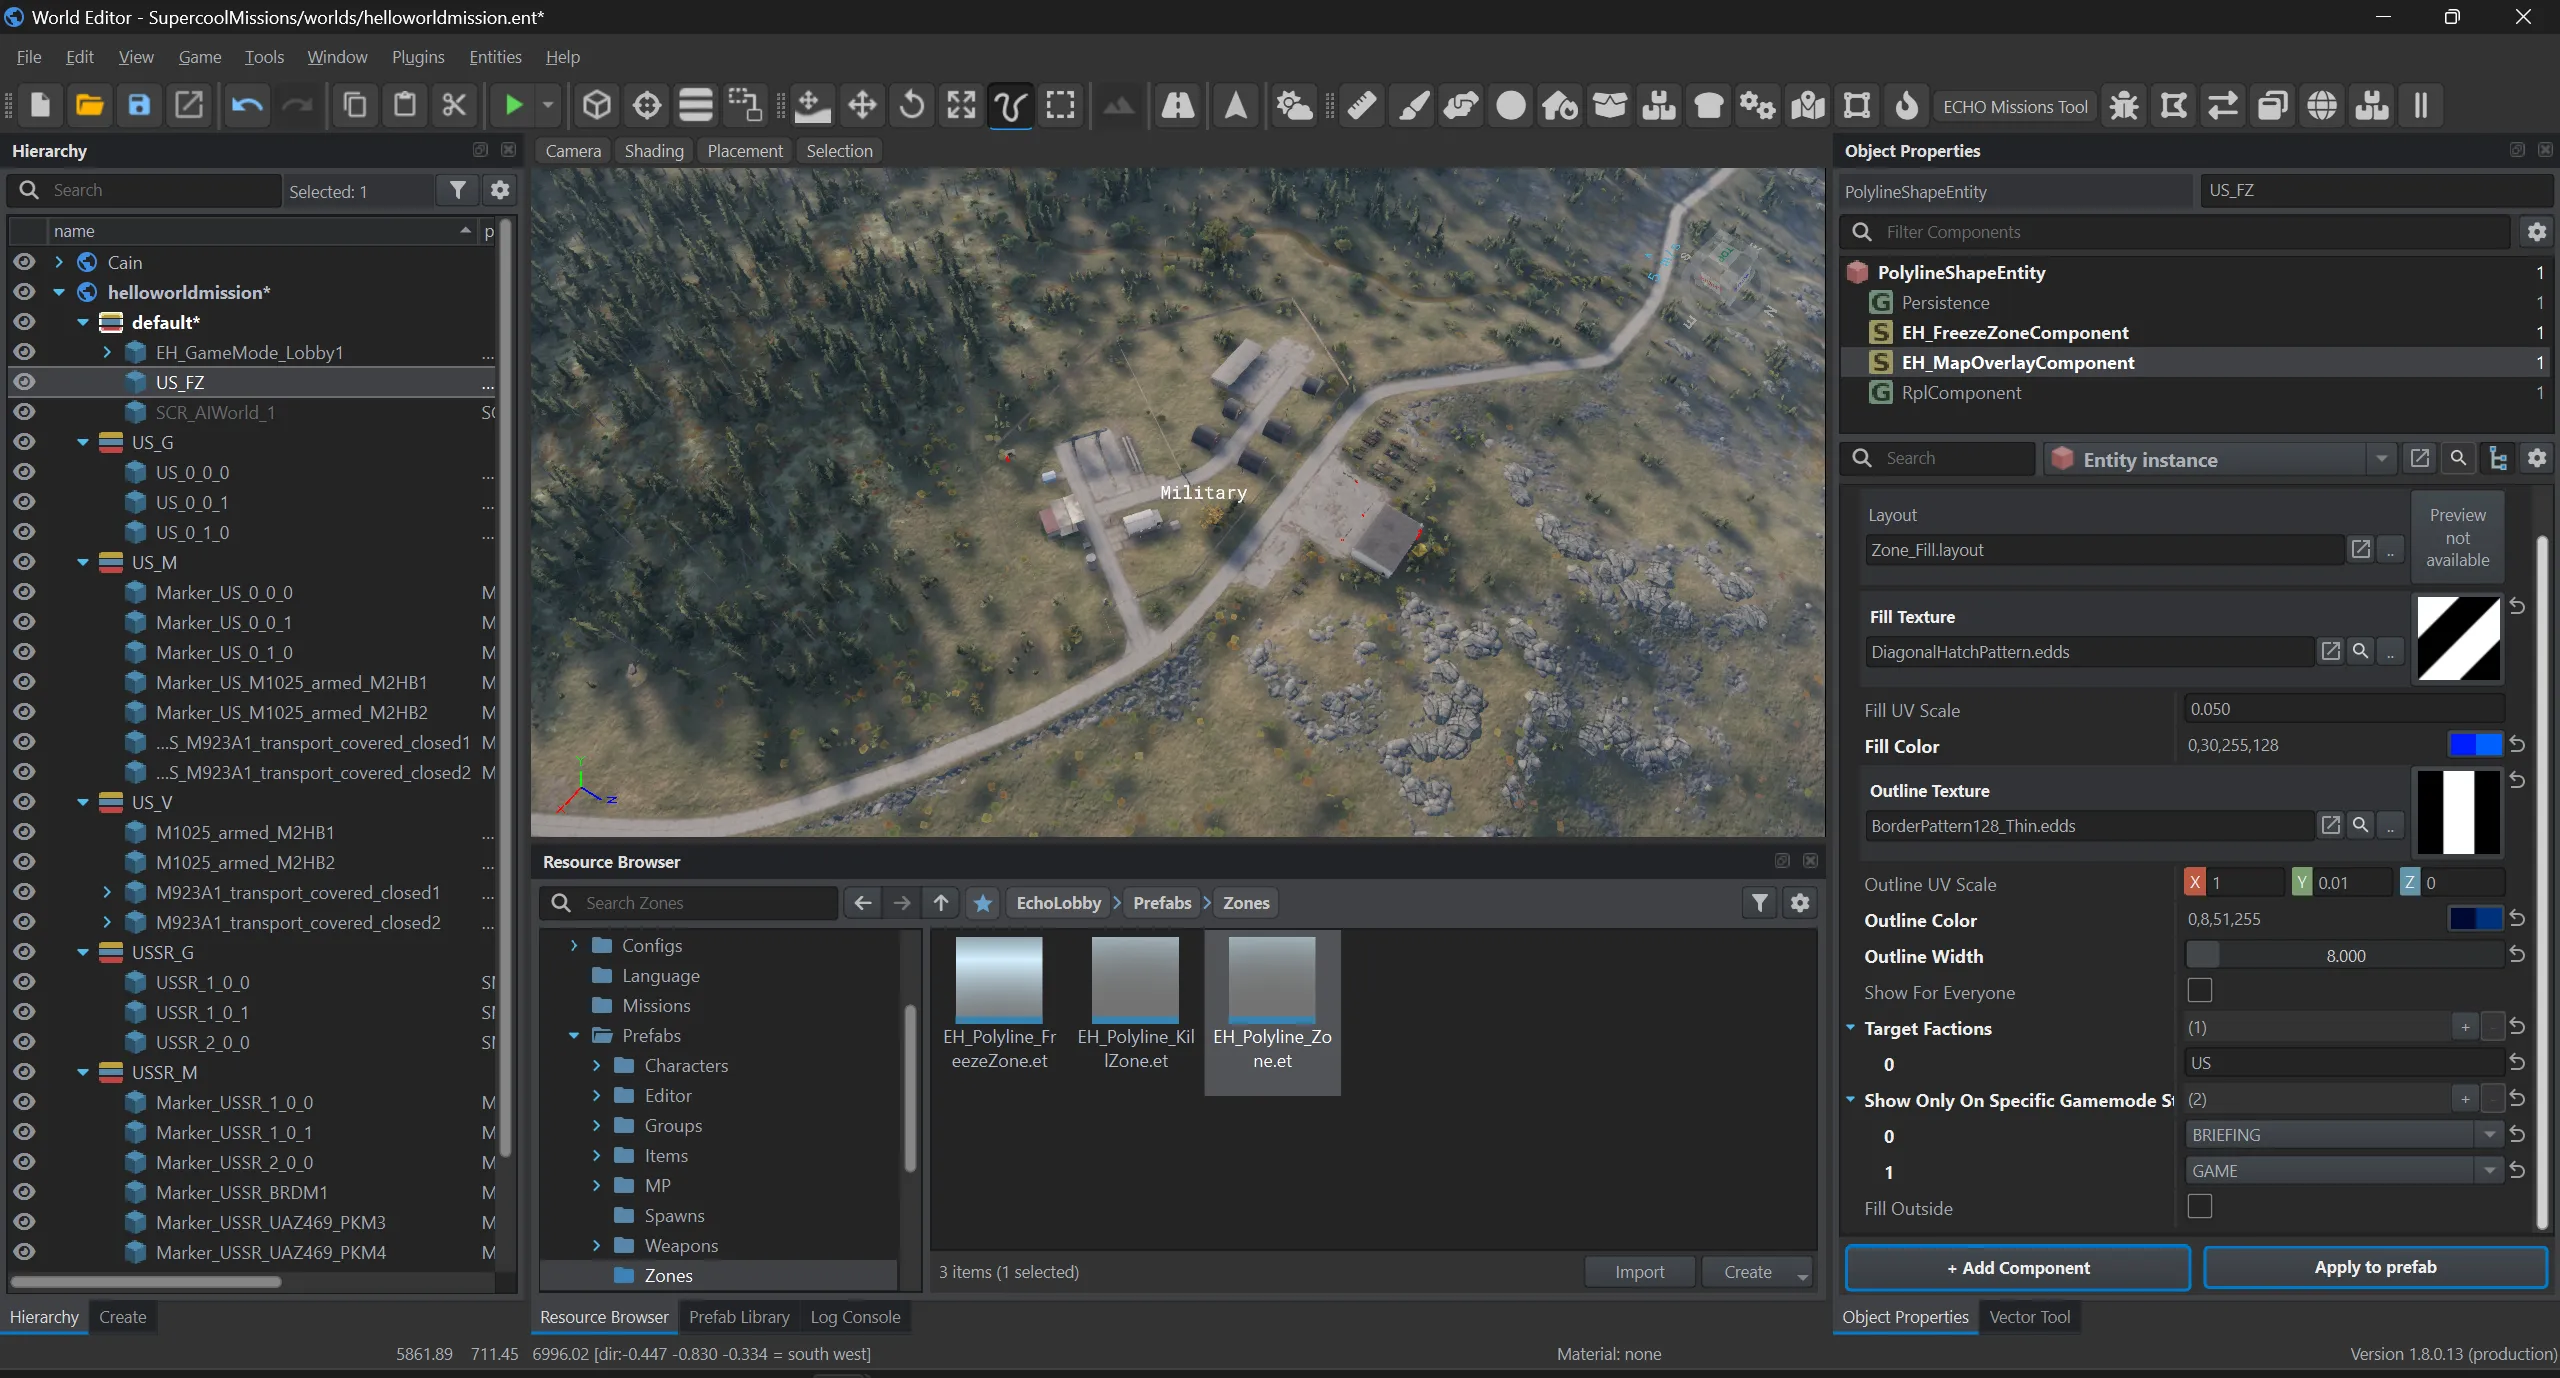
The same entity has EH_MapOverlayComponent — how the zone looks on the map: fill, hatching, outline, who sees it and in which states.
In detail: Freezetime and Zones.
A zone on the map
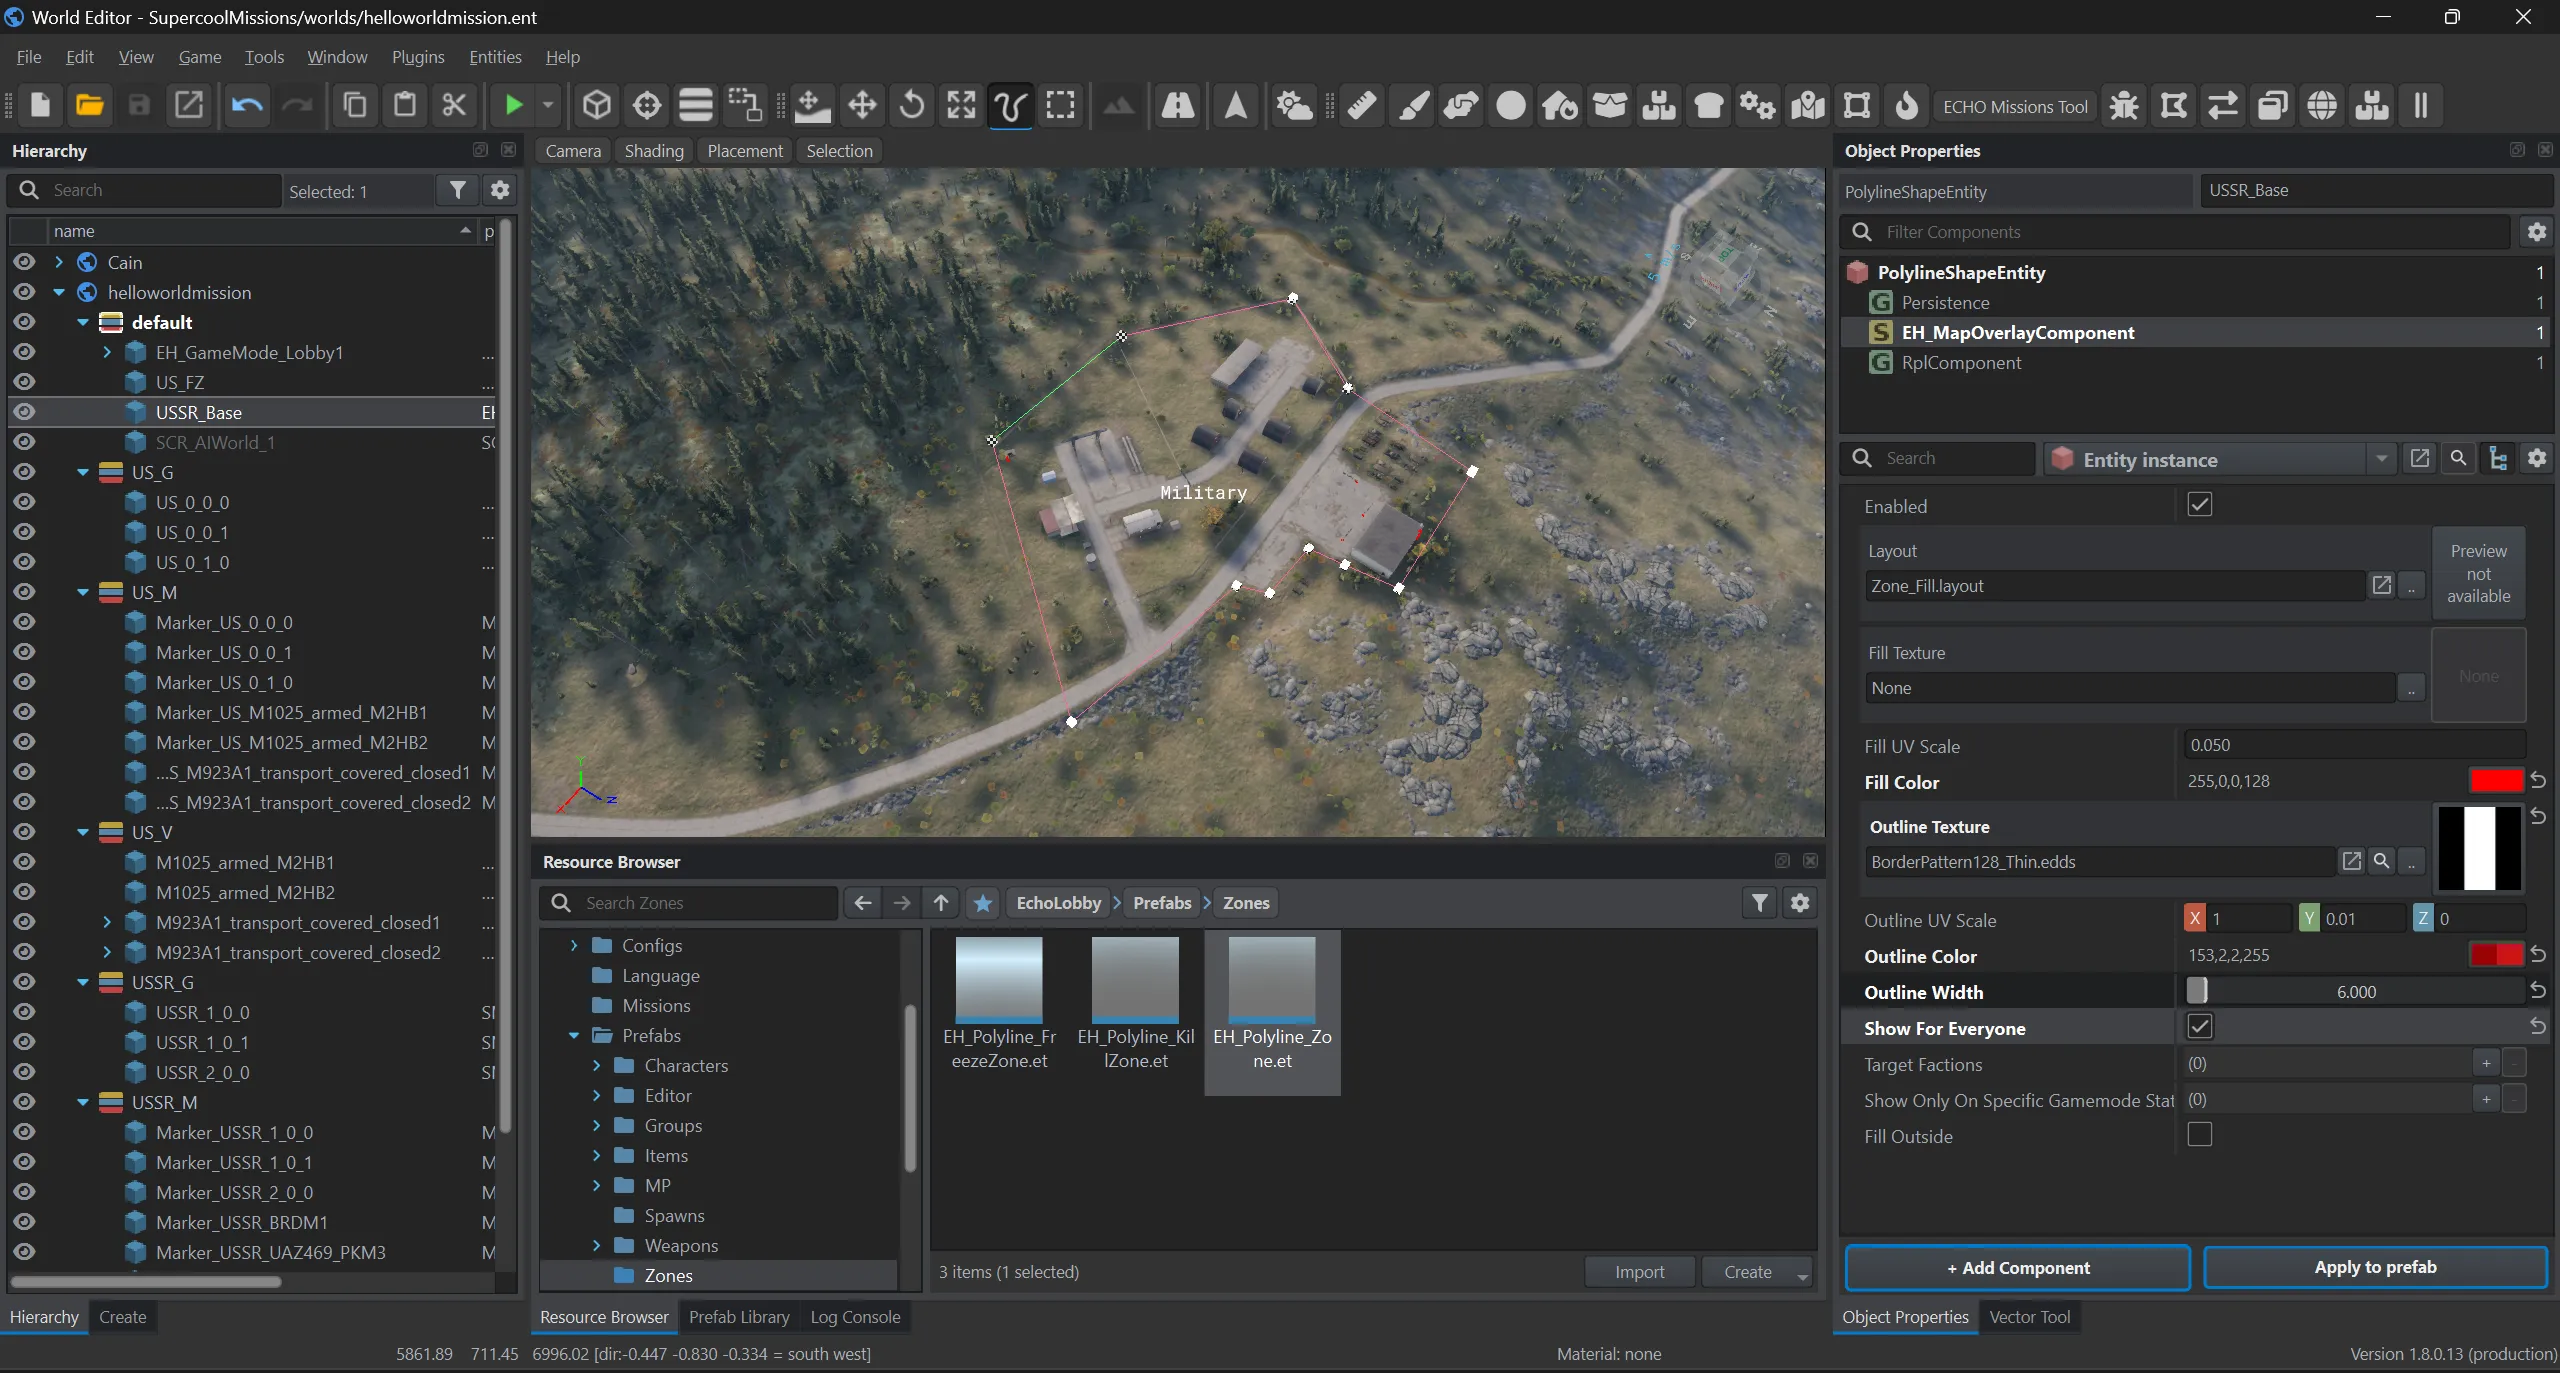
Section titled “A zone on the map”To simply draw something on the map — the enemy base as an objective, say — place EH_Polyline_Zone.et and outline the area.
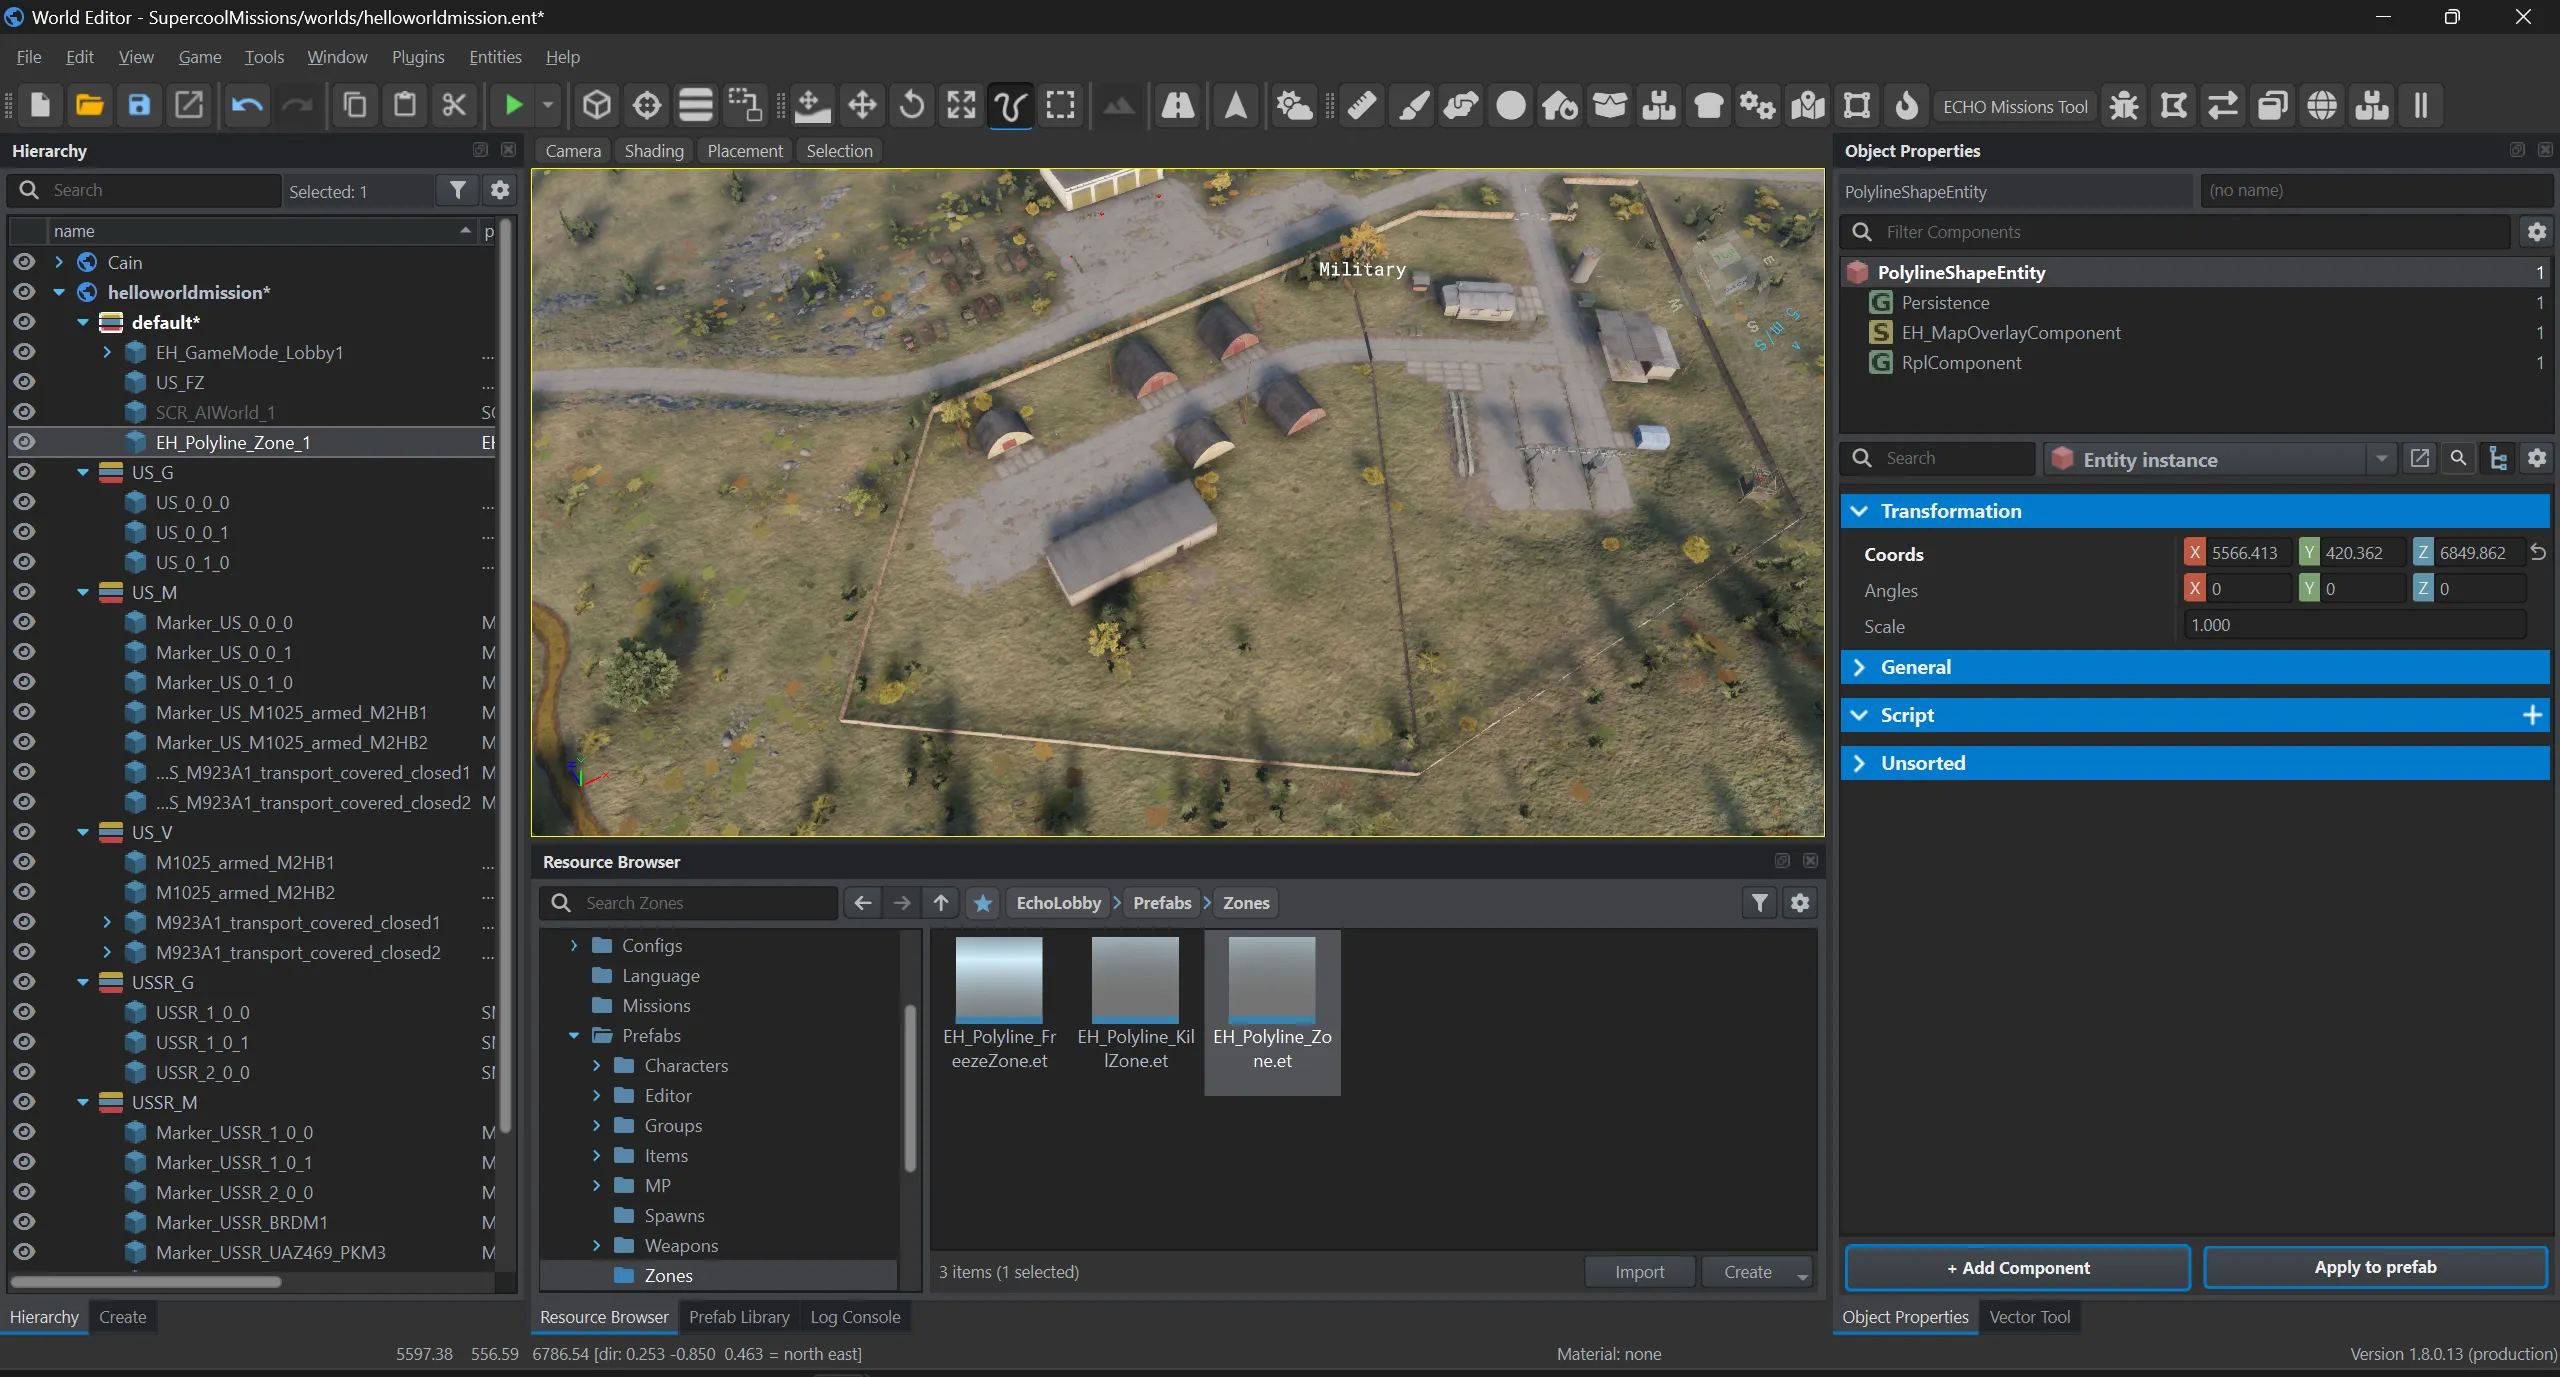
In EH_MapOverlayComponent set the fill and outline colors and who sees the zone.
The area boundary
Section titled “The area boundary”A boundary you may not leave is made by EH_Polyline_KillZone.et. Outline the whole area of operations and put both sides into Target Factions in EH_KillZoneComponent.
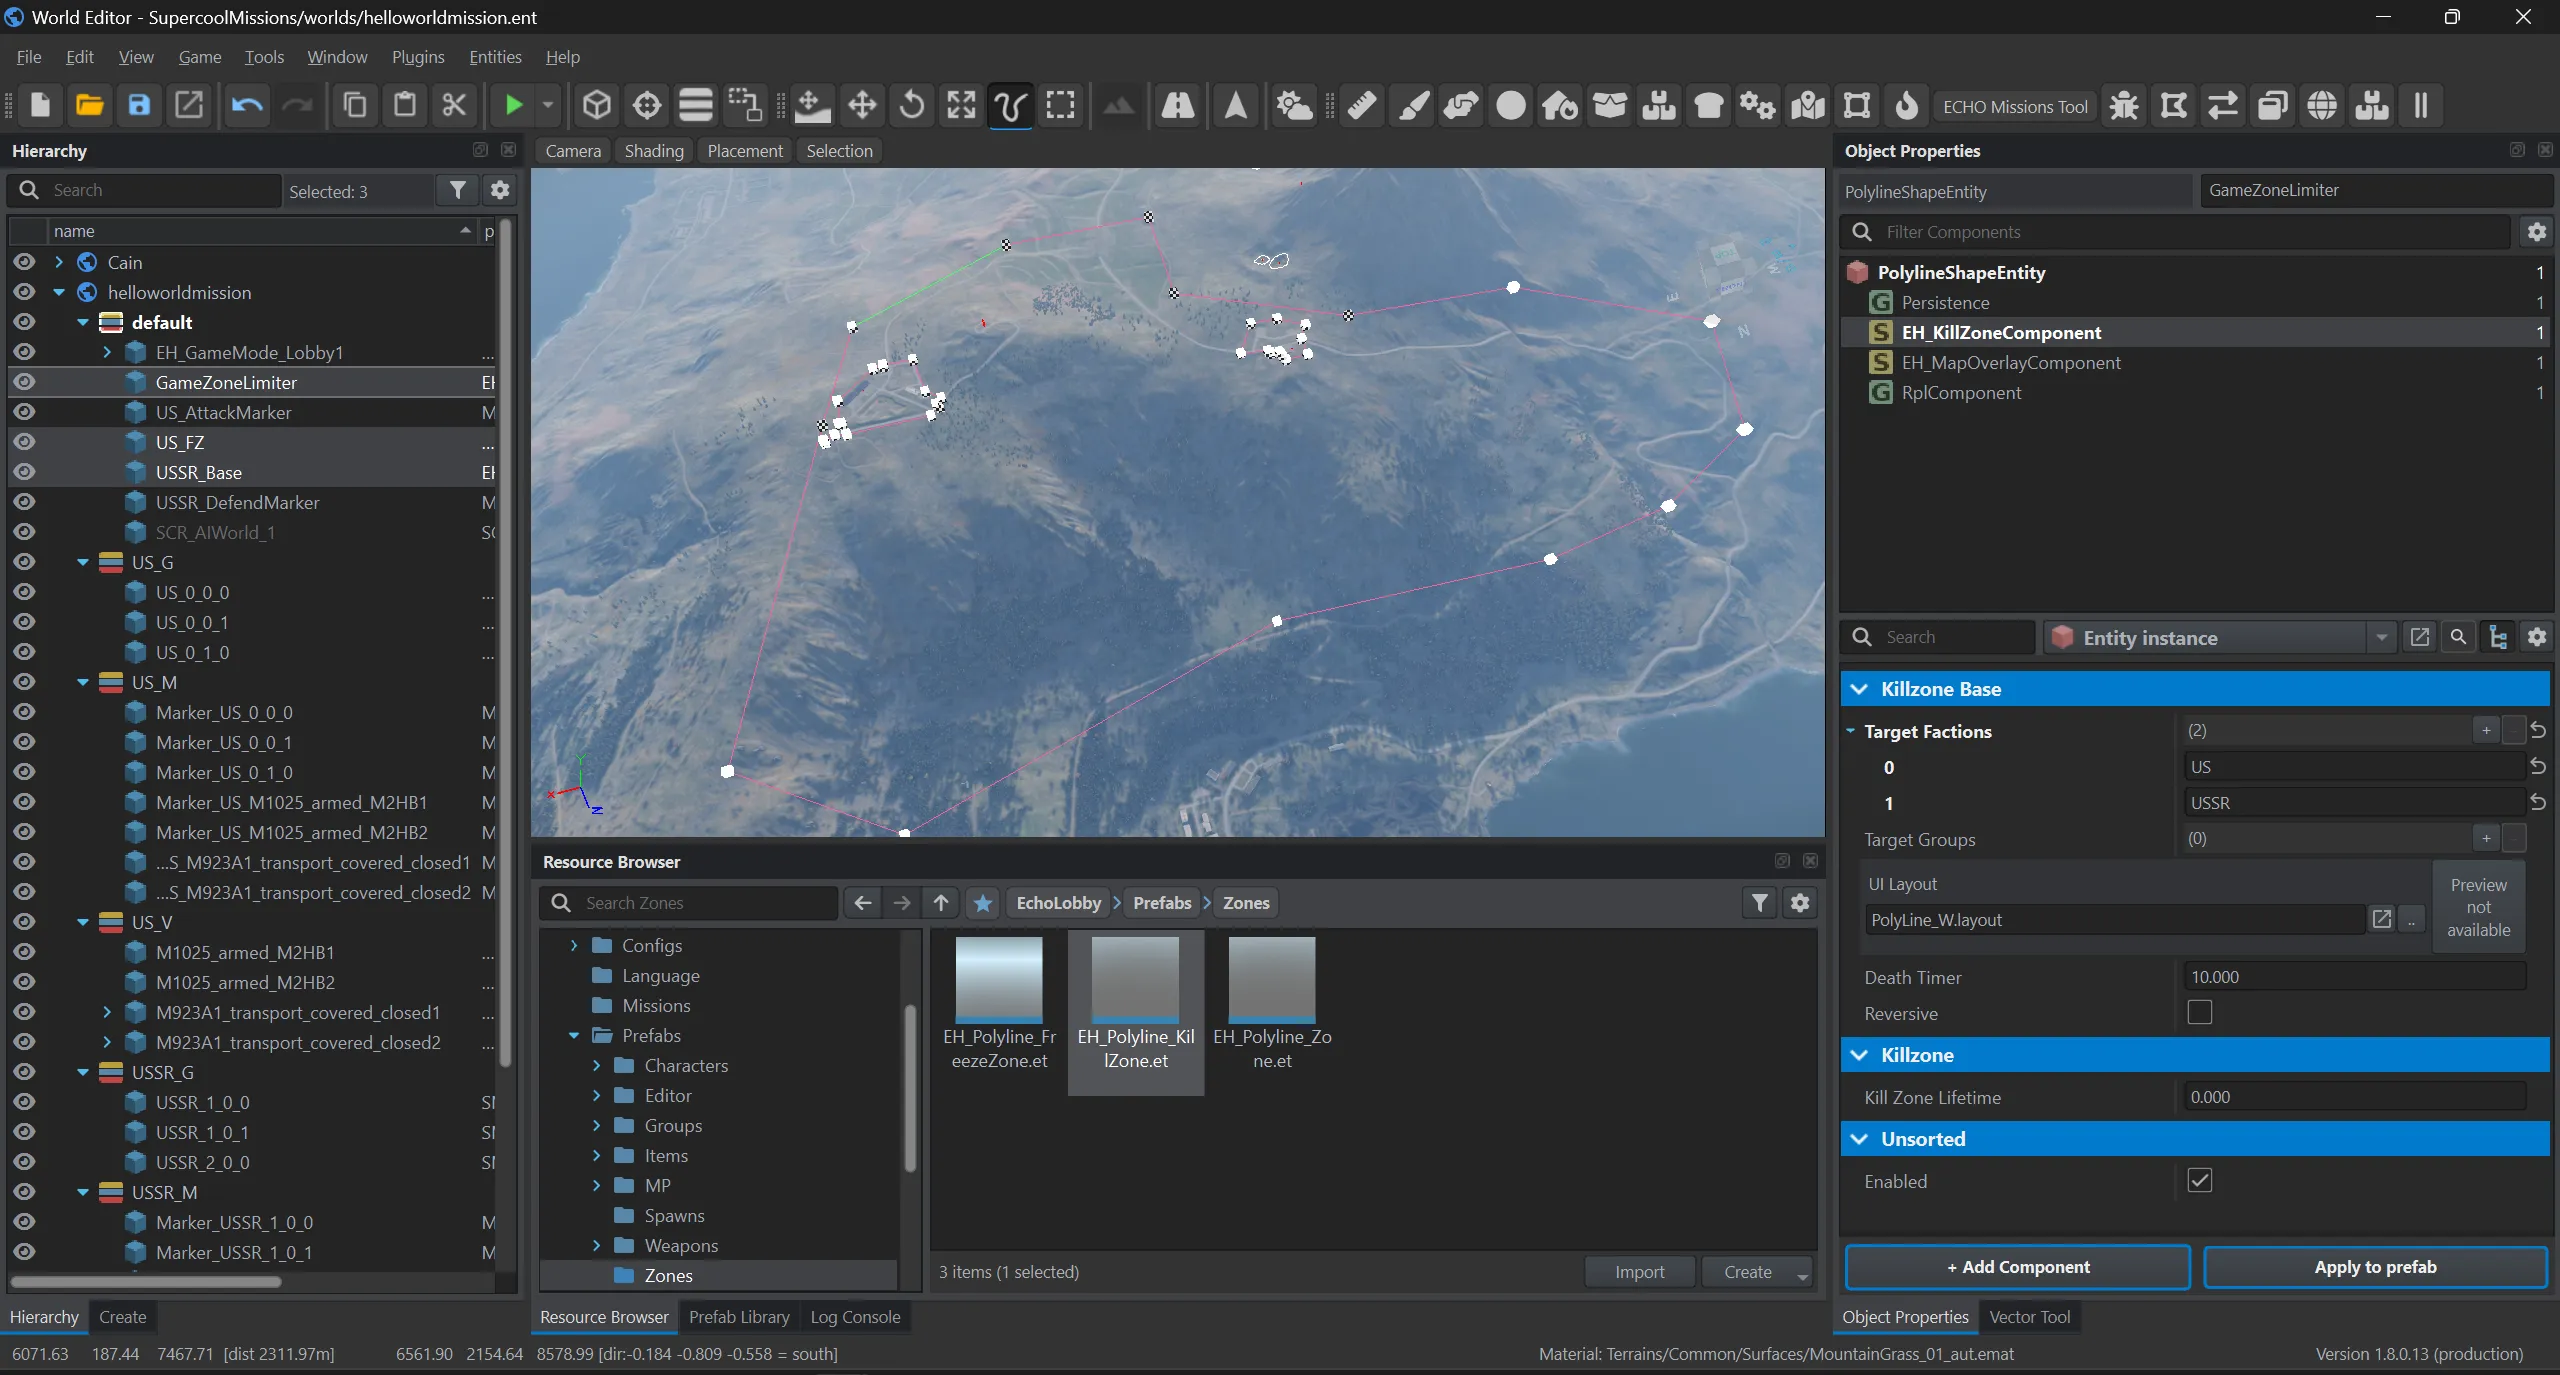
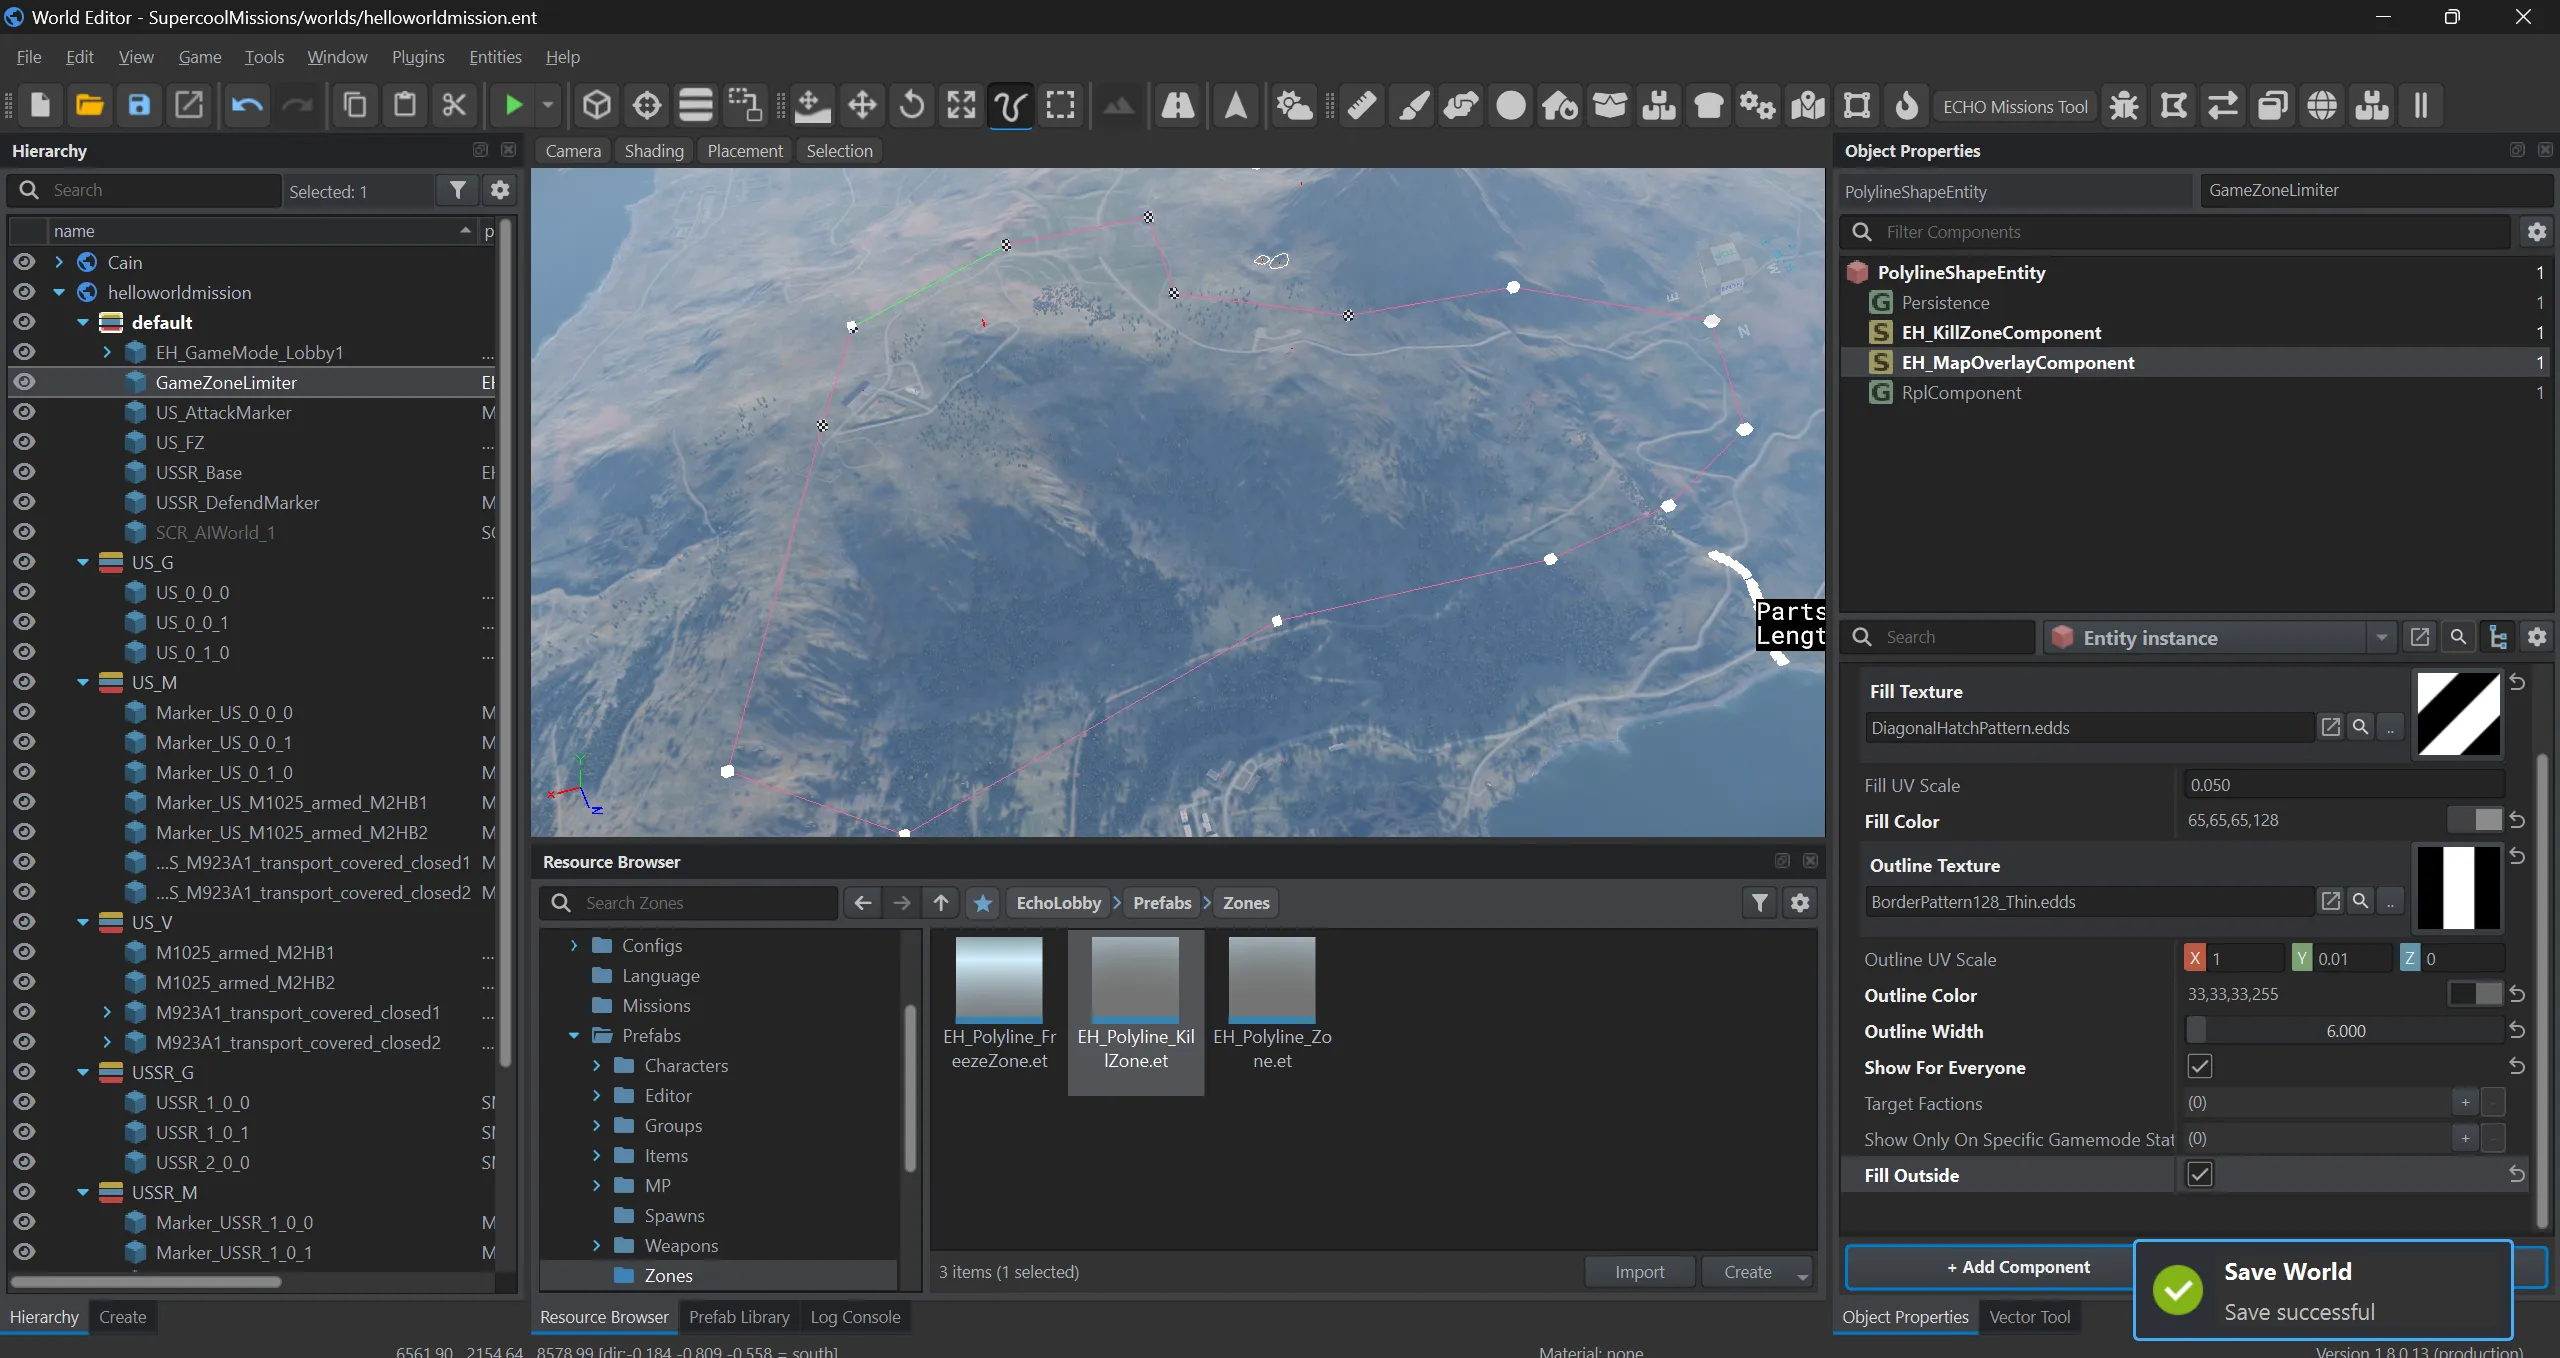
In its EH_MapOverlayComponent enable Fill Outside — everything outside the area is then darkened on the map.
11. Task markers
Section titled “11. Task markers”Place two Prefabs/Editor/MapMarker/MapMarkerDefault.et prefabs — one marker per side.
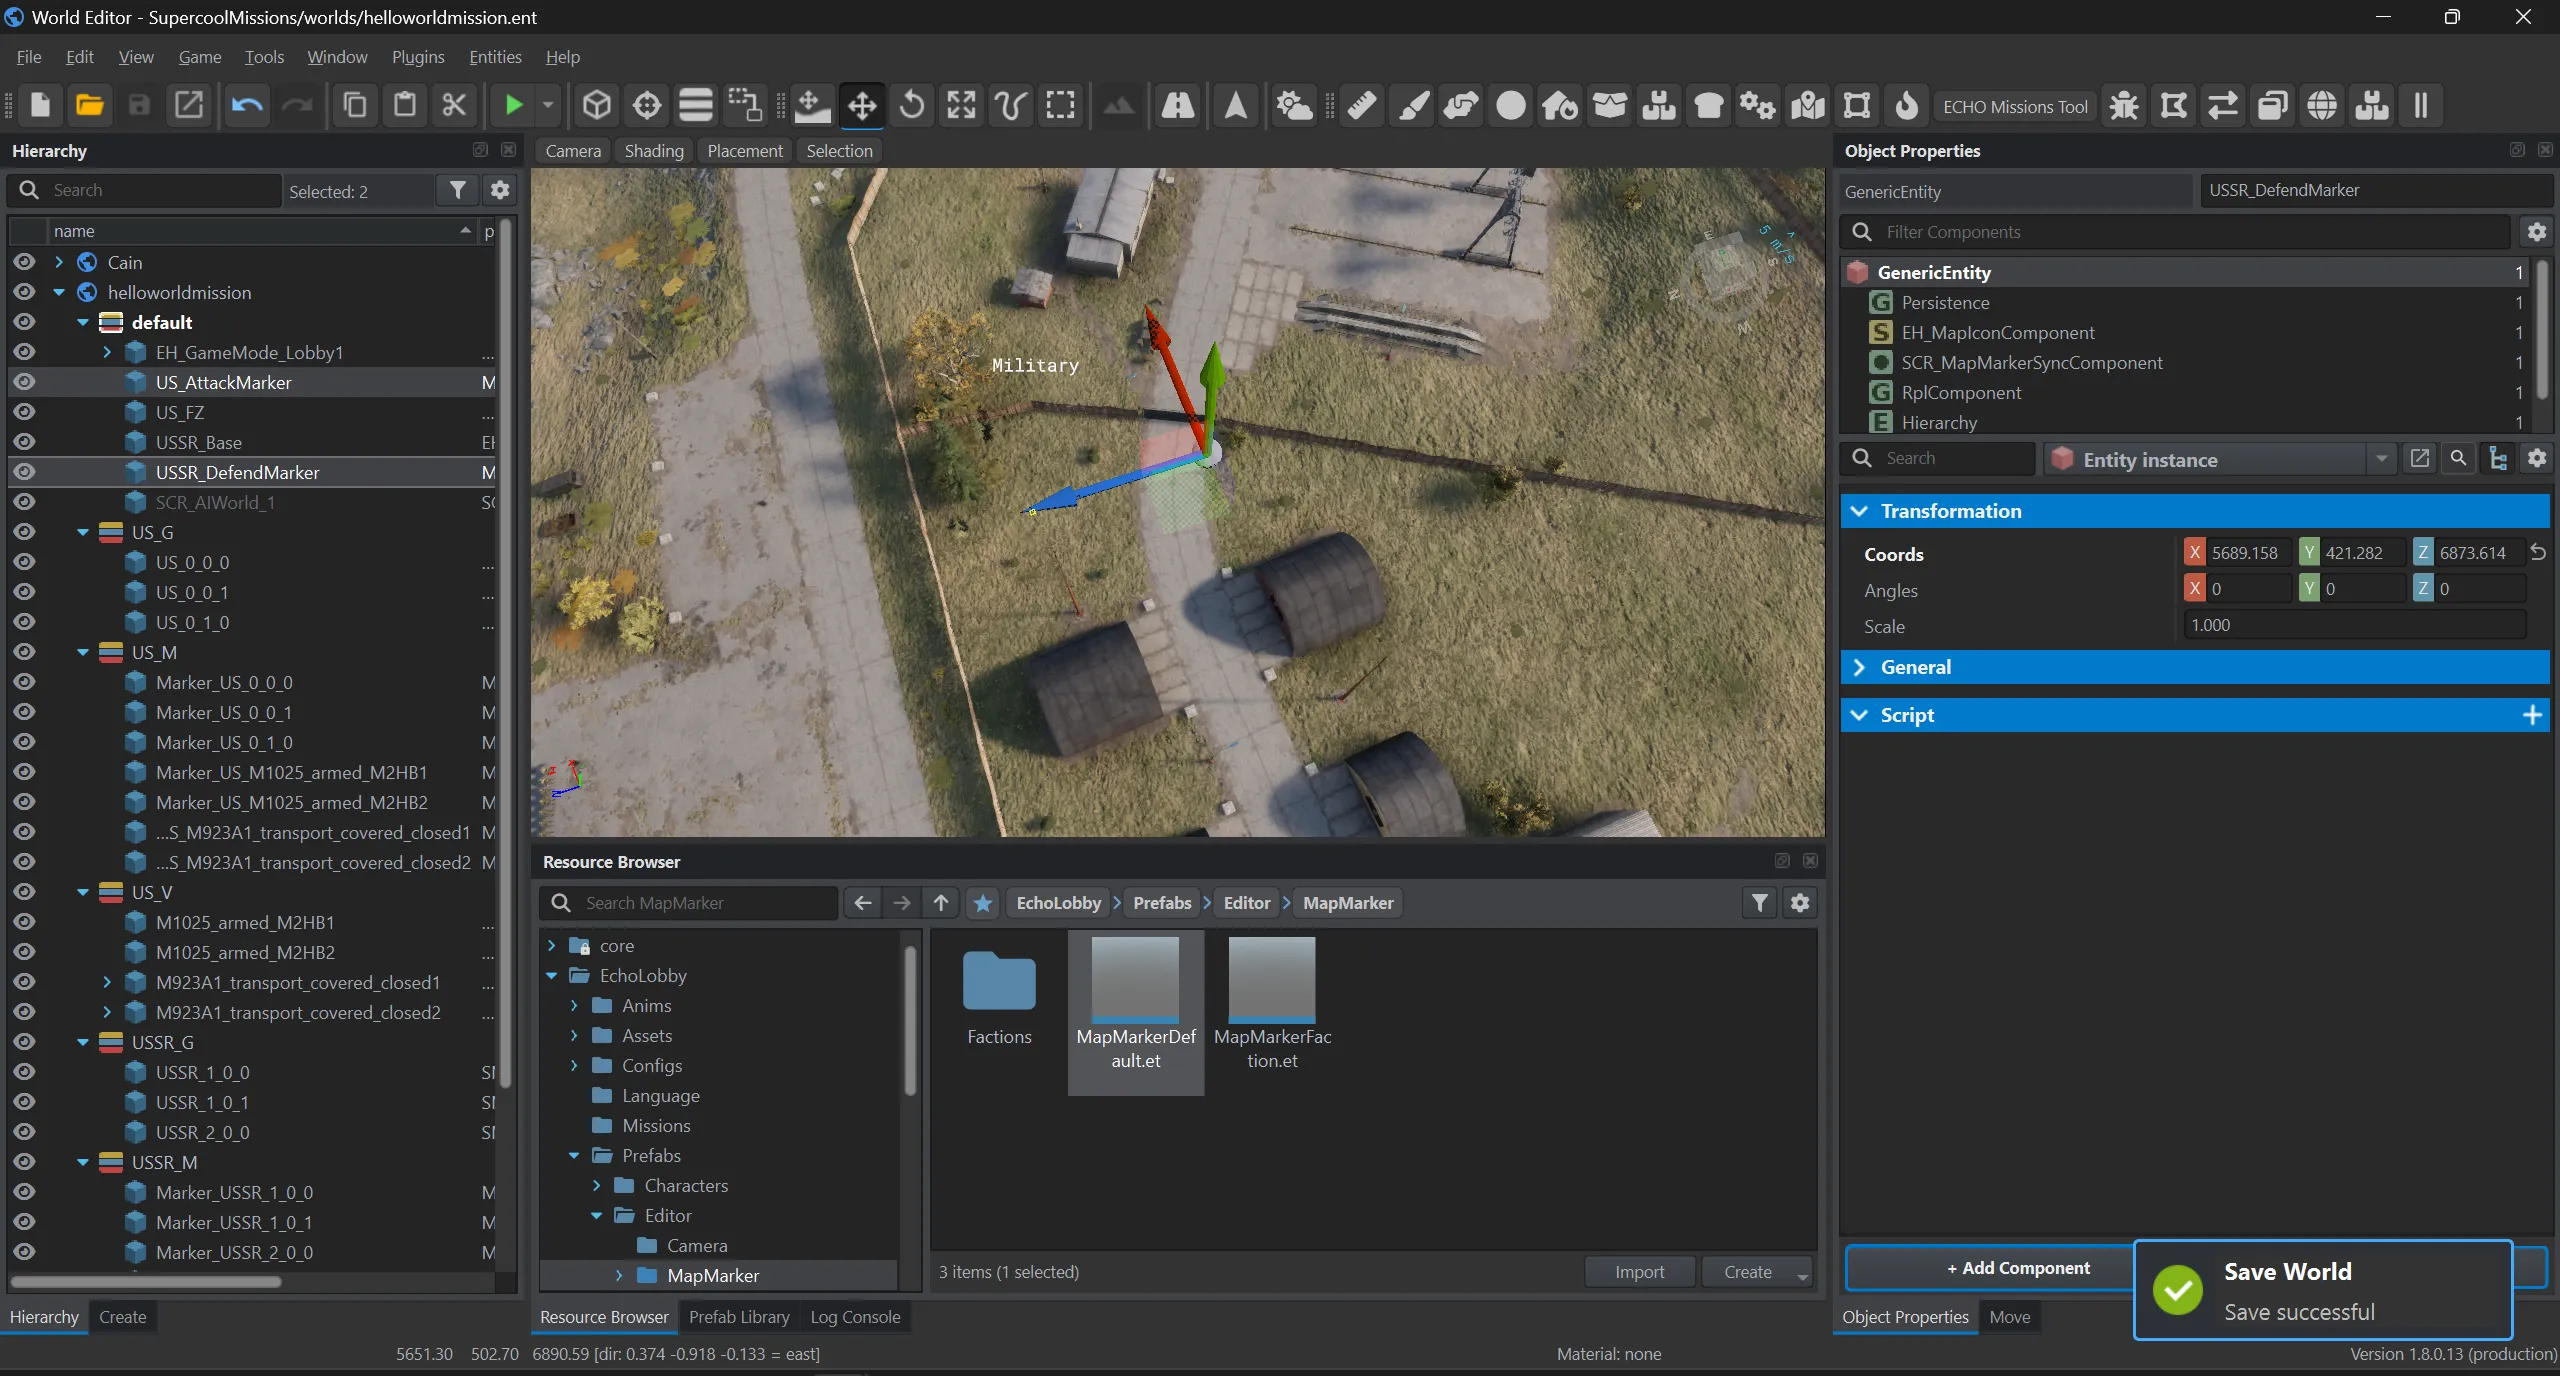
The icons are conveniently taken from the vanilla UI/Imagesets/Conflict/ConflictIconsSet.imageset: Task_Attack for the attackers and Task_Defend for the defenders.
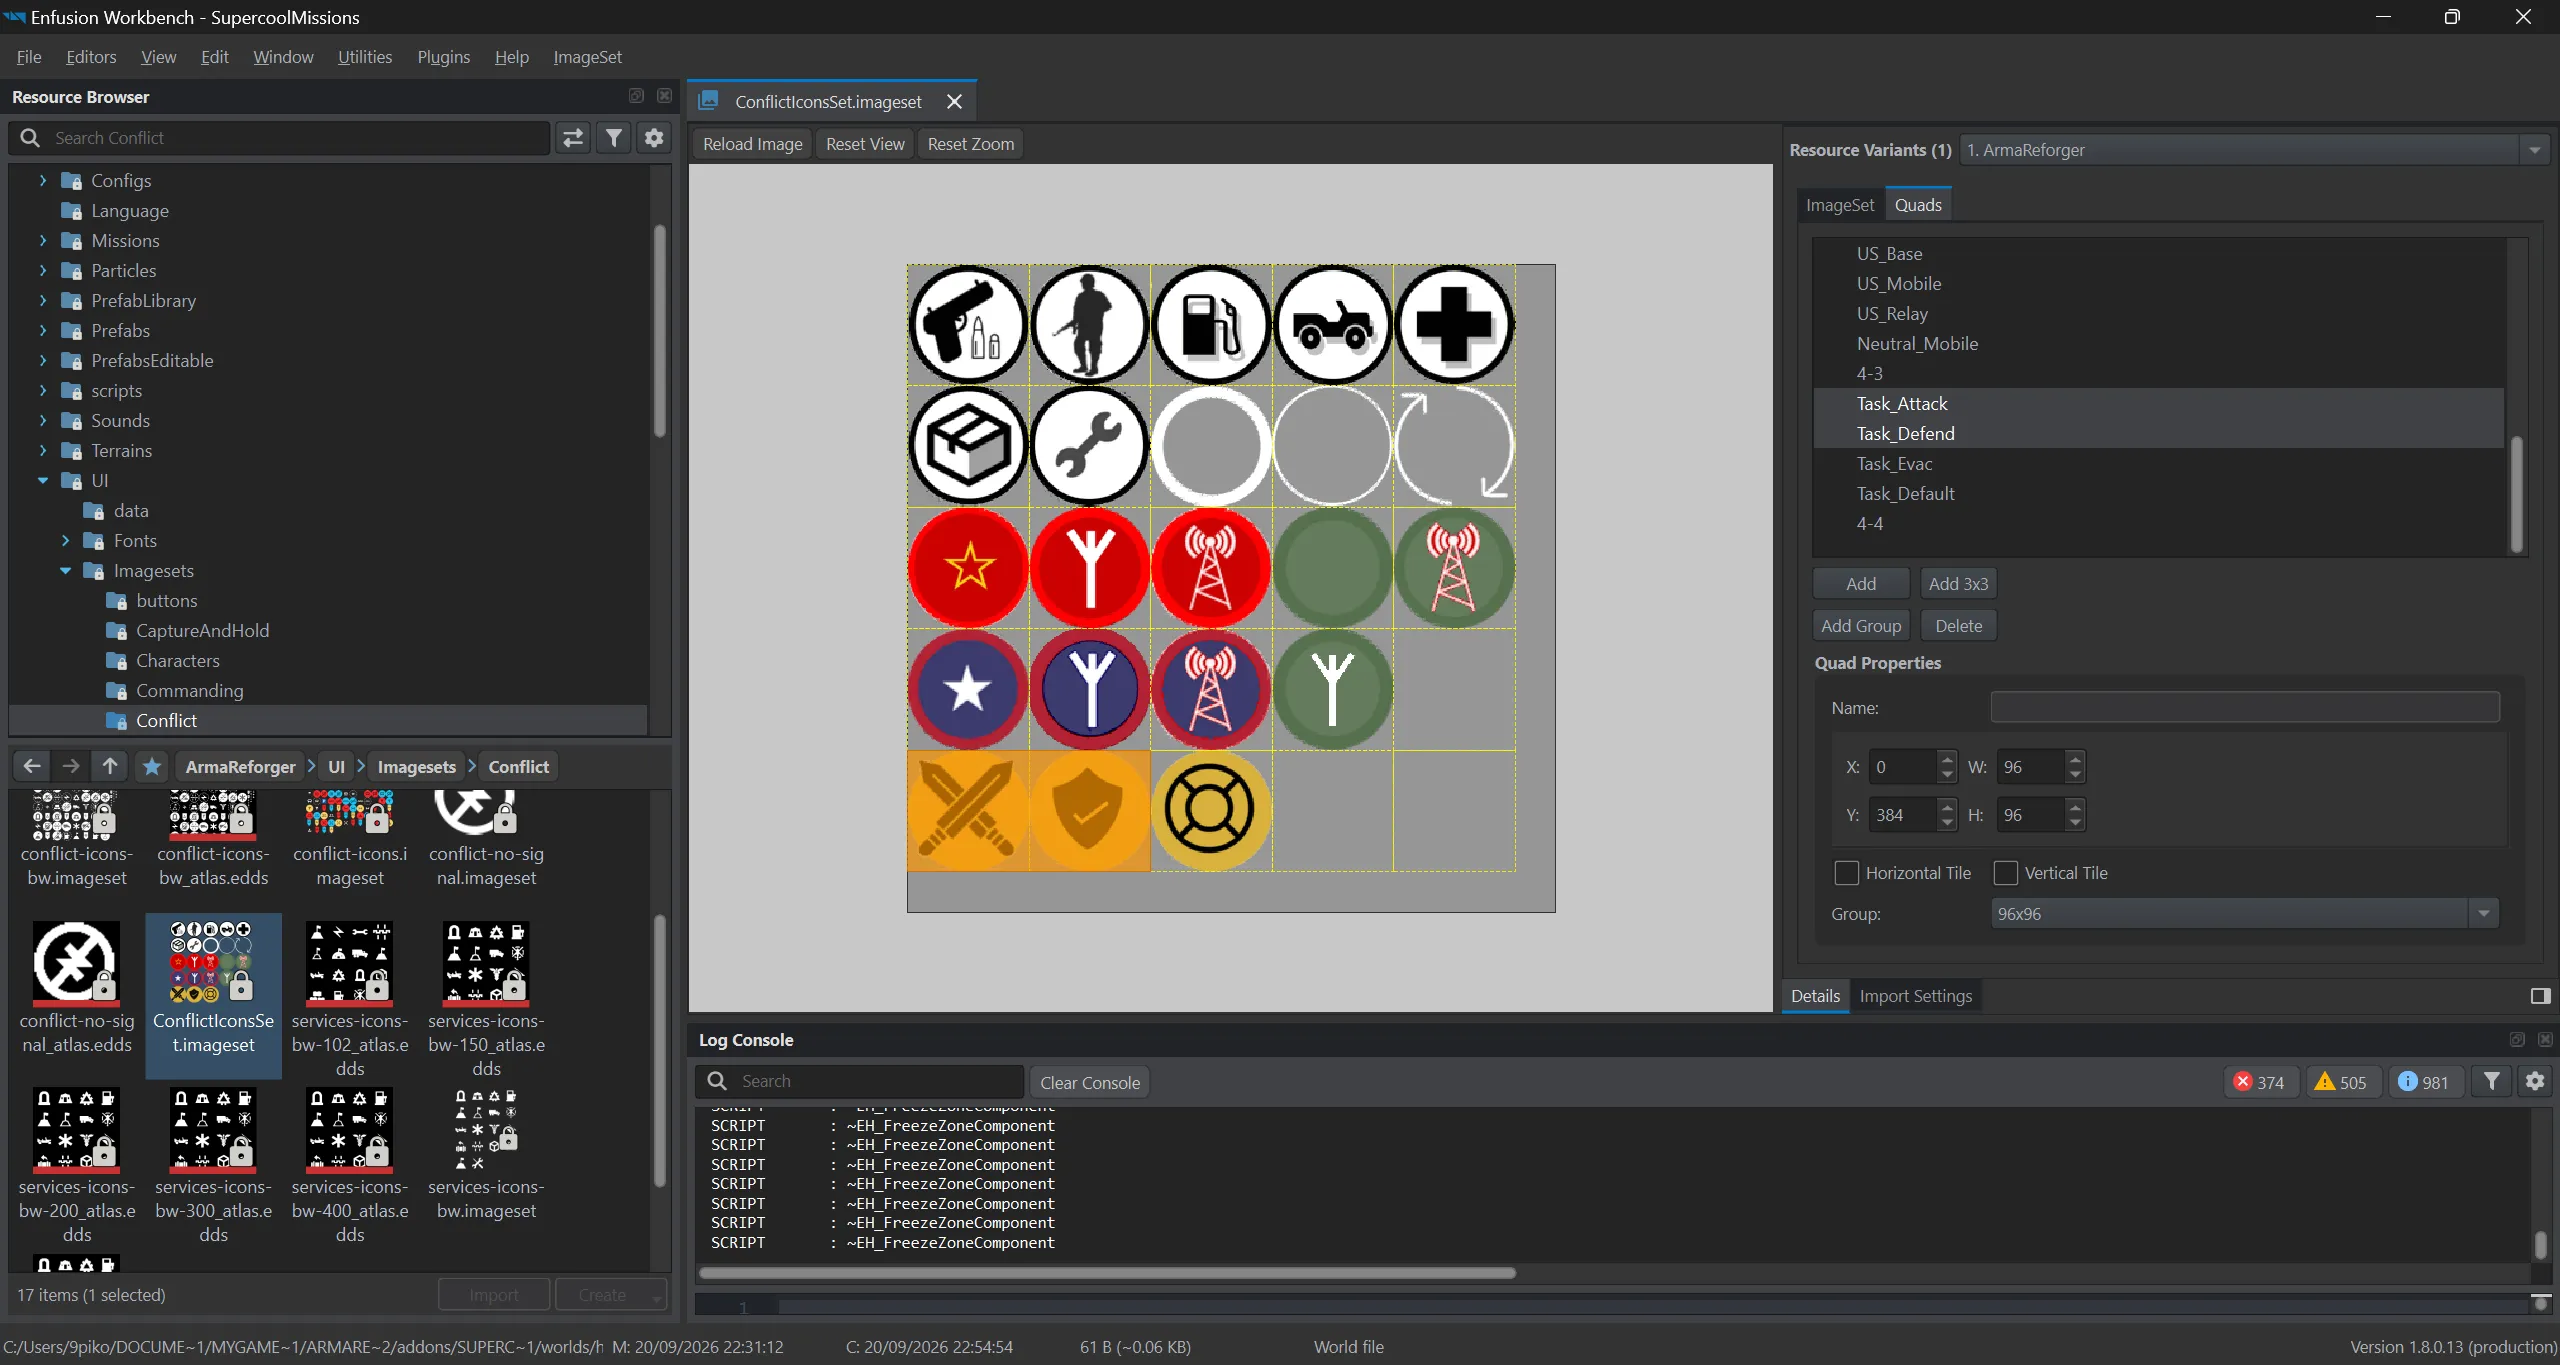
In EH_MapIconComponent put the imageset into Icon Texture, the icon’s name into Icon Name, the label into Marker Text, your side into Target Factions, and the states the marker is shown in.
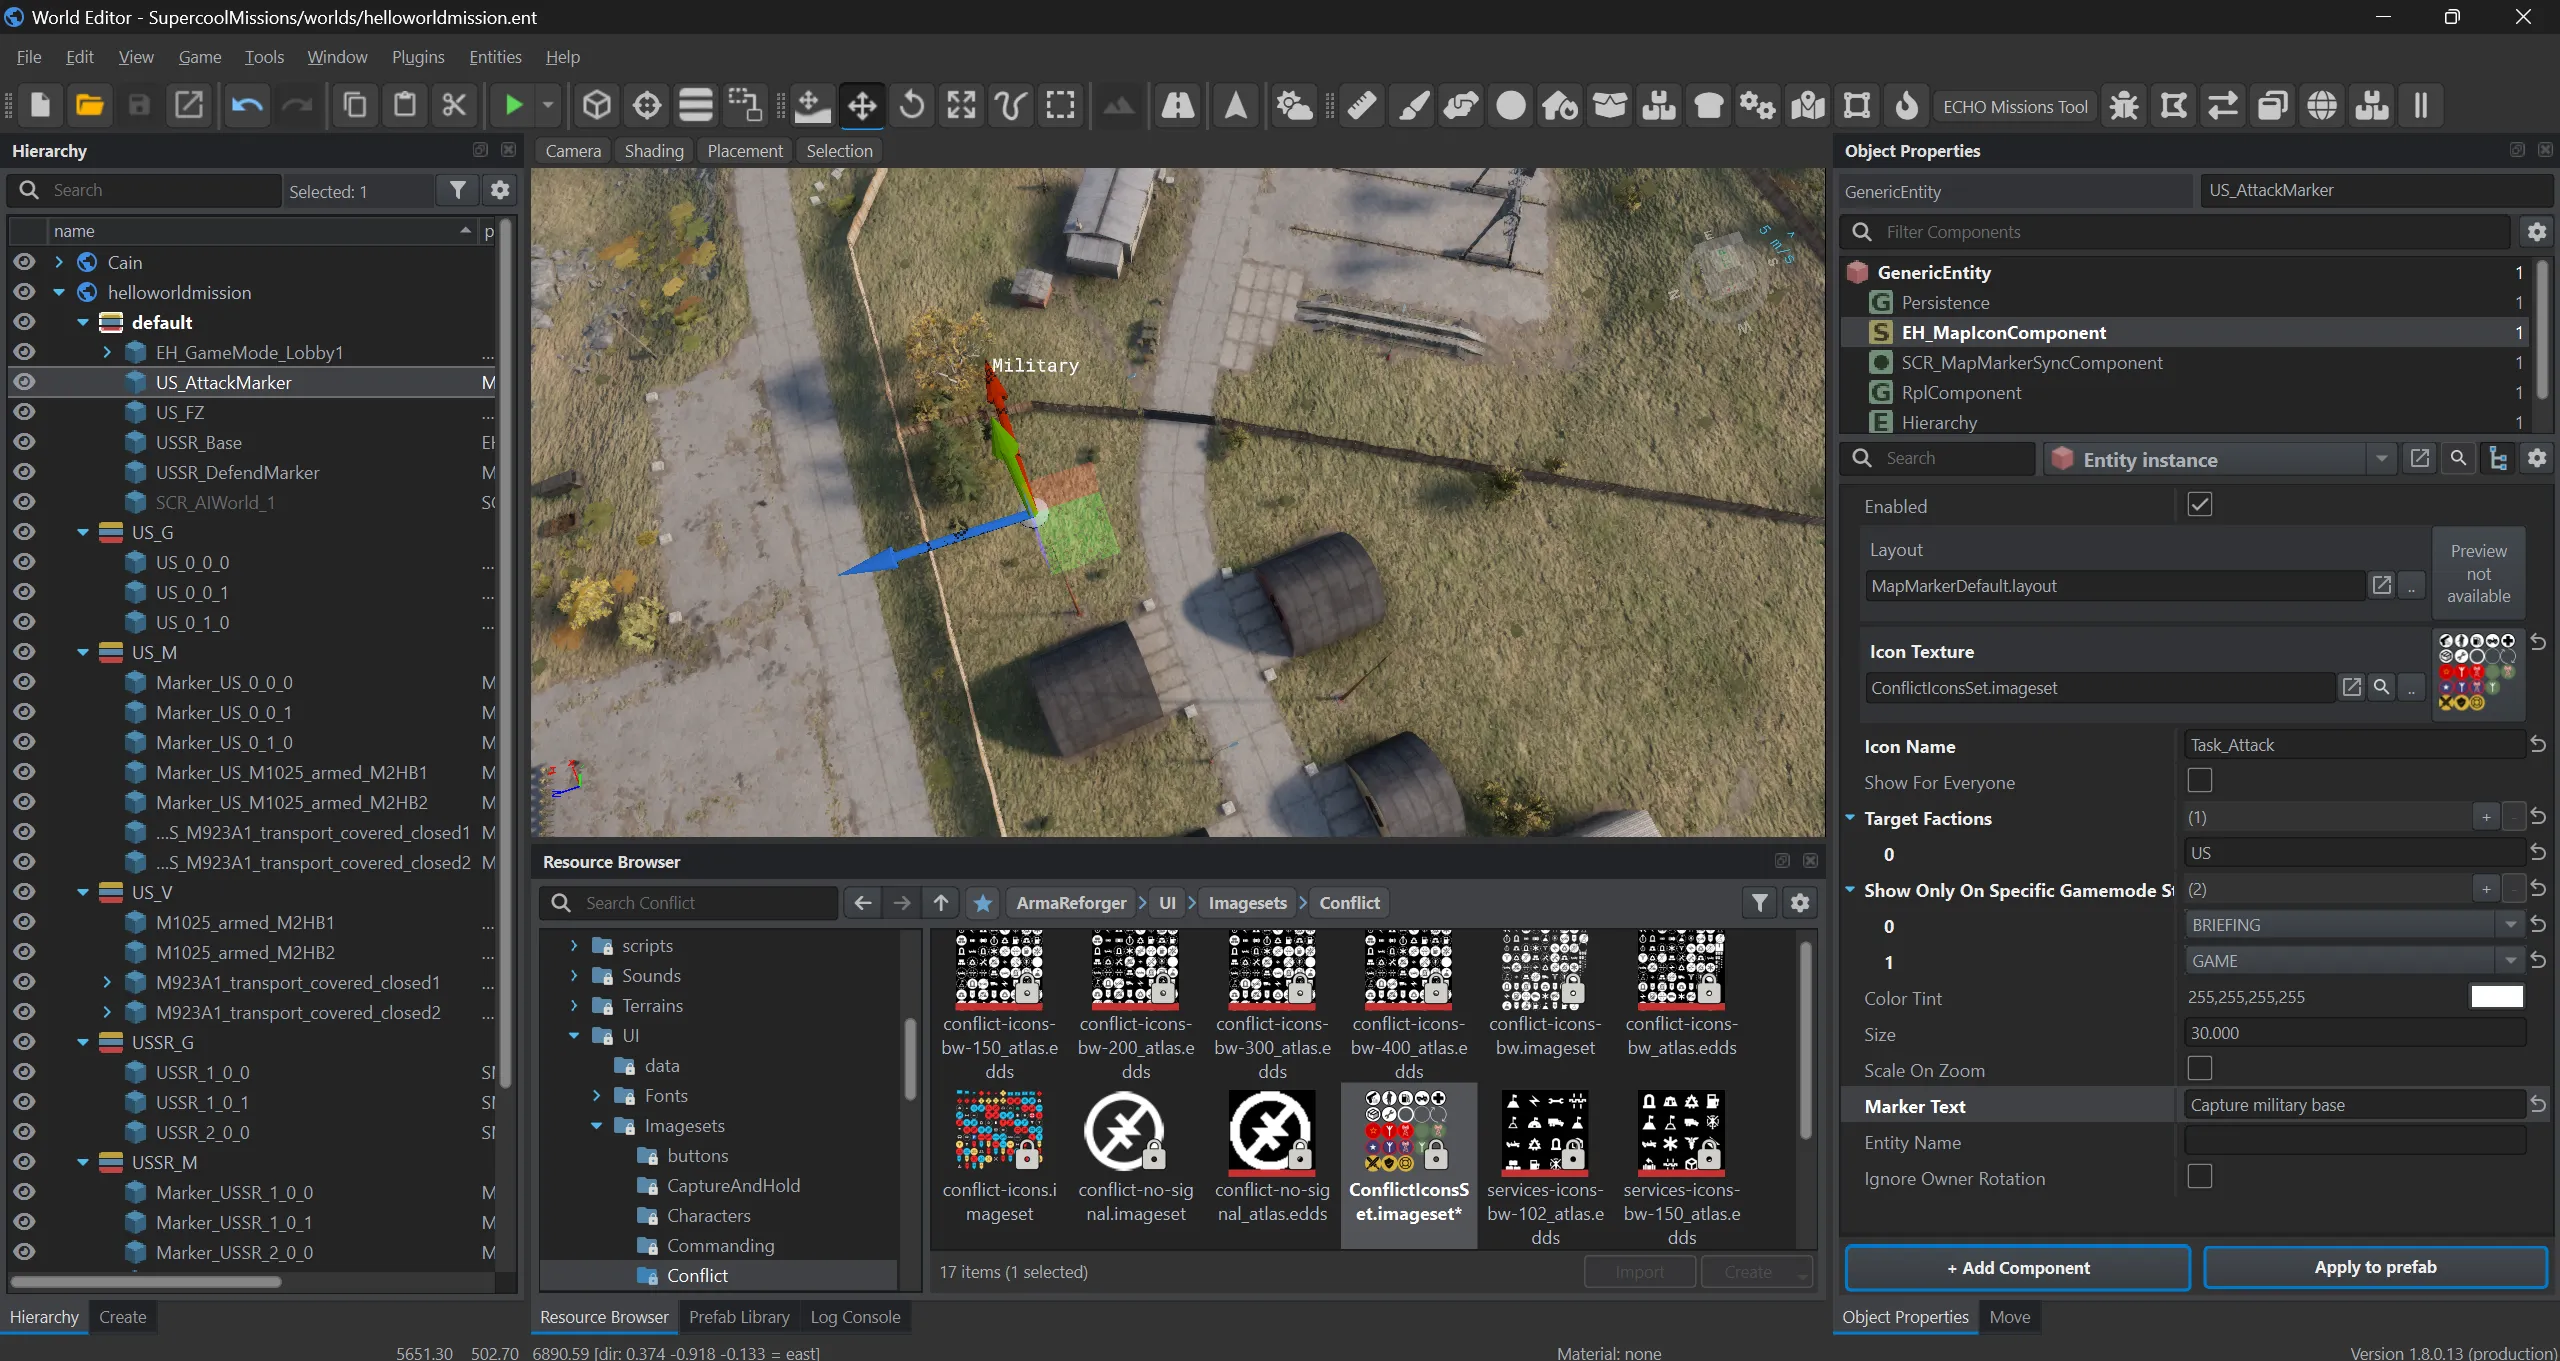
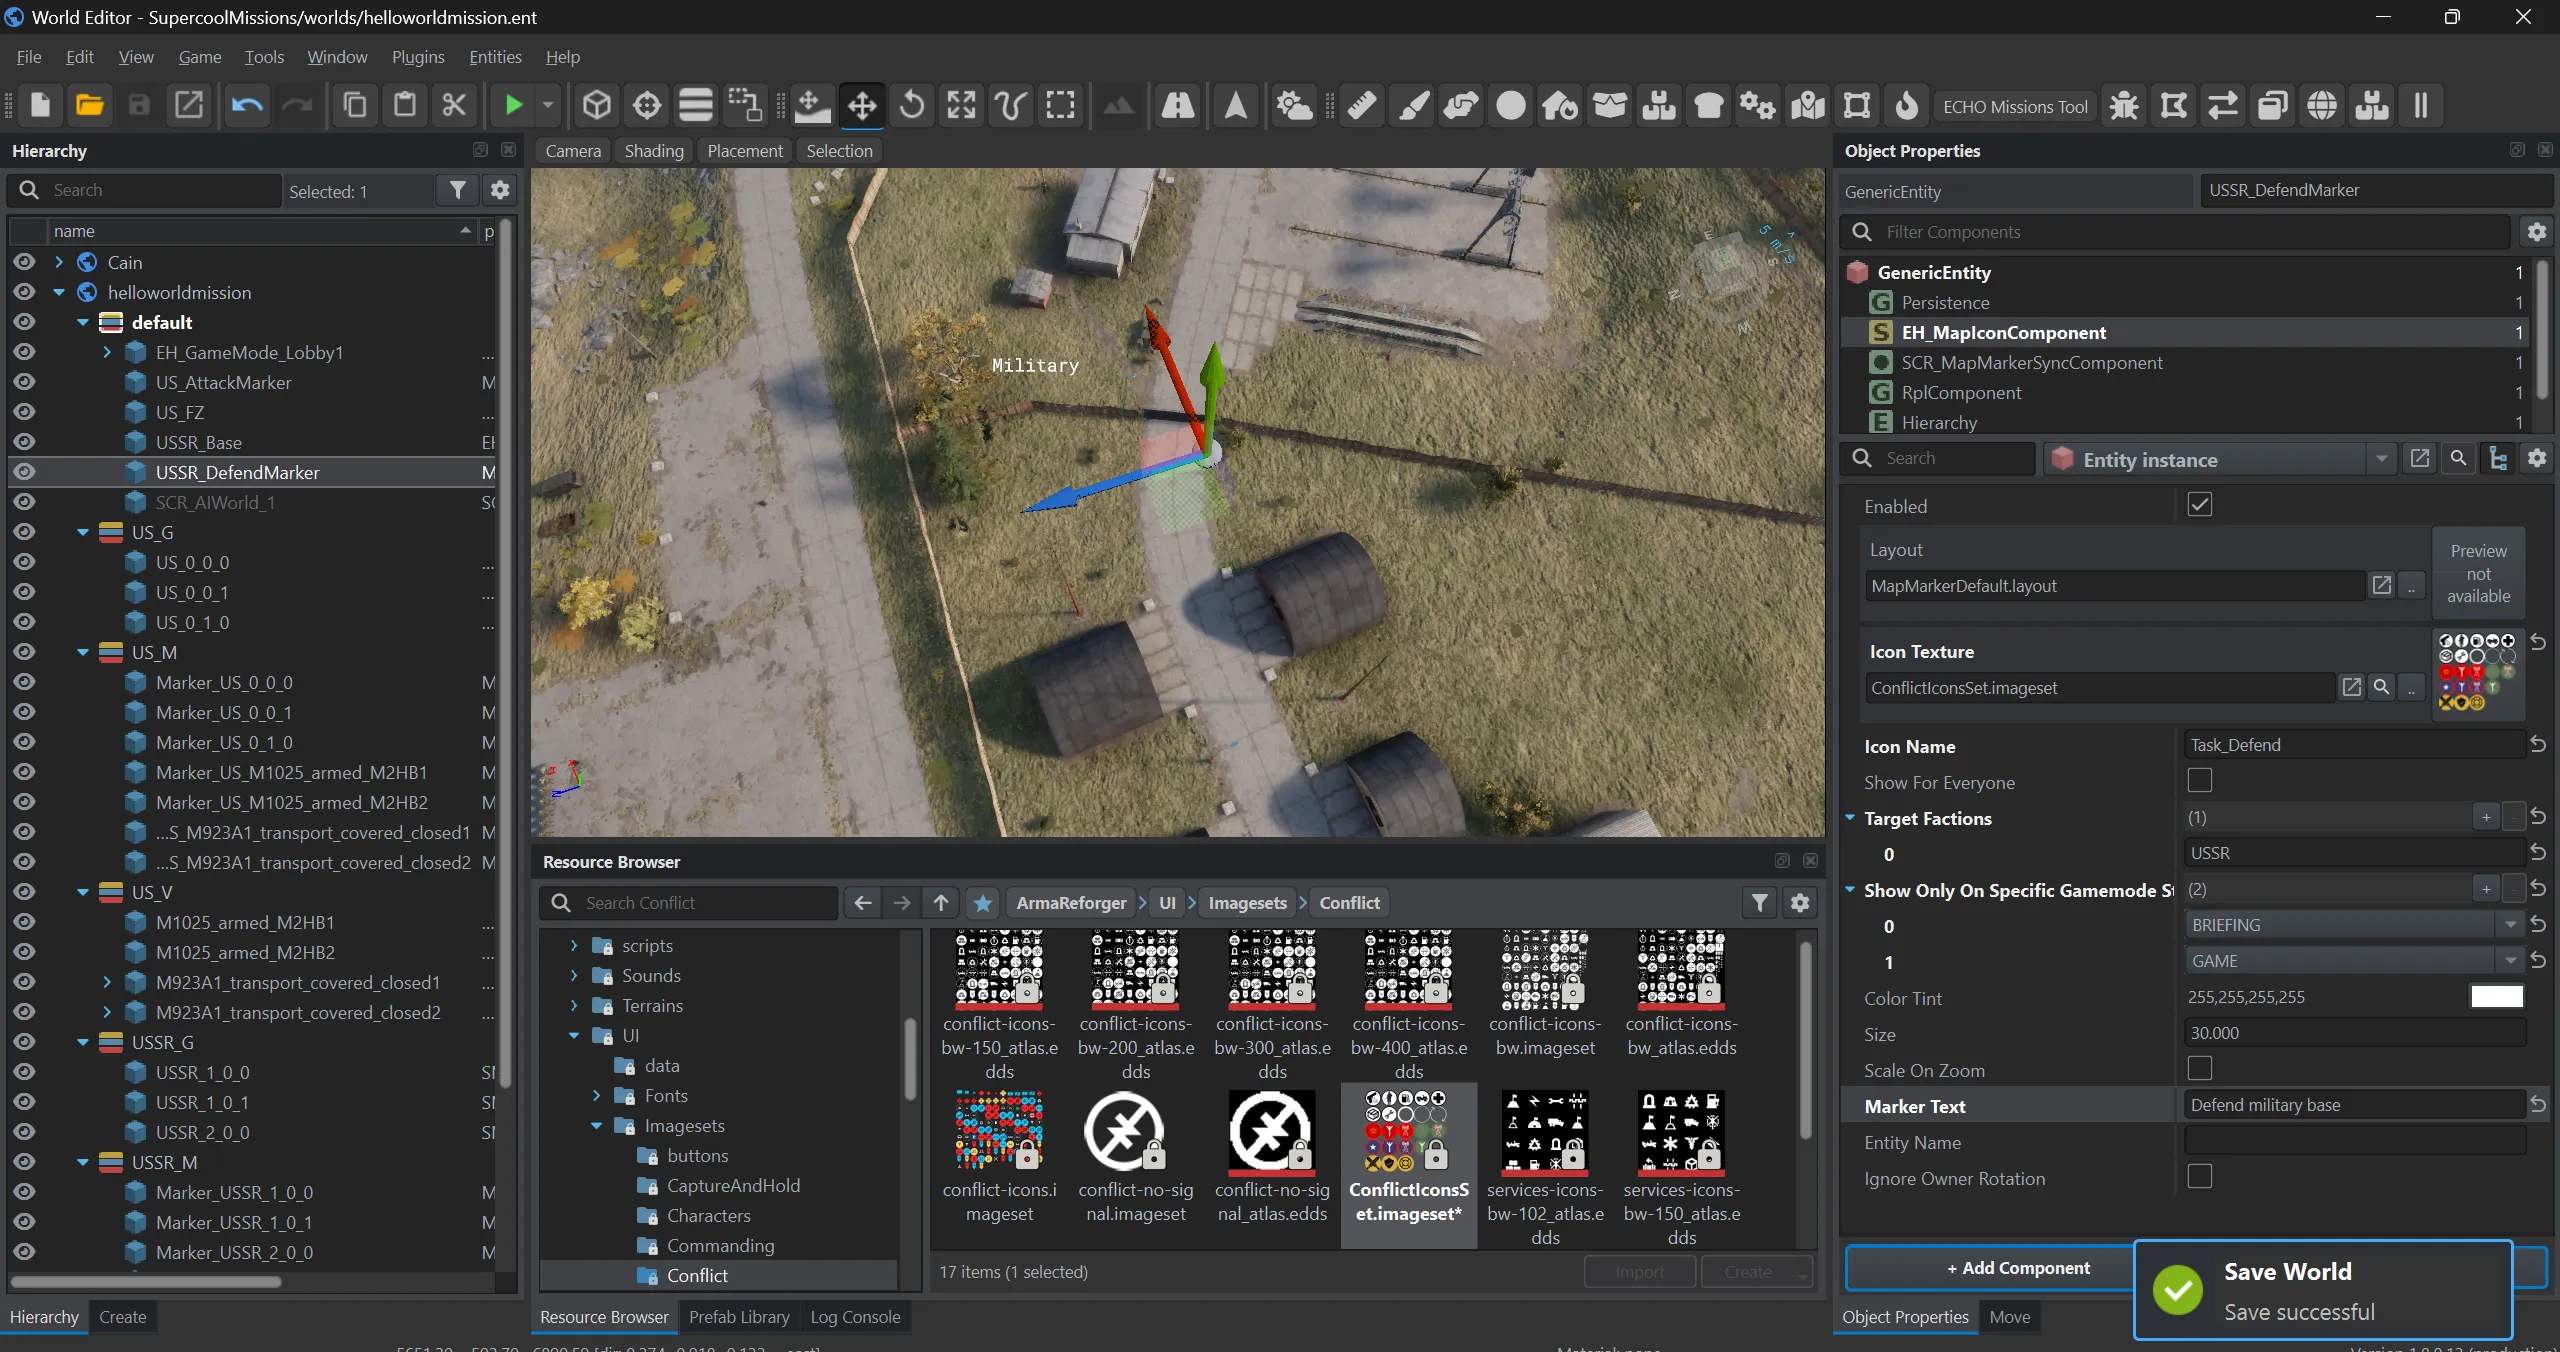
In detail: Map icons.
12. The mission description
Section titled “12. The mission description”Fill in the Mission Descriptions list on the gamemode: a common section for everyone and a section of tasks for each side, through Target Factions.
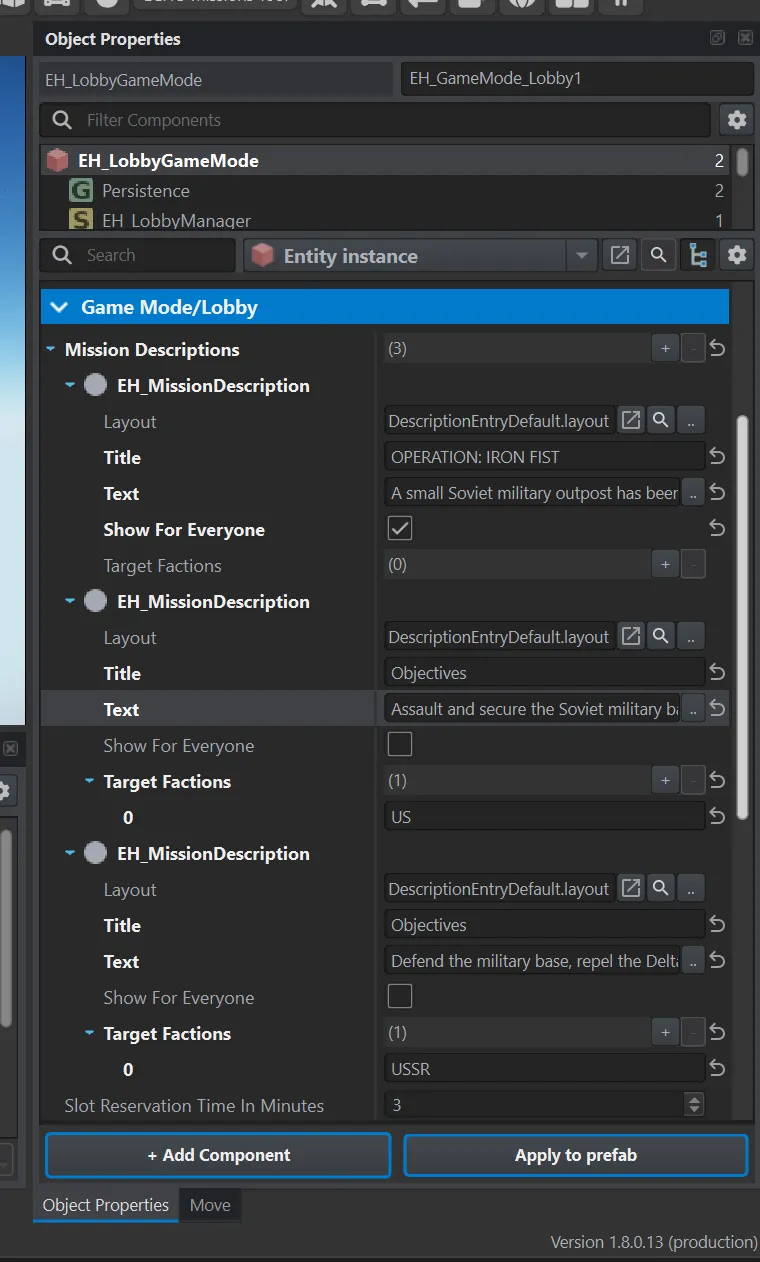
In detail: Mission descriptions.
13. The mission header
Section titled “13. The mission header”The last step is the mission file. It sets the name, the author and the player count, and it is what the server starts.
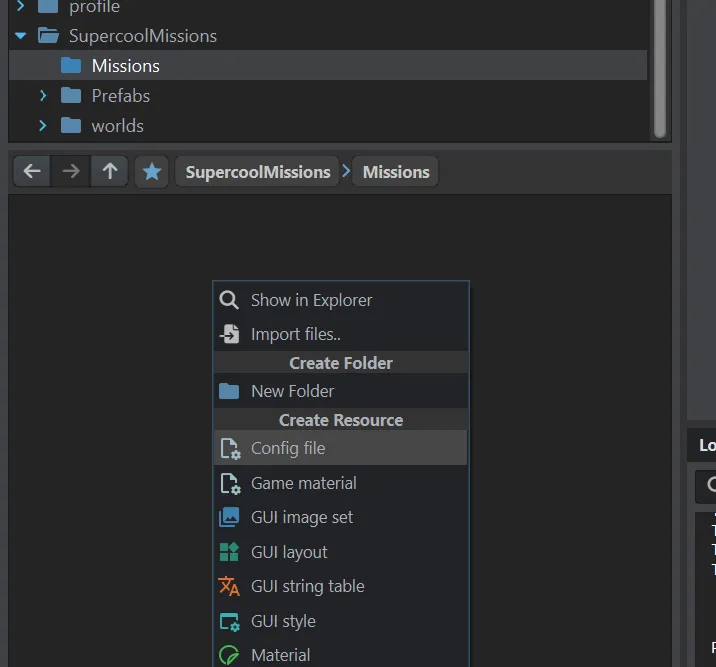
Create a Missions/ folder in your addon, right-click inside it and choose Create Resource → Config file. In the dialog pick the SCR_MissionHeader class.
Fill in the fields: World — your sub-scene, Name and Author — they go into the lobby header, Game Mode and Player Count — the label of the mode and the number of players. The file name usually carries the number of slots, for example helloworldmission_48.conf.
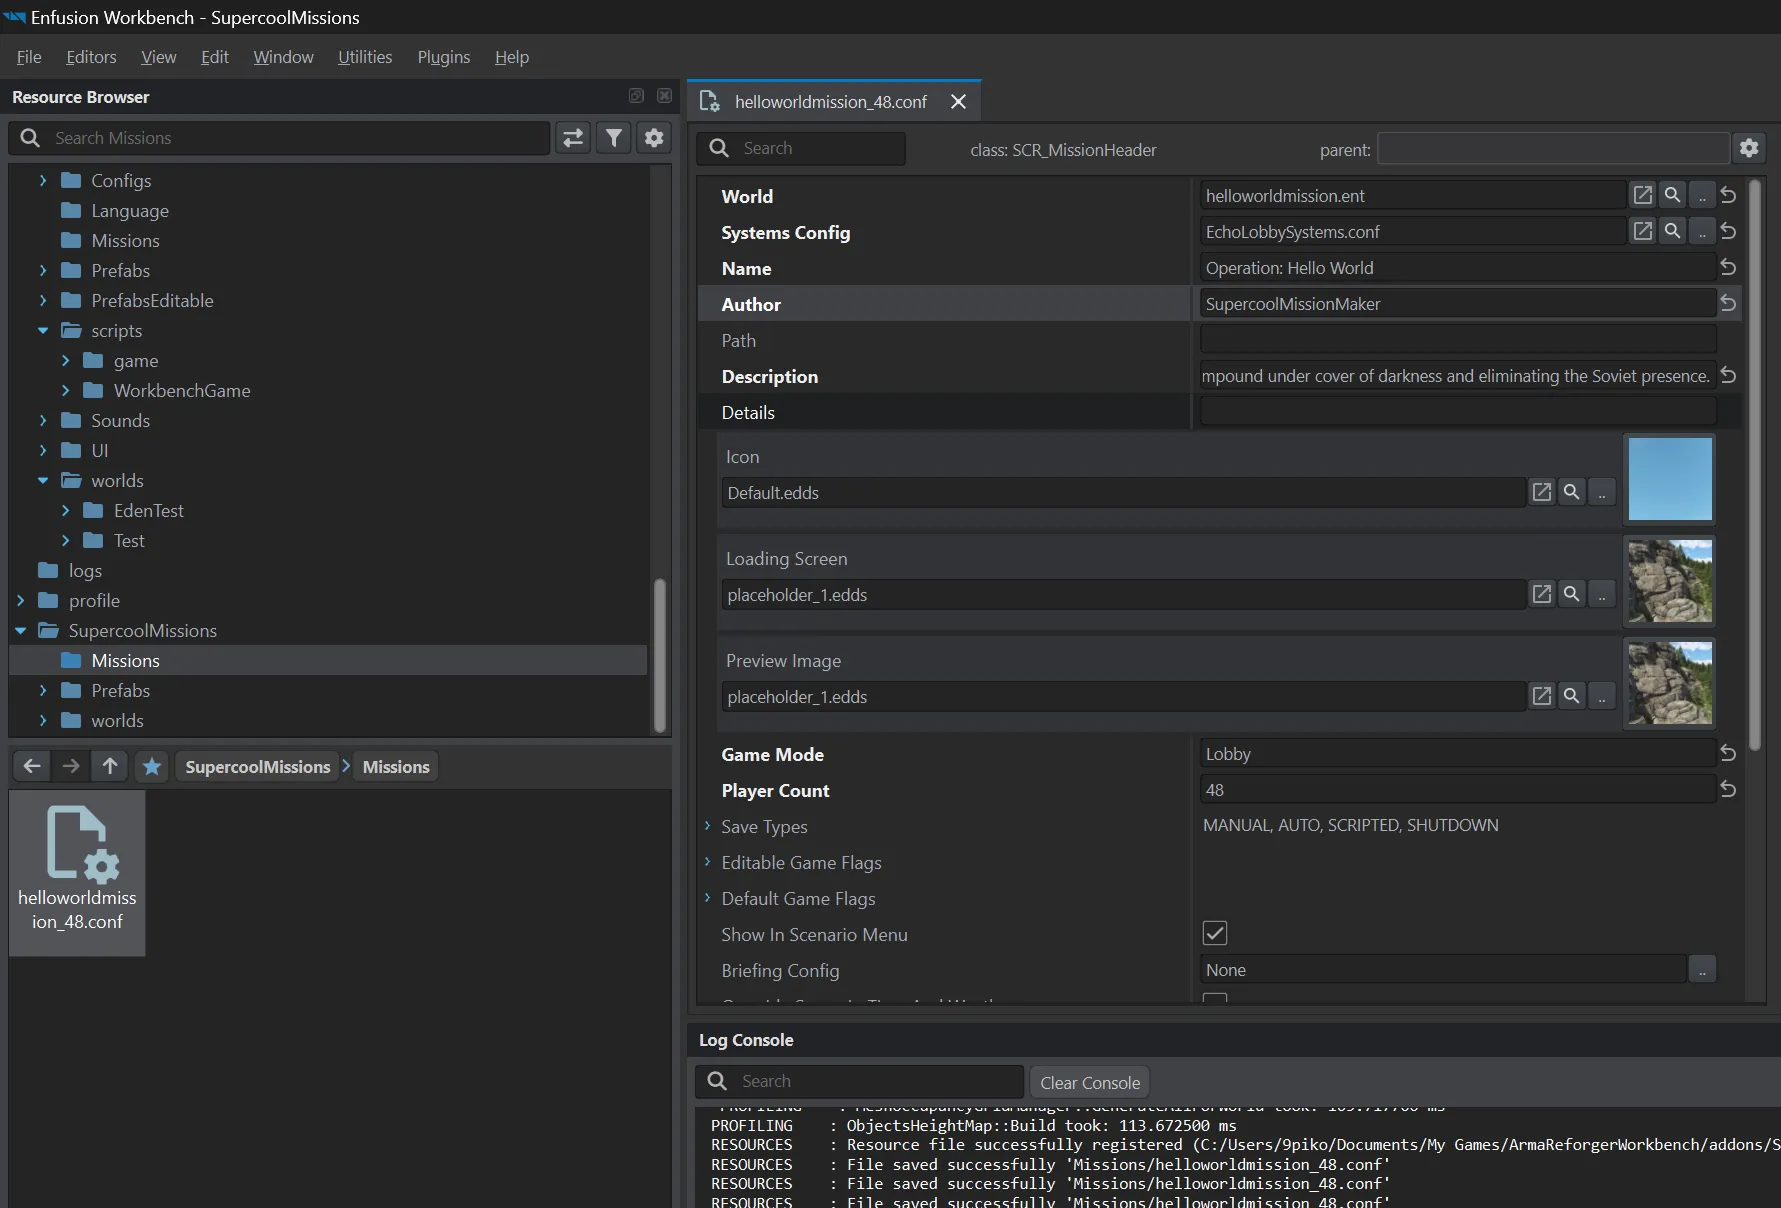
The Systems Config field belongs to restoring a mission after a server restart — that feature is still in development, see Mission header.
14. The check
Section titled “14. The check”Start the mission and go through its states: waiting, slotting, briefing, the game.
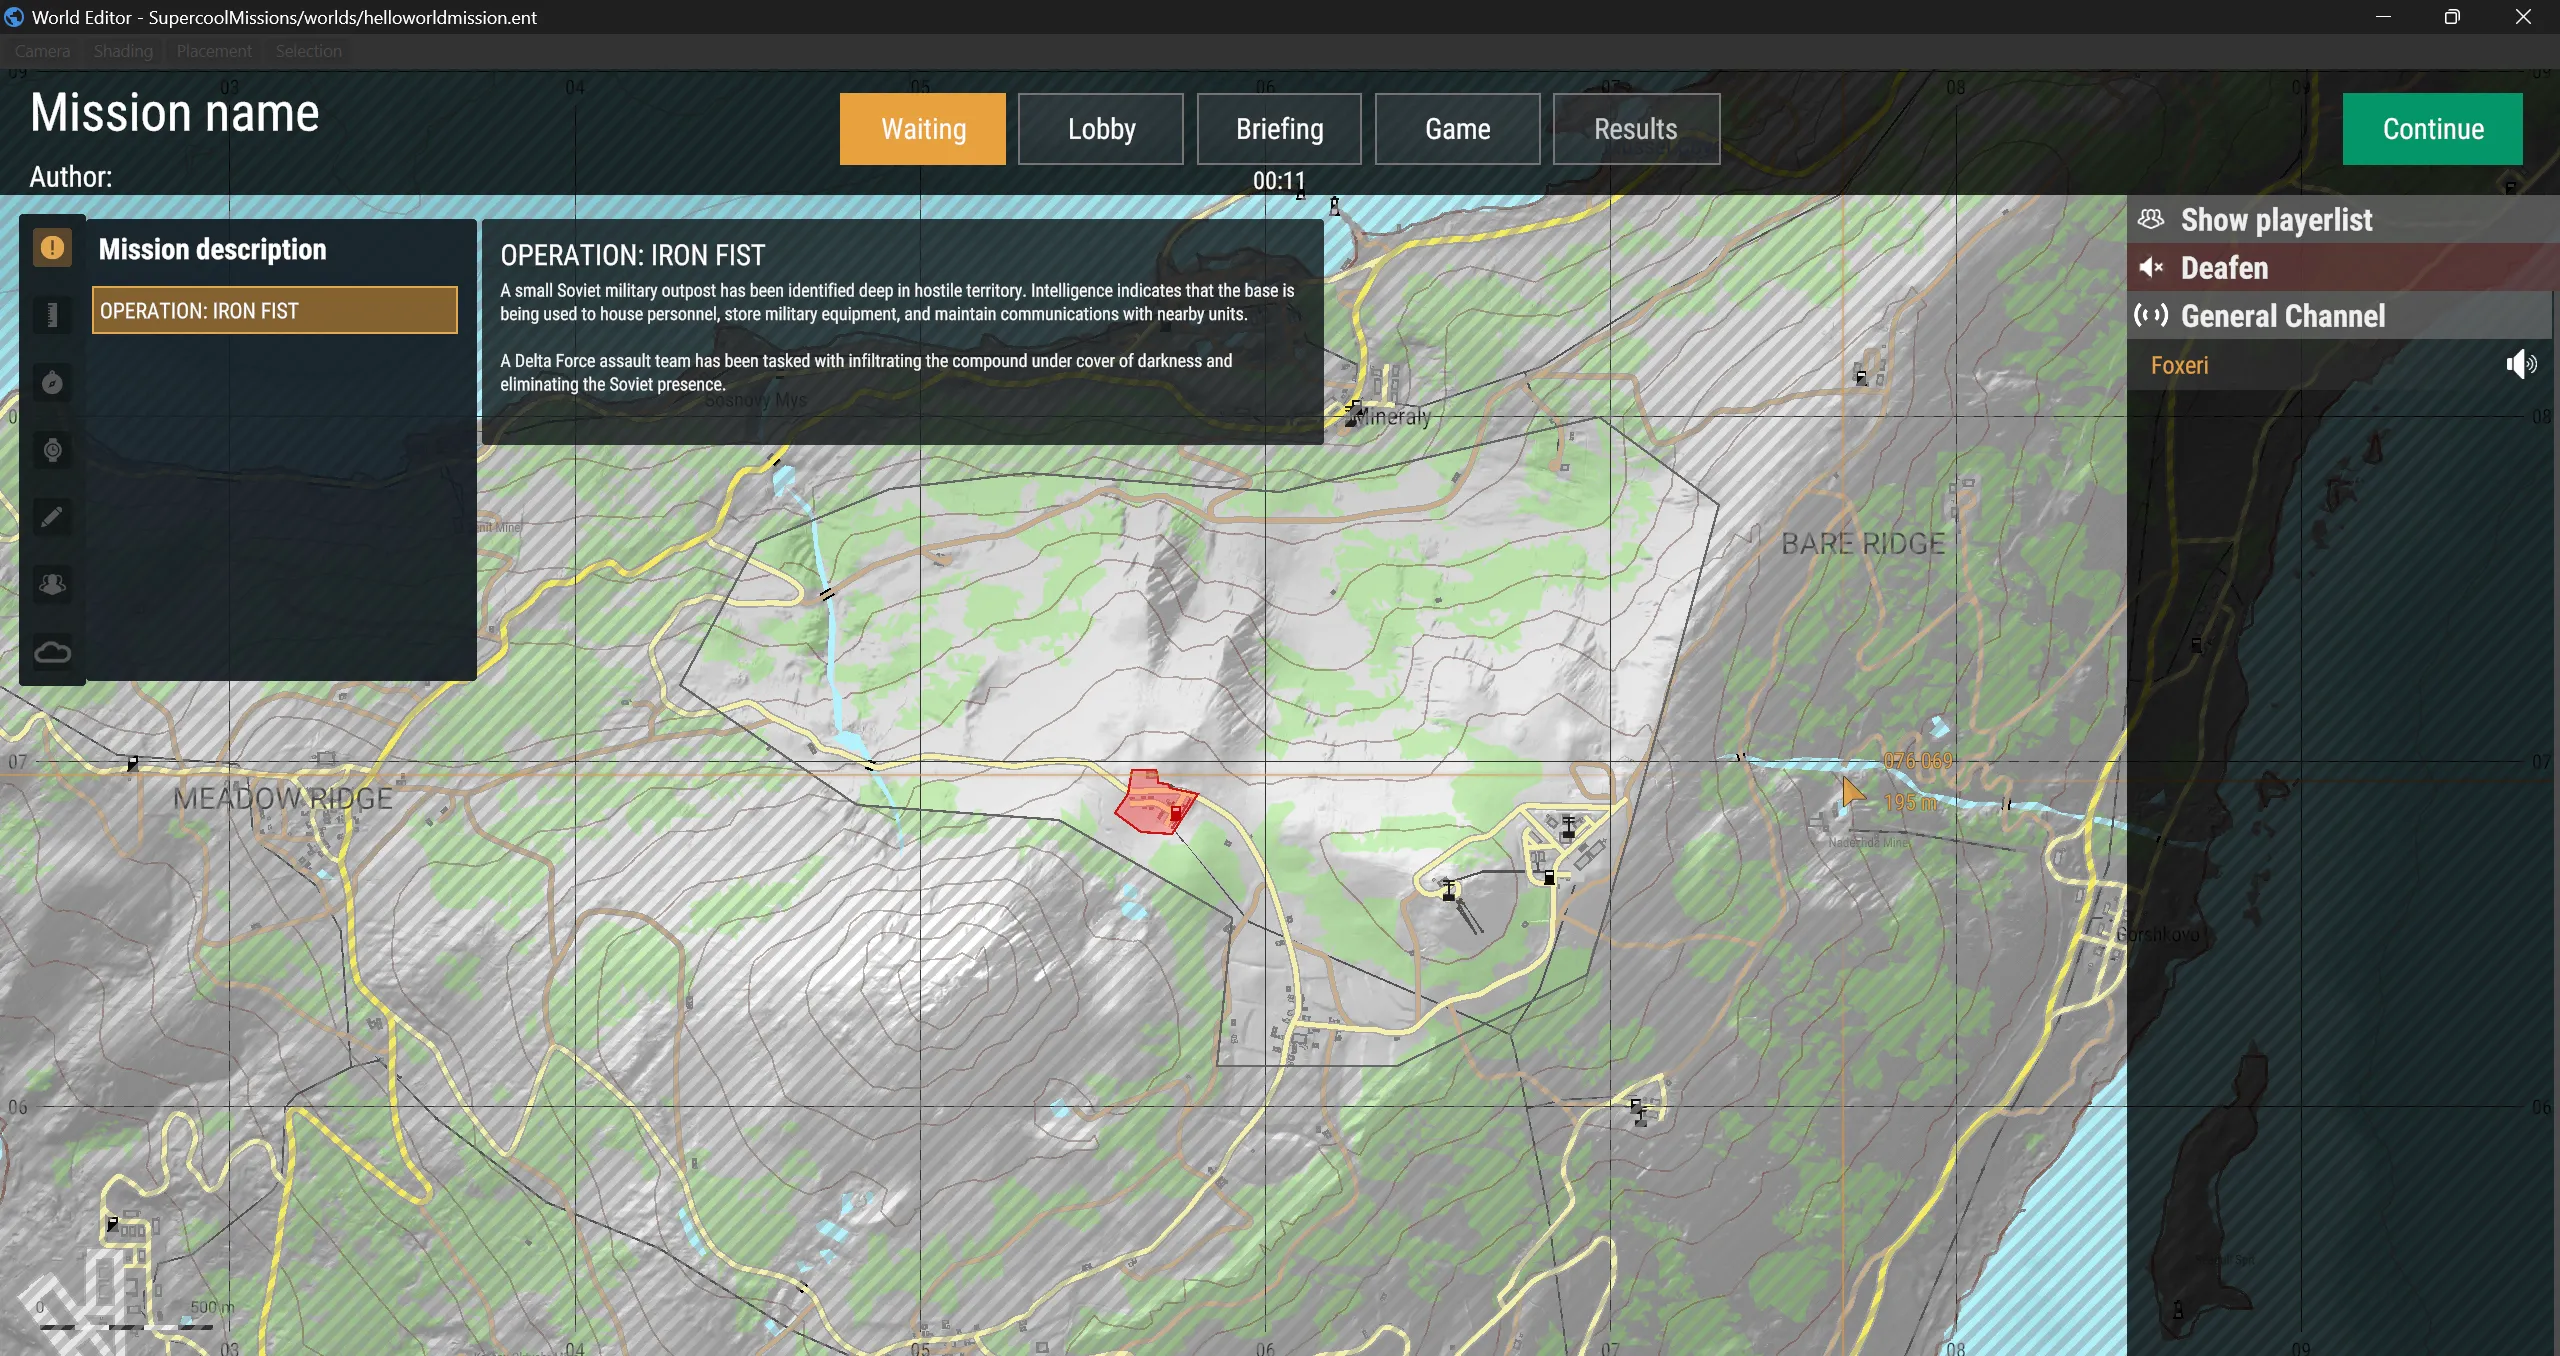
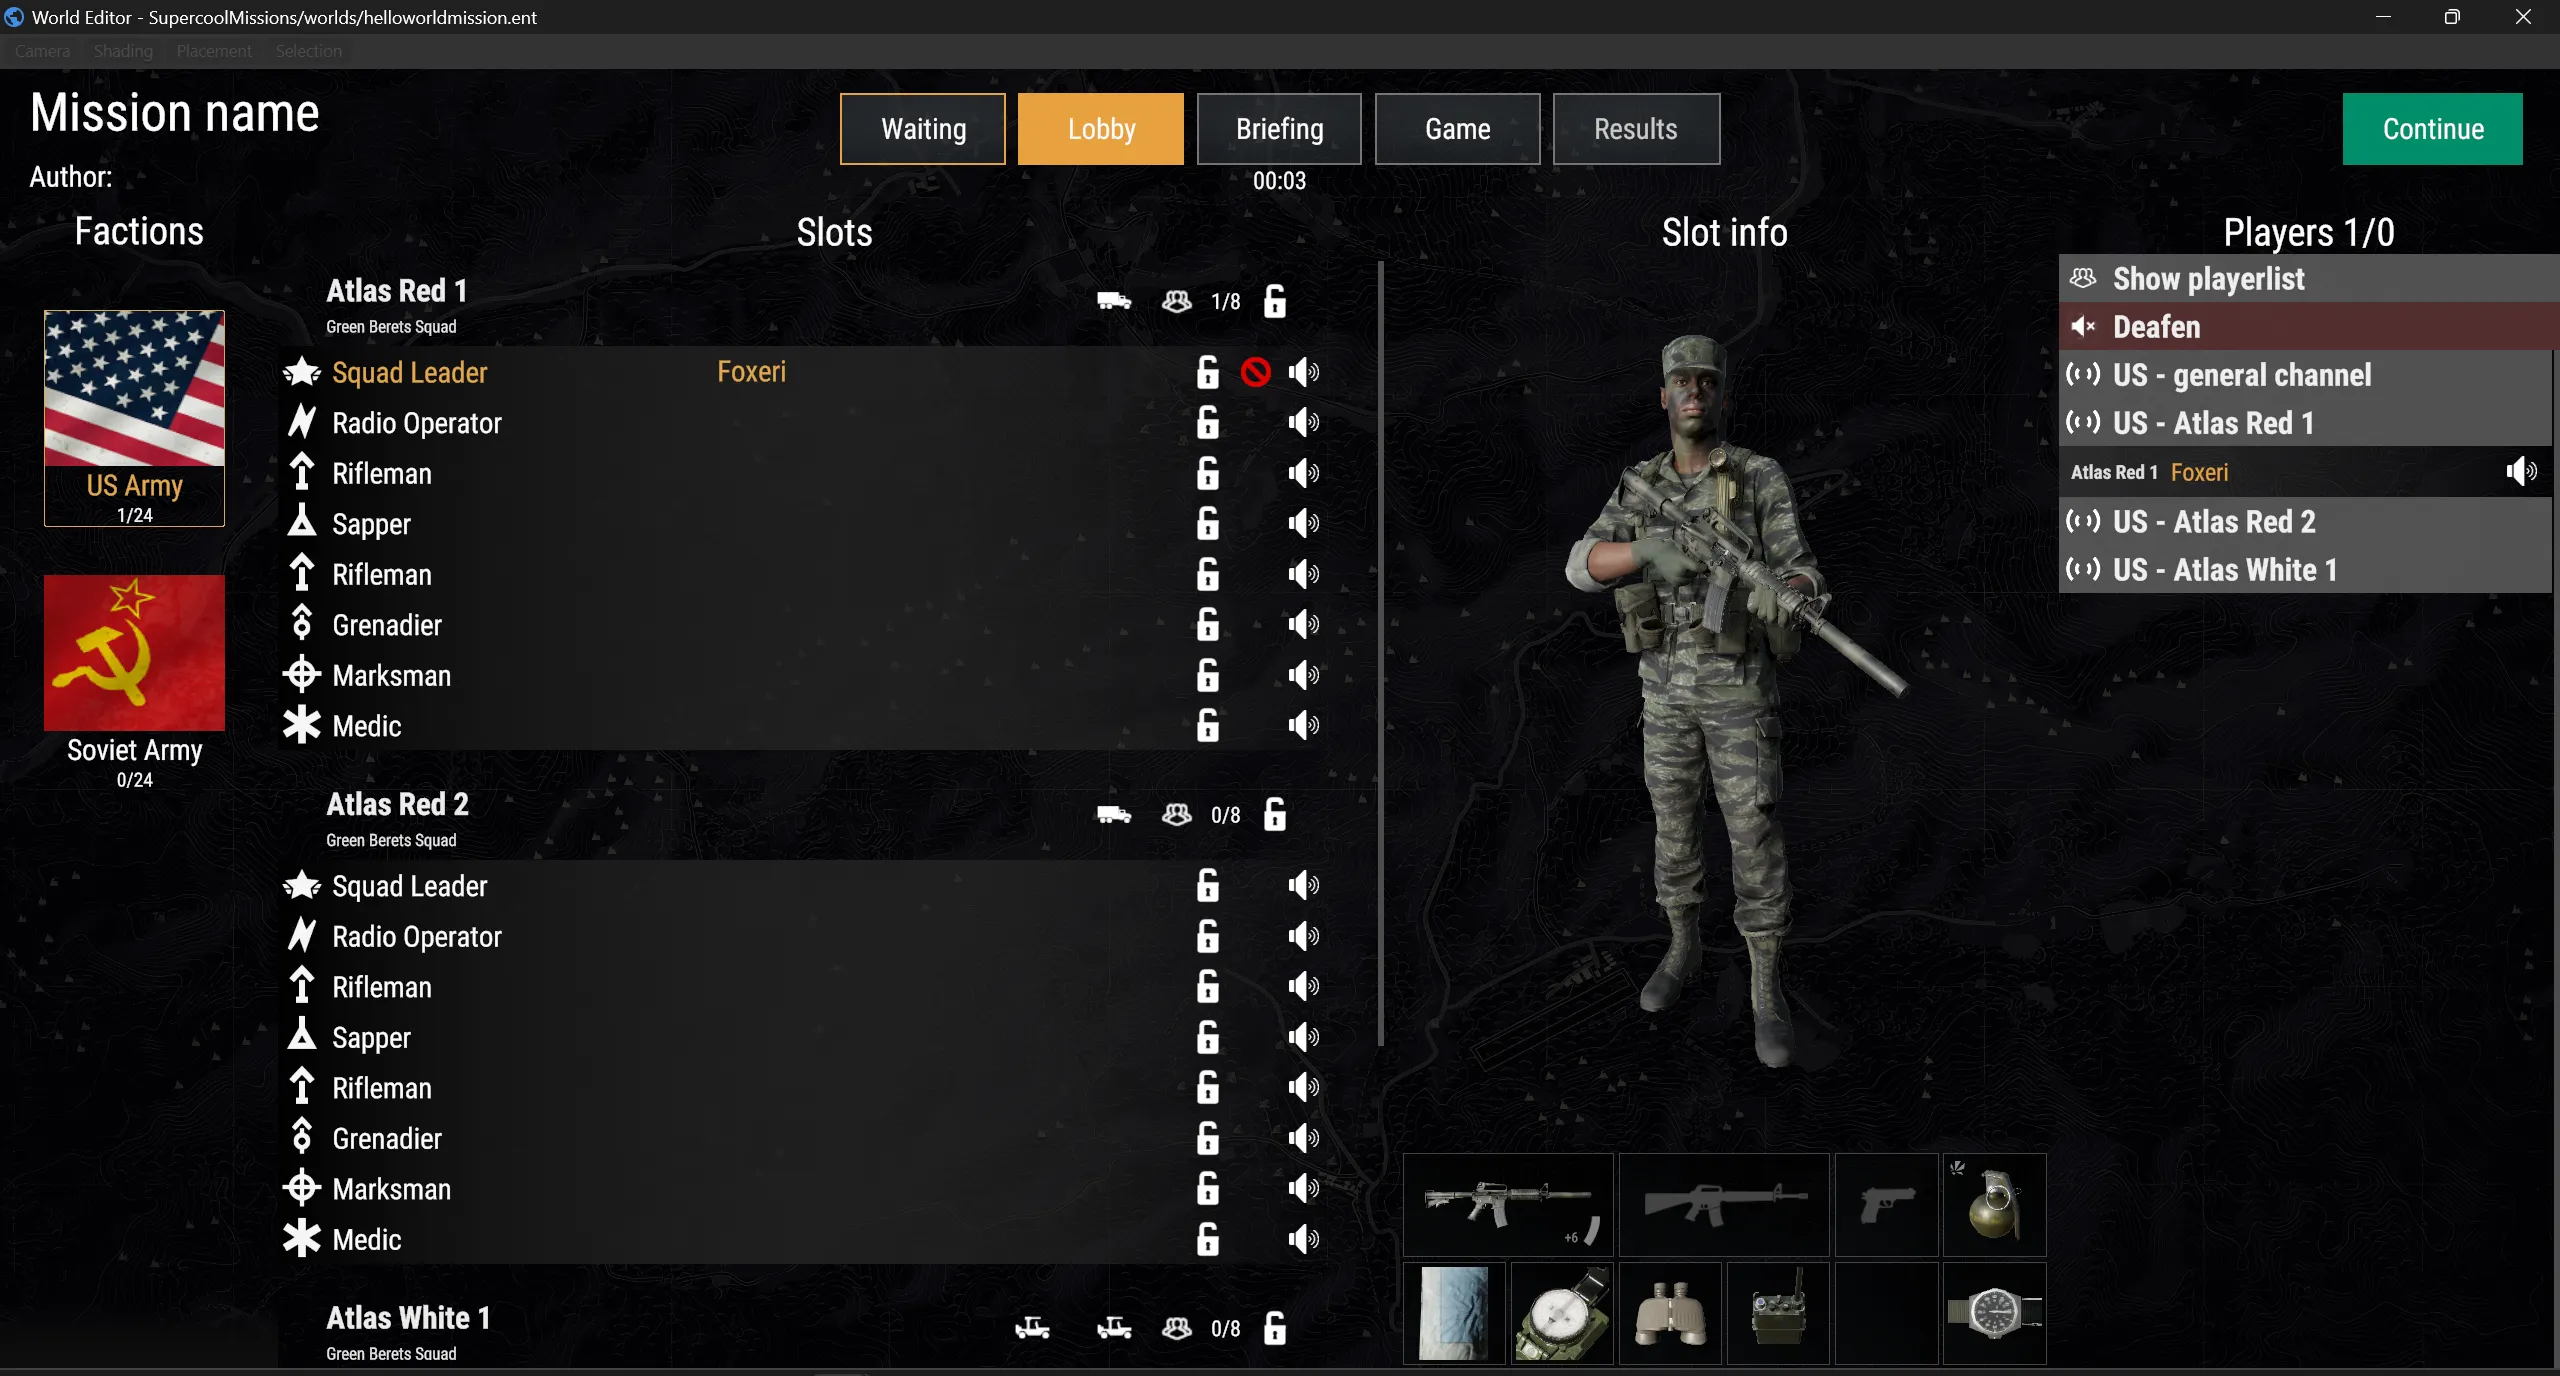
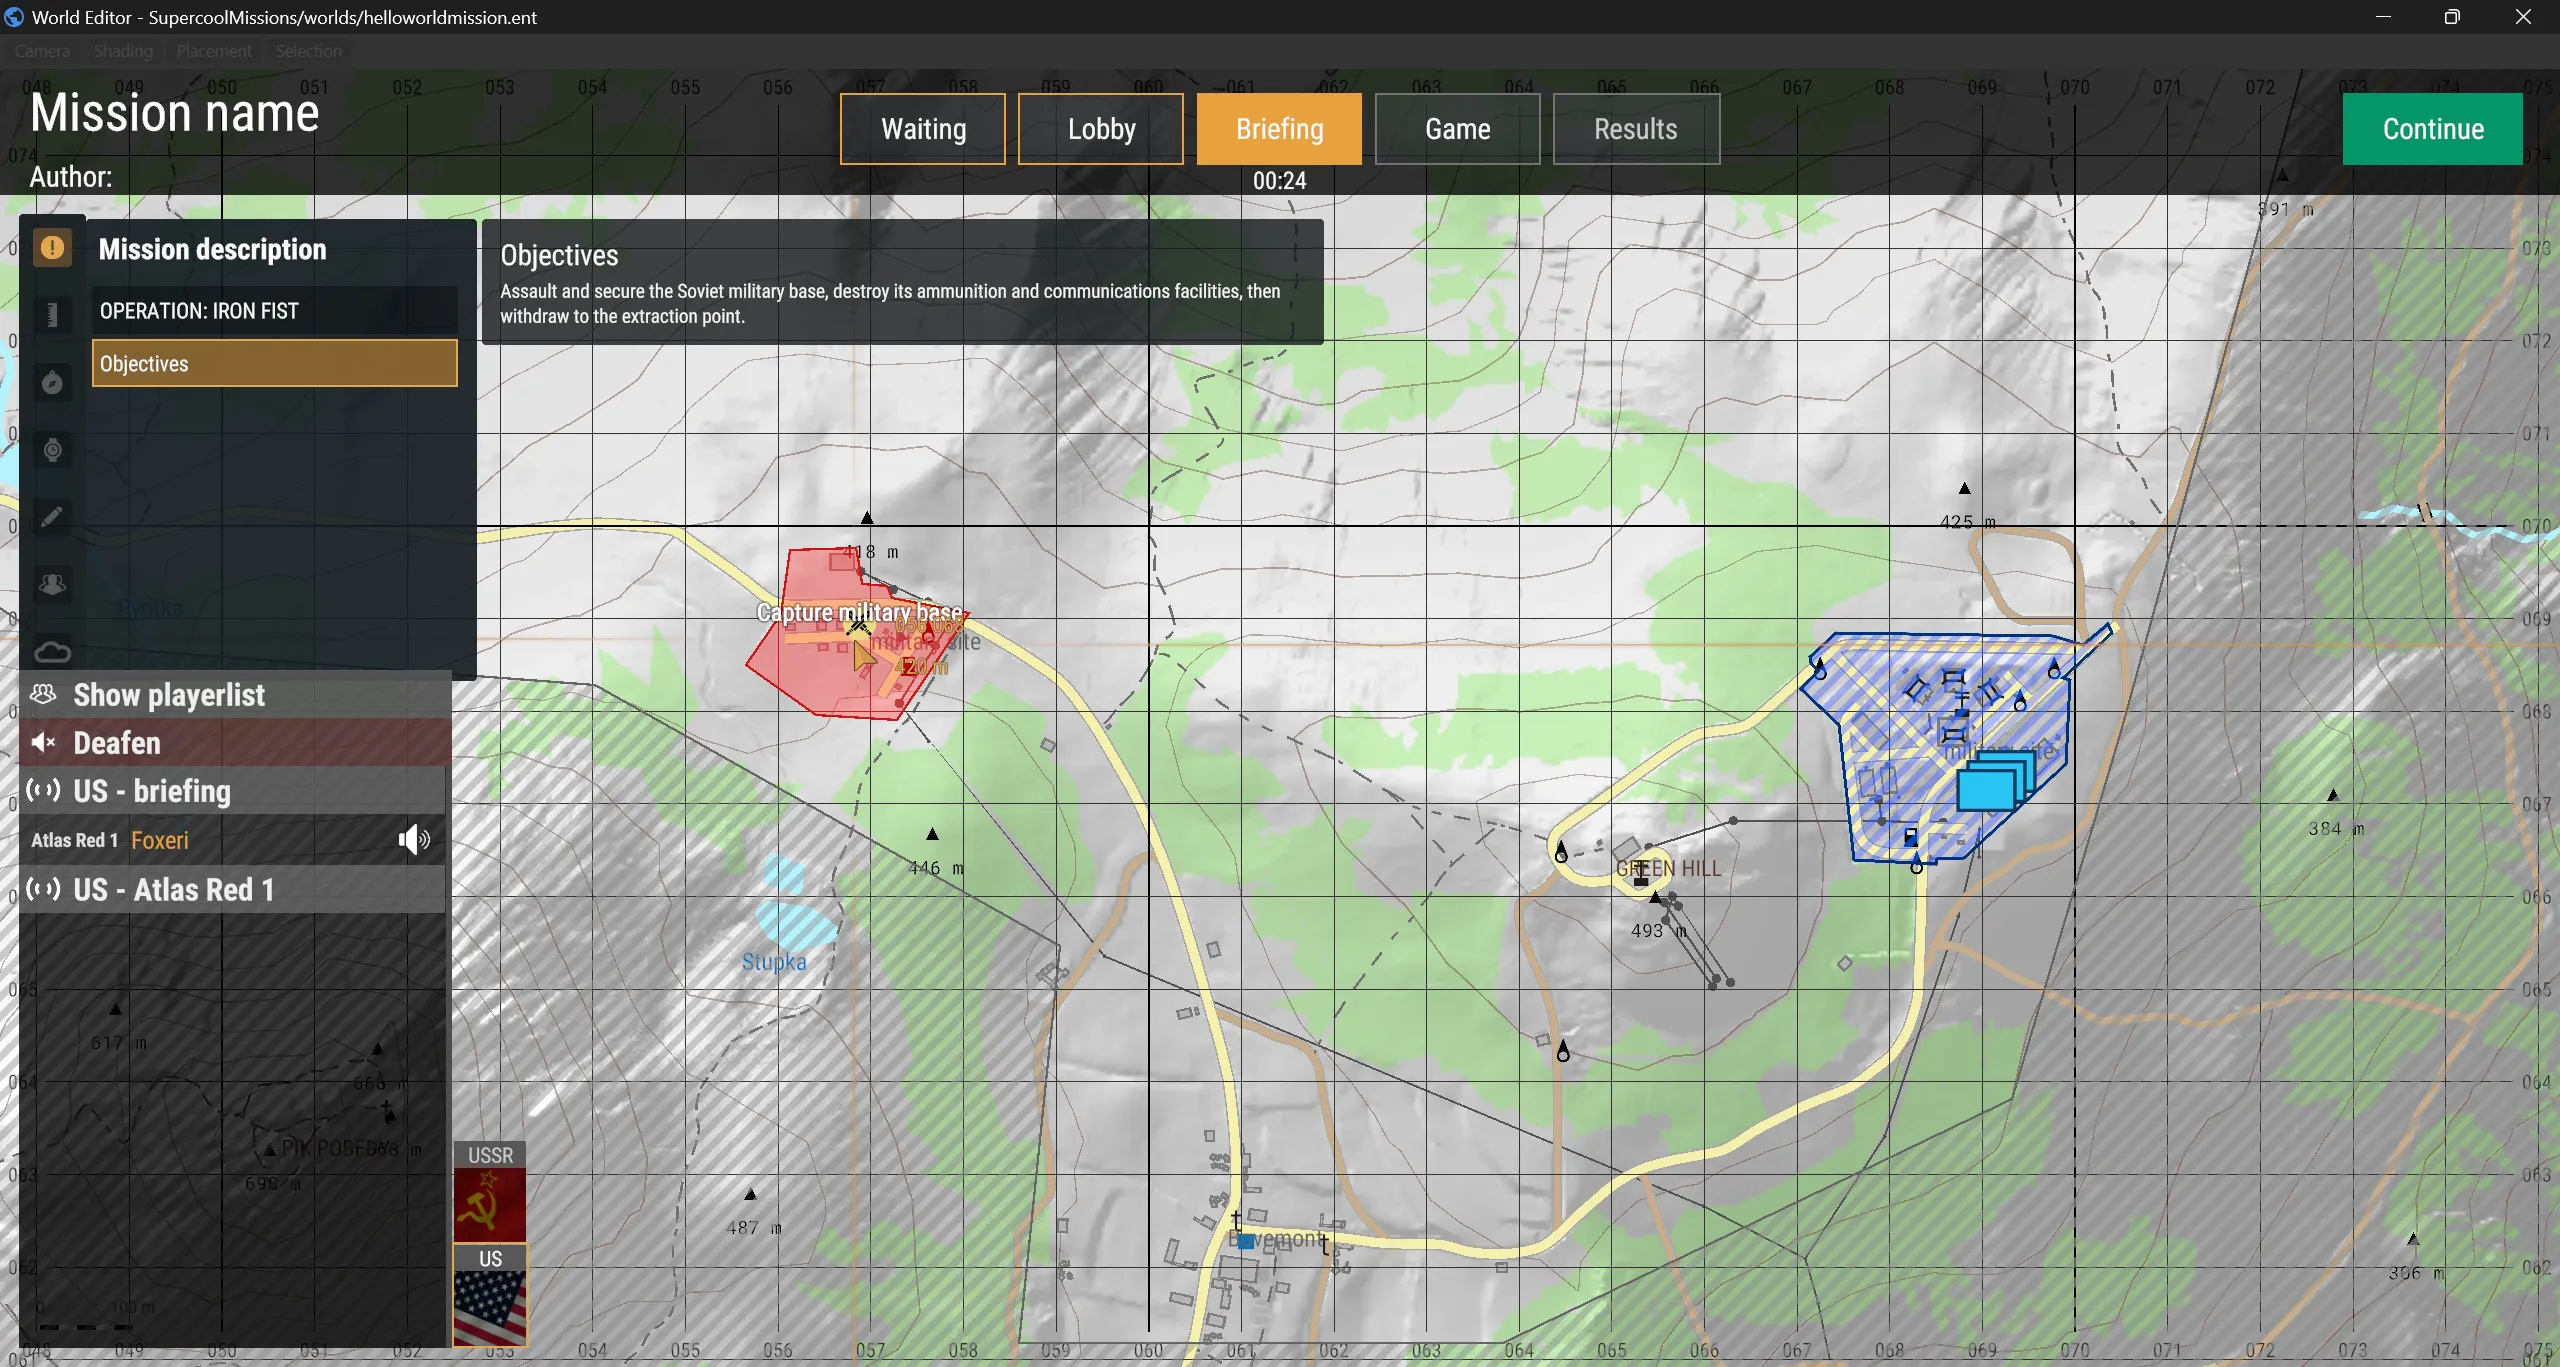
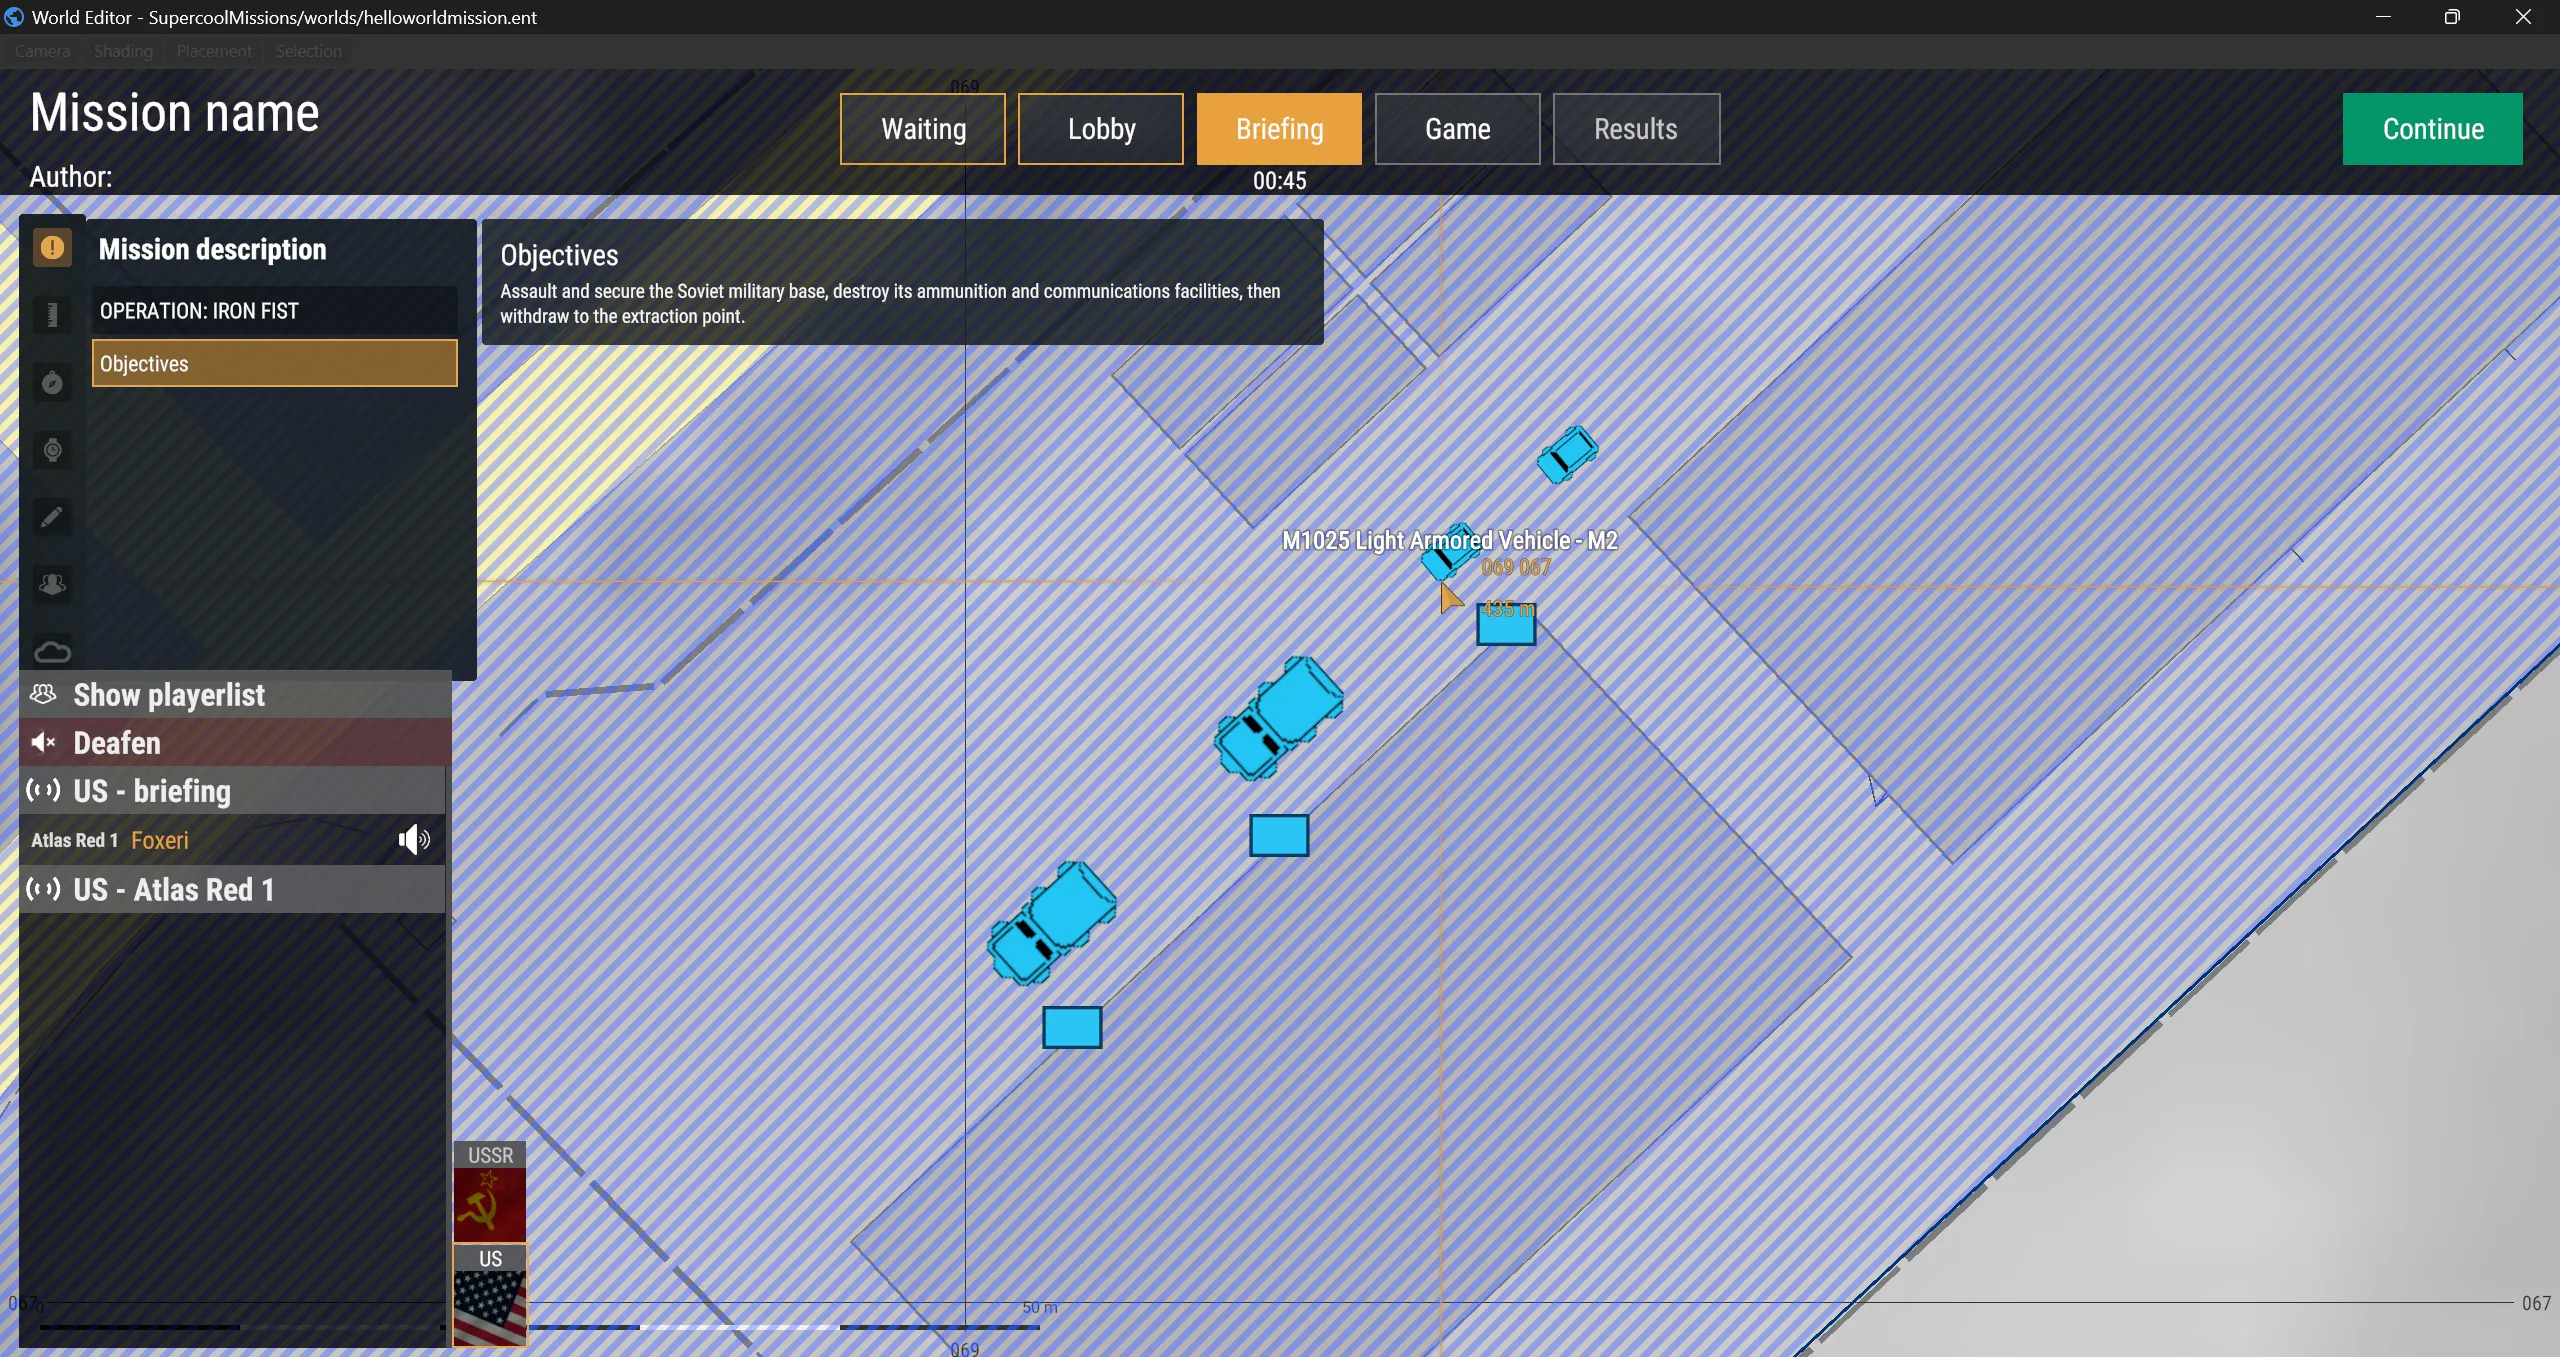
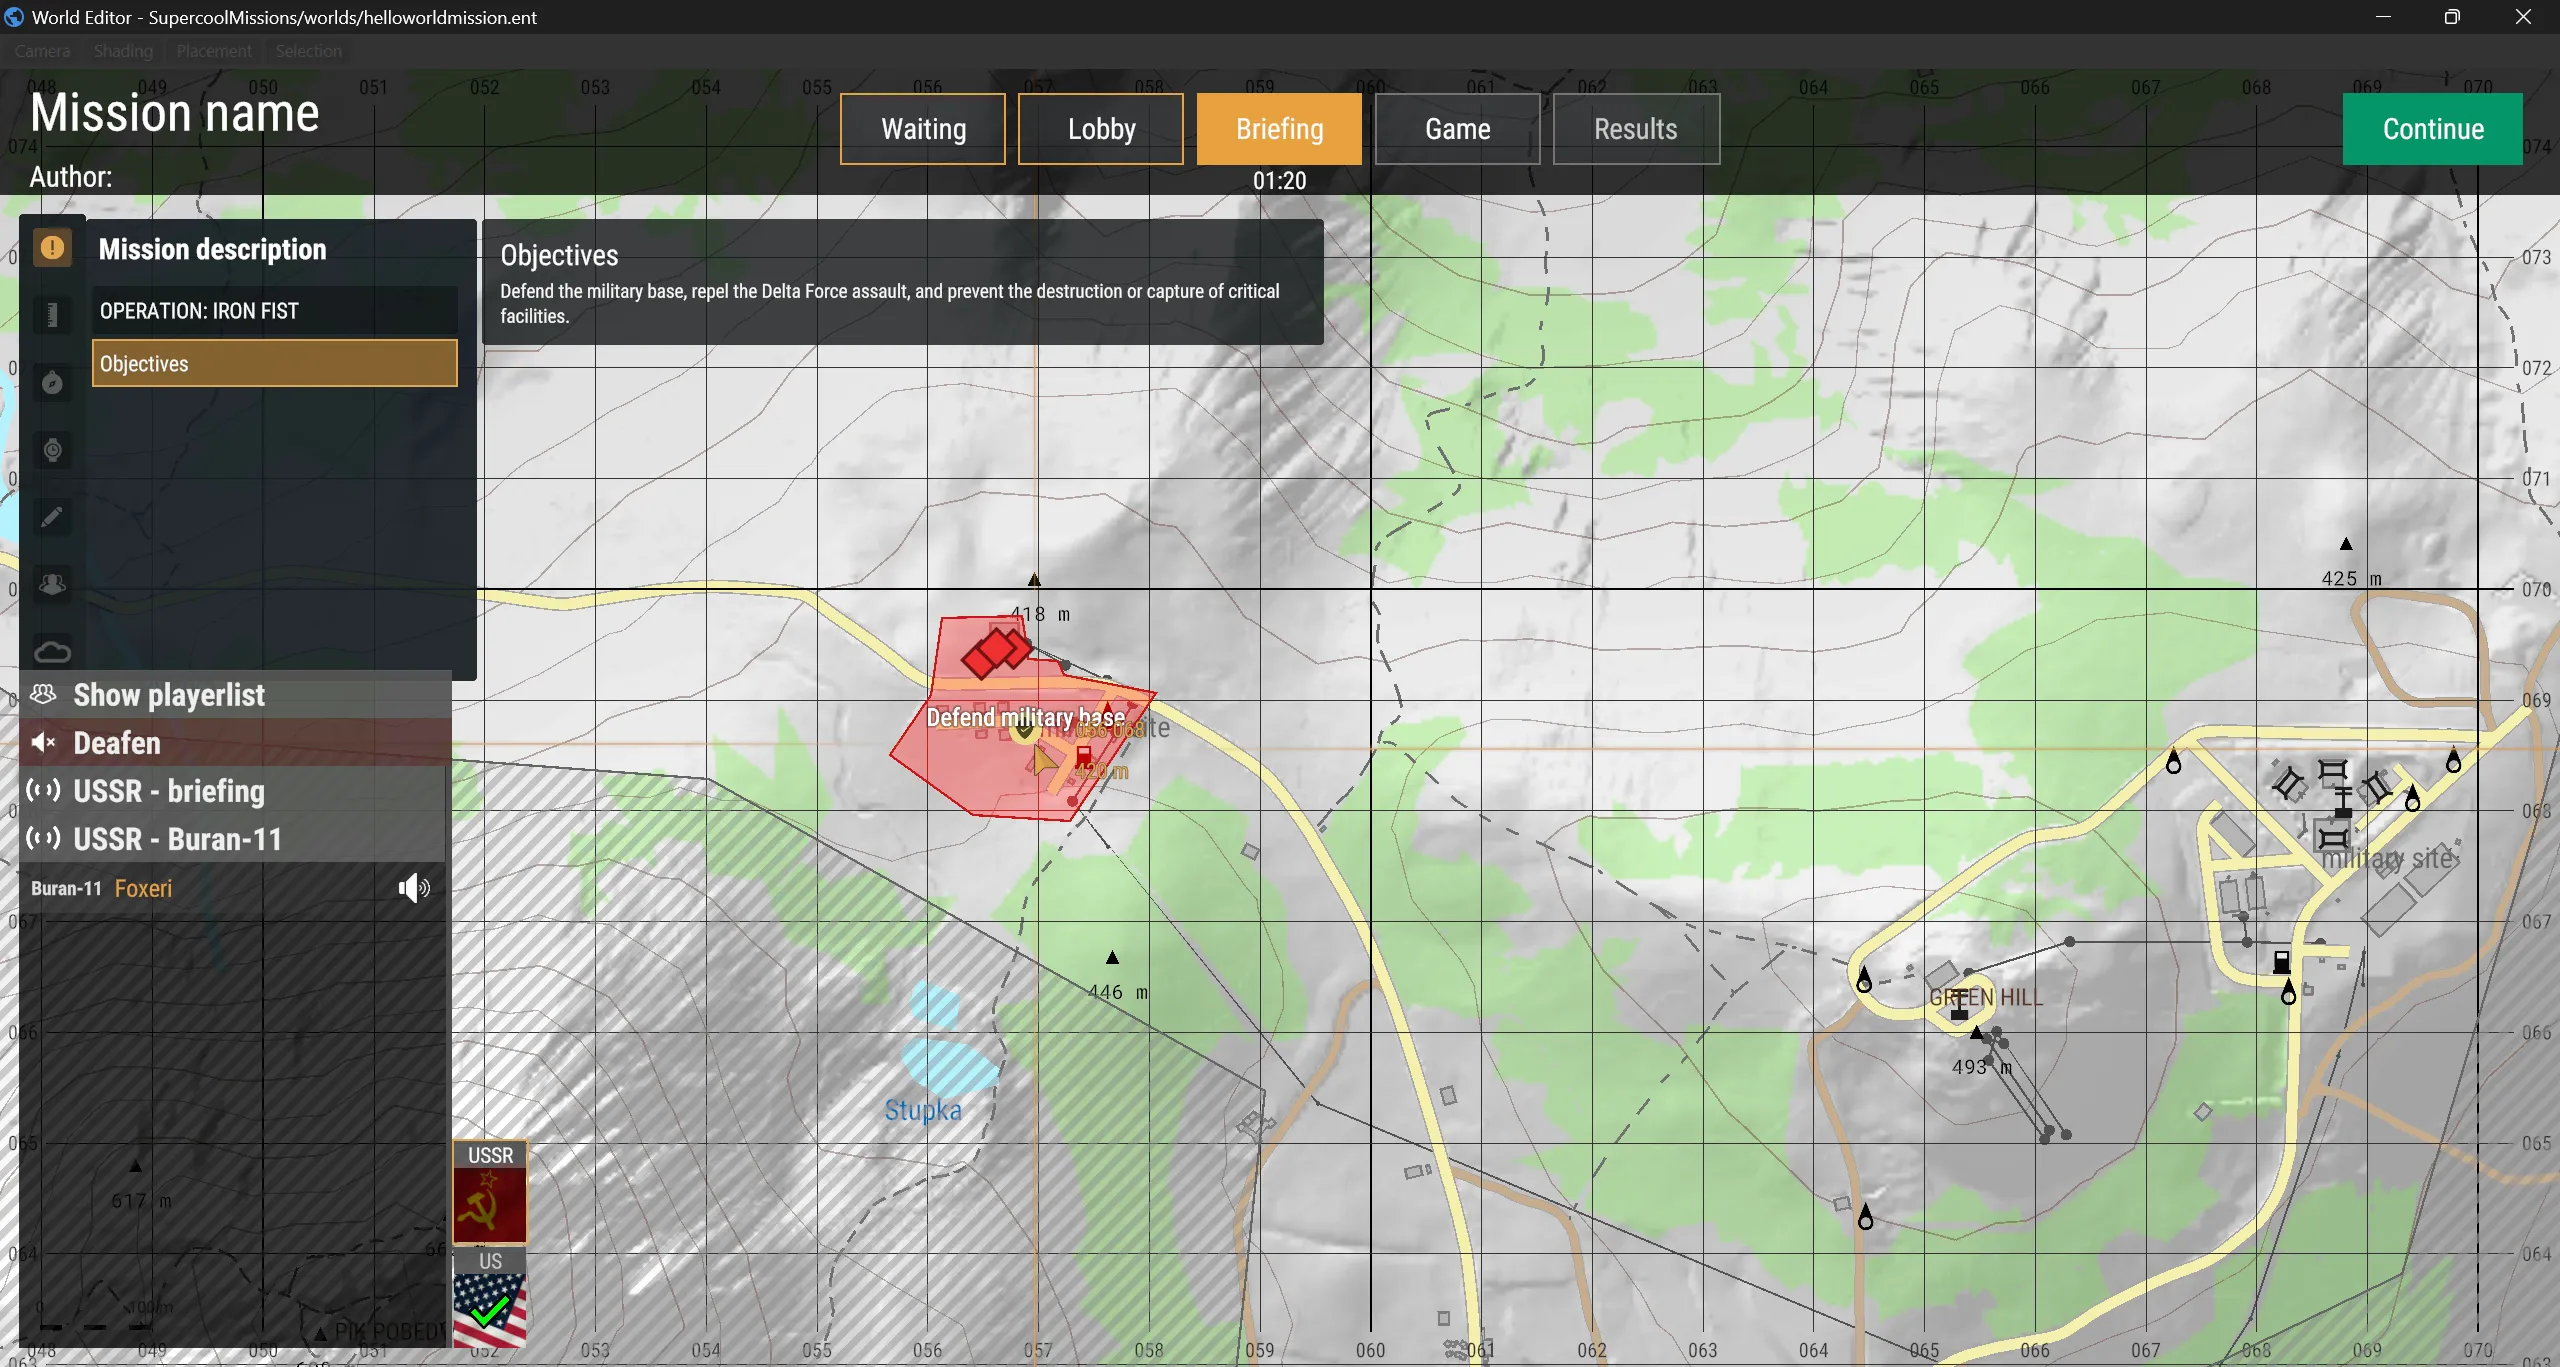
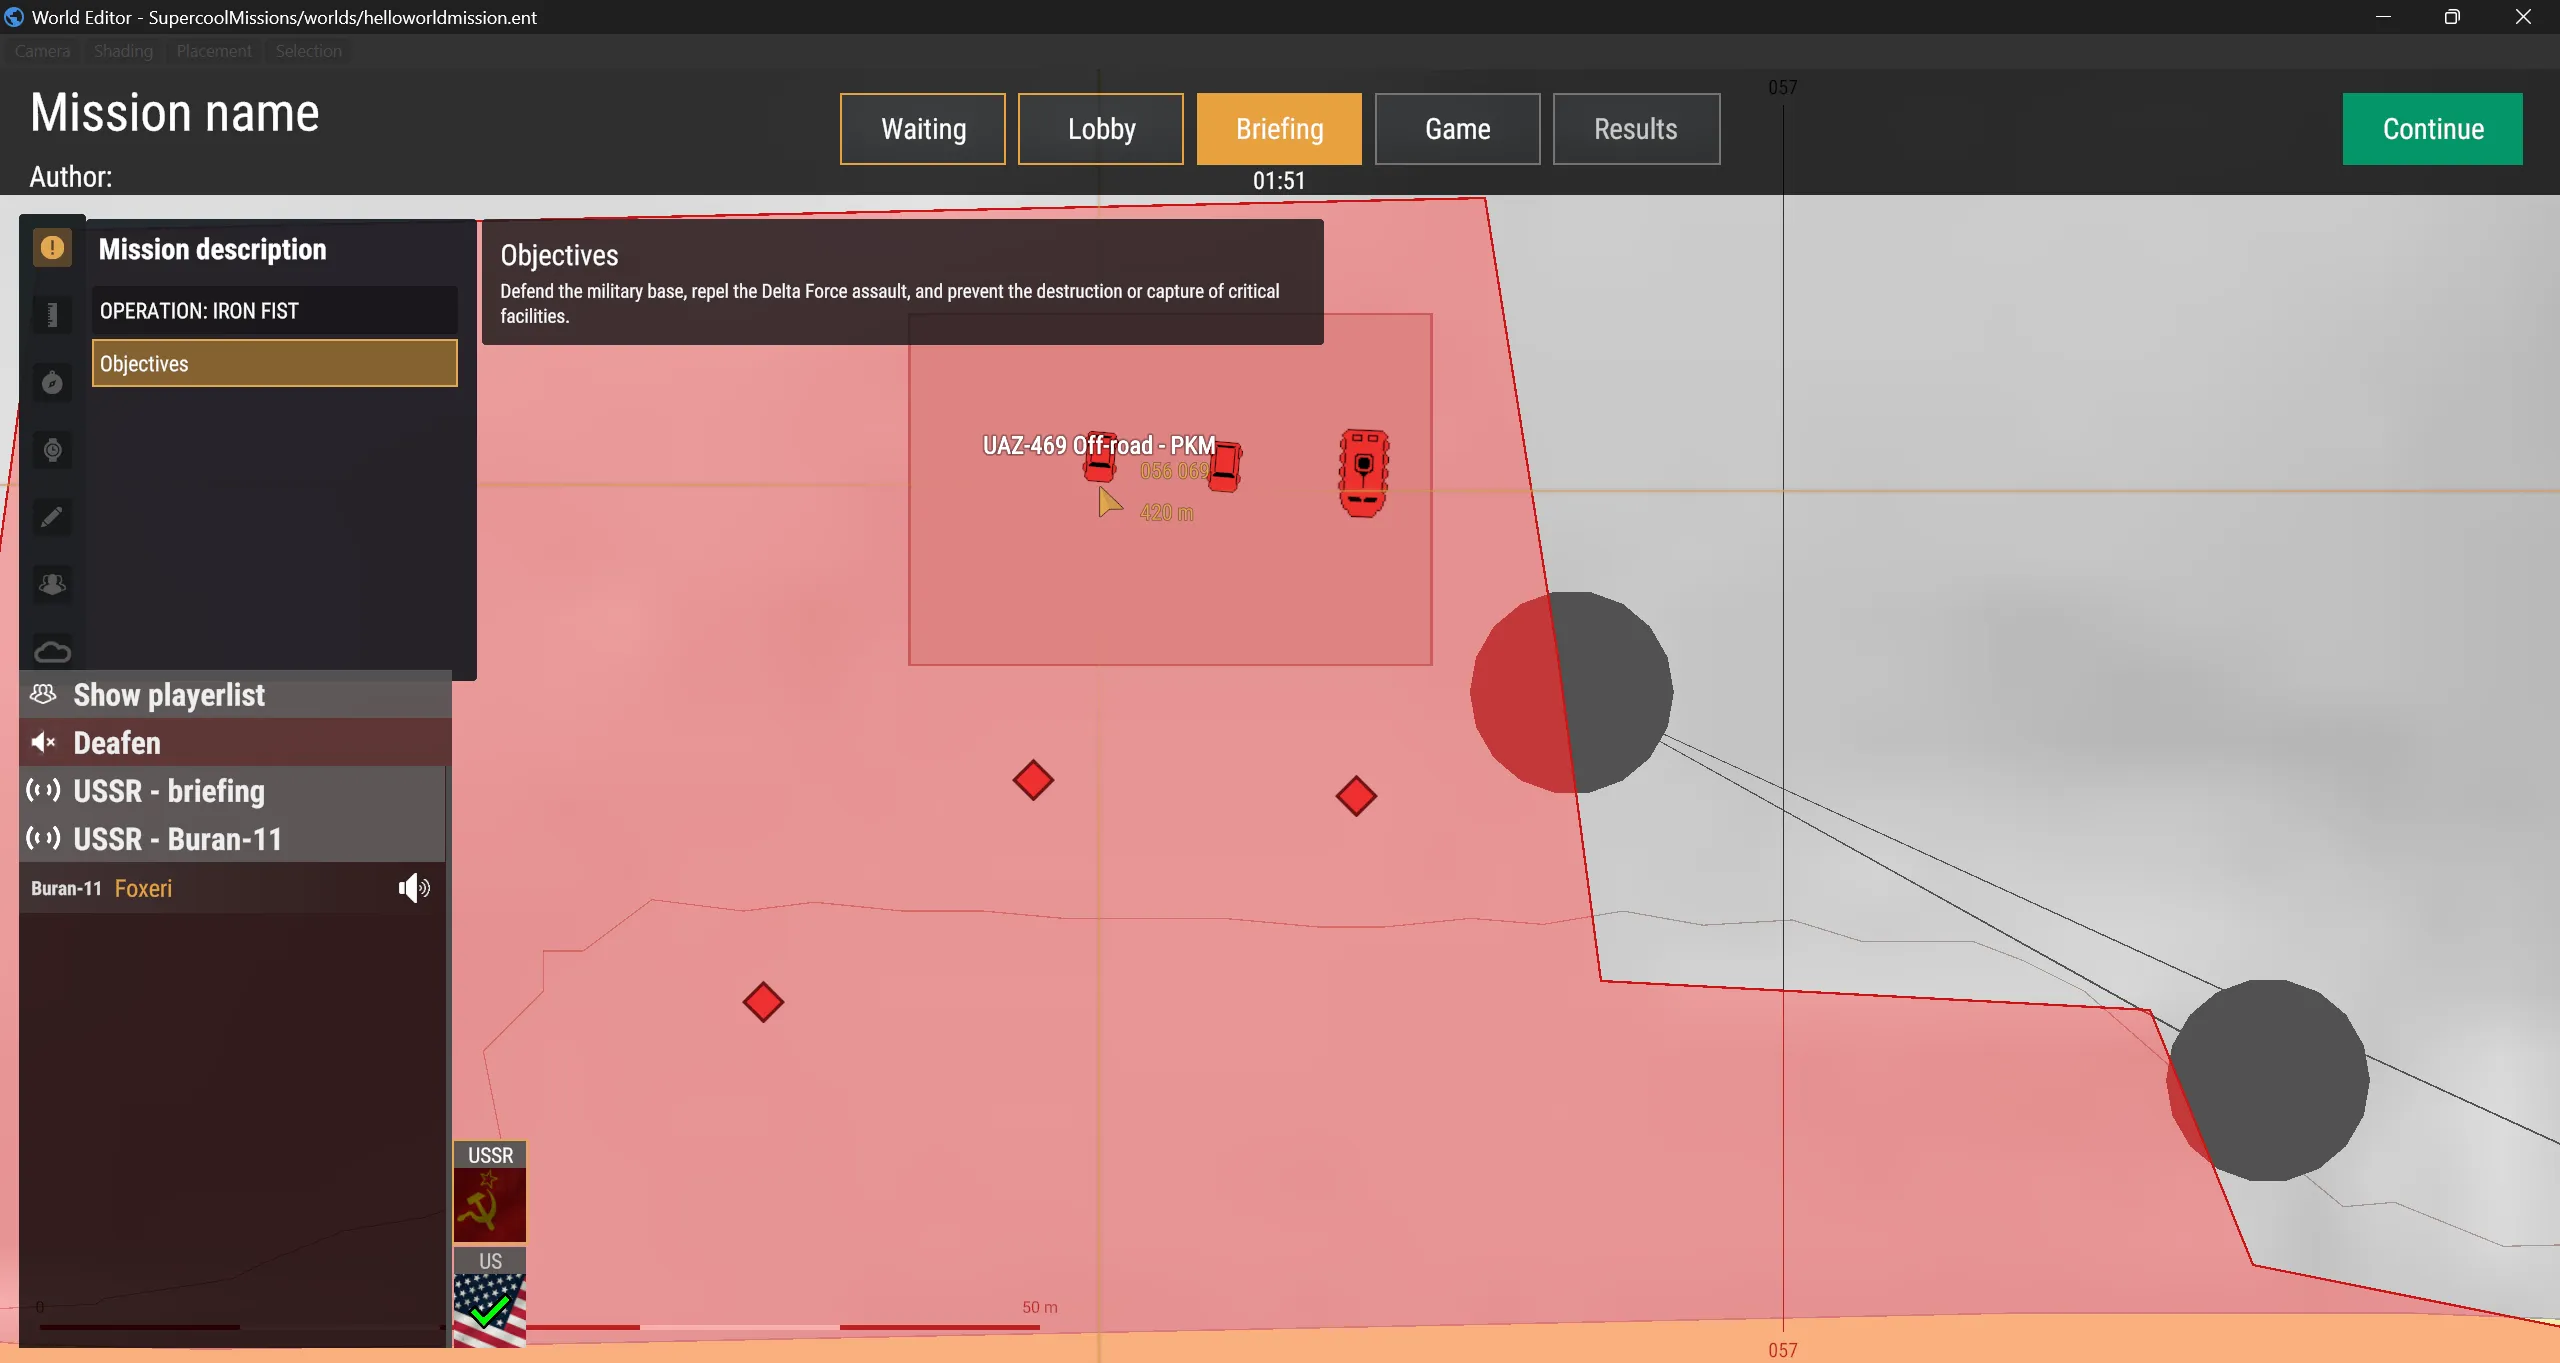
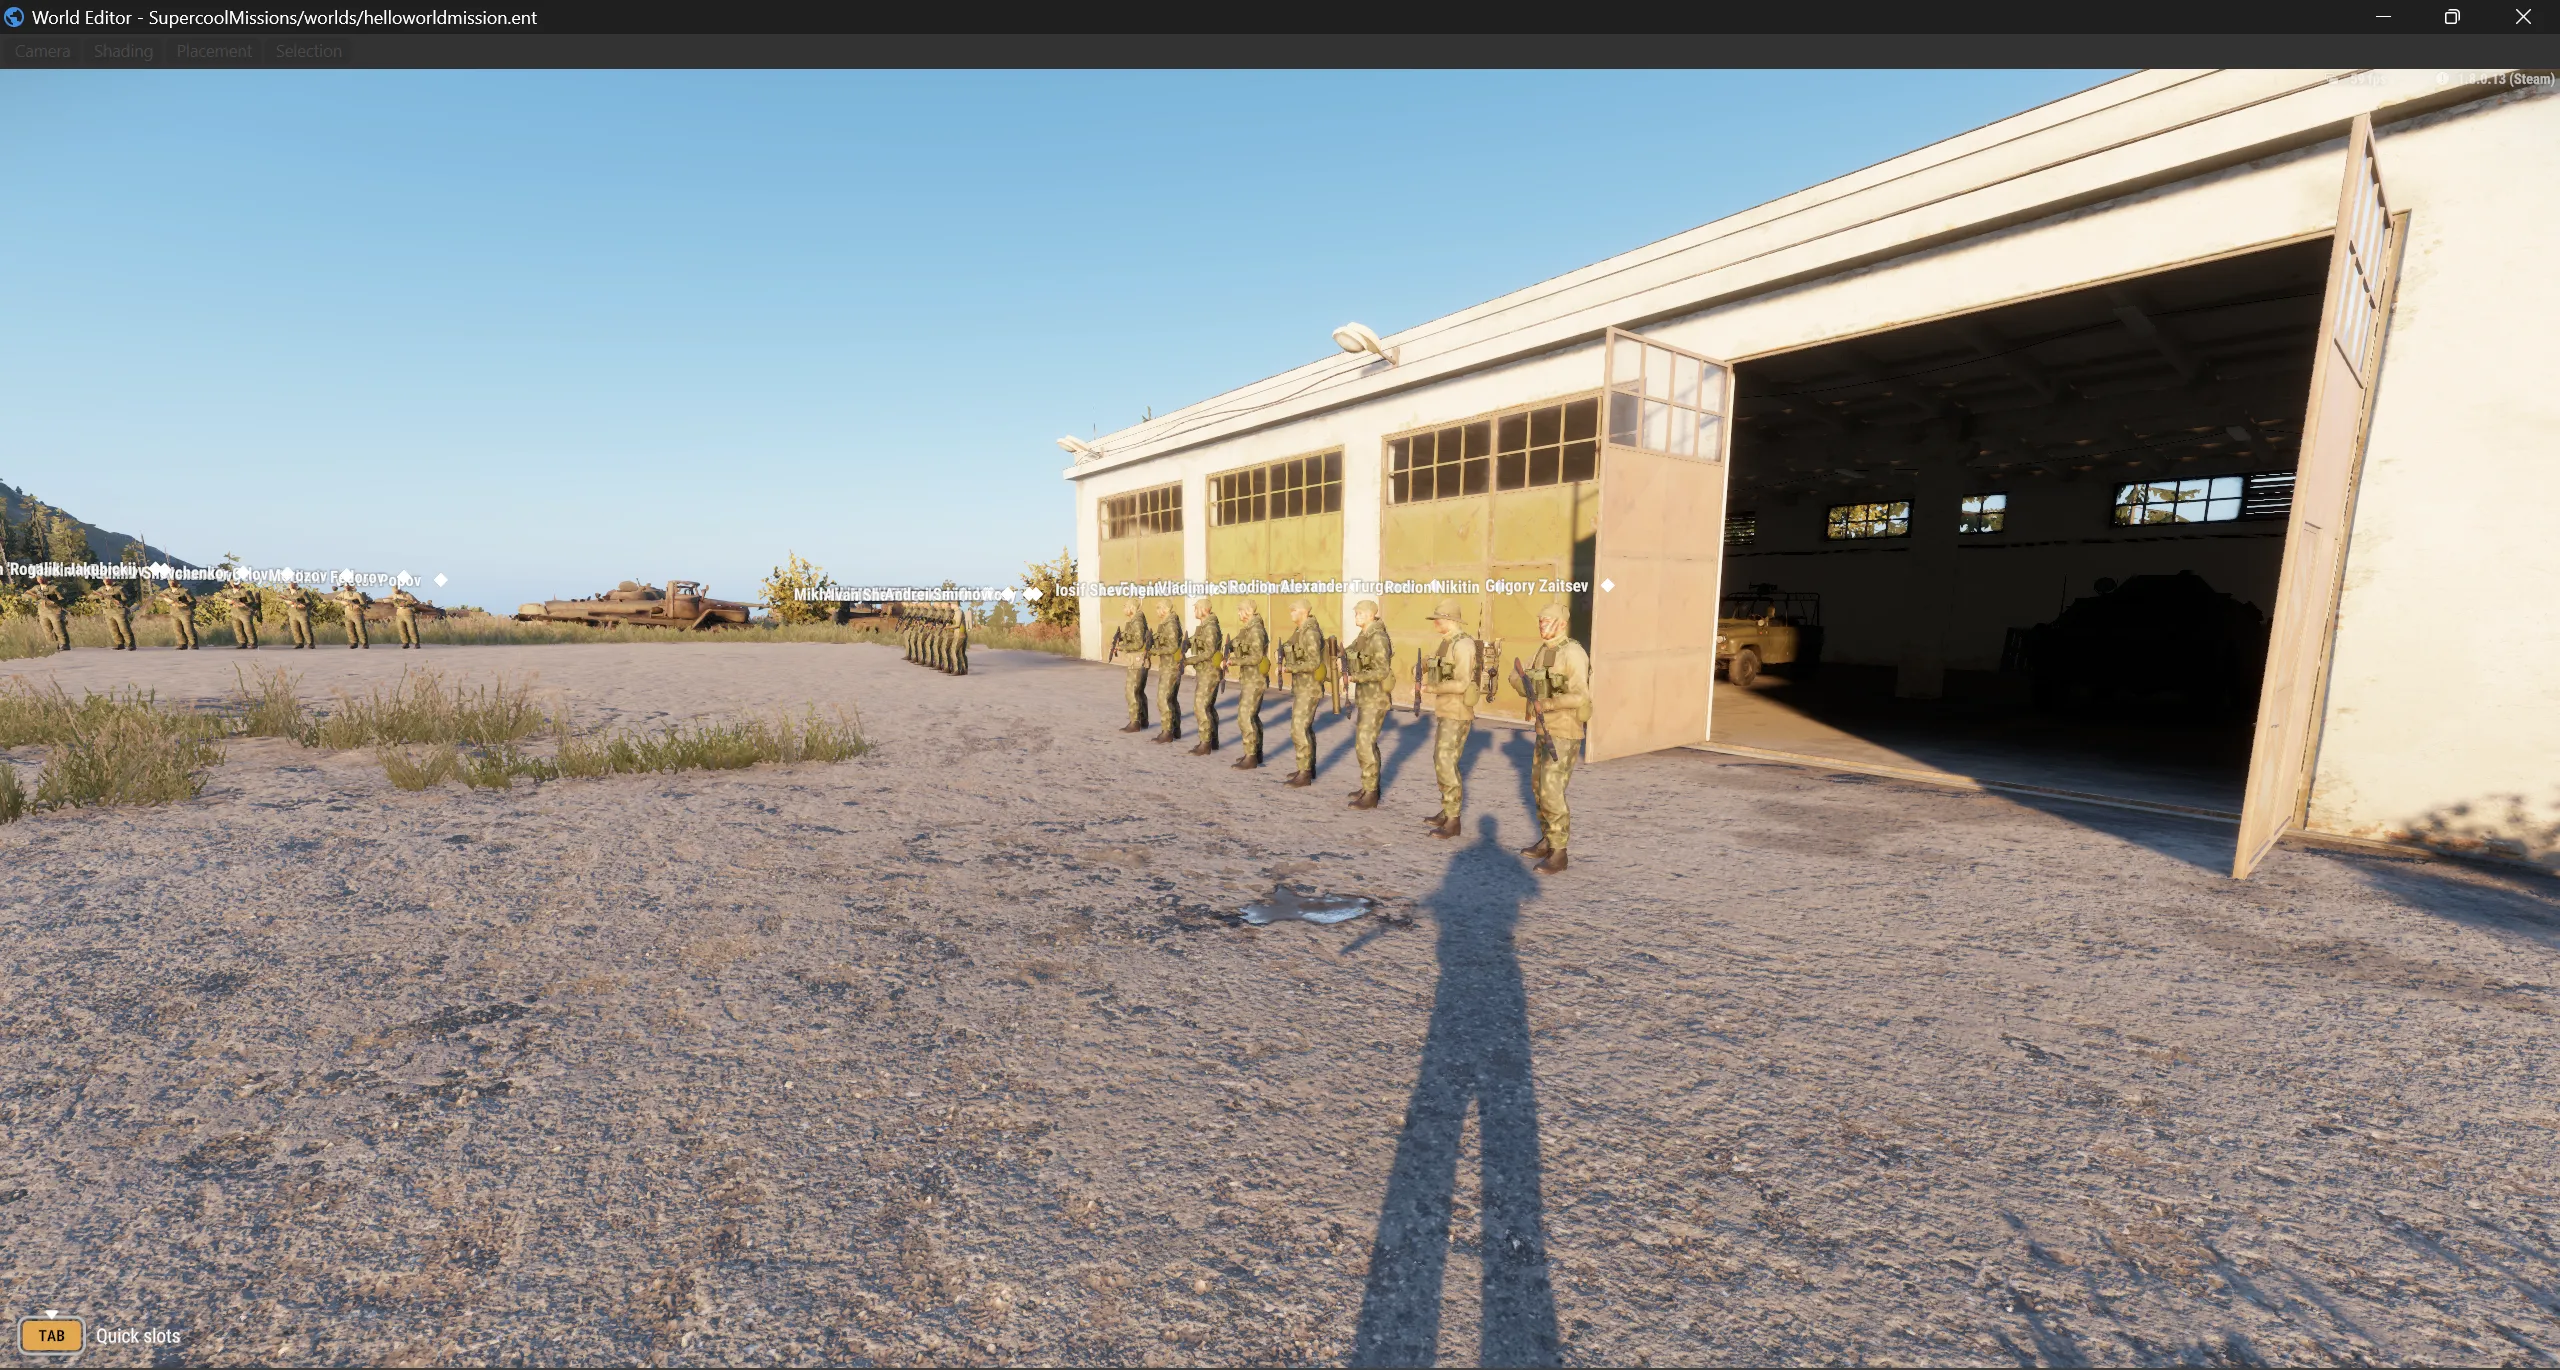
What should match: the groups and slots are there, the vehicles are shown in the group’s row, the zones and markers are shown to the right side in the right state, the freezetime ends. What it all looks like: Mission states.
Before releasing a mission, run World Editor → Plugins → ECHO Mission Validator and fix everything marked ERROR.
See also
Section titled “See also”- Mission states — what players will see
- Quick start — the same thing, short
- Reference — every setting, part by part
- Common mistakes